Hello
Thanks for the donation.
Below is info. You requested.
REMOVAL:
Disconnect the battery ground cable.
Remove the engine cover.
Remove the steering column-to-instrument panel bolts. Lower the column carefully.
Remove the upper and lower instrument panel attaching screws. Remove the radio support bracket screw.
Raise and support the right side of the instrument panel.
Remove the lower right instrument panel bracket.
Remove the vacuum actuator from the kick panel.
Disconnect the temperature cable and vacuum hoses at the case. Remove the heater distributor duct from over the engine hump.
Remove the two defroster duct-to-firewall attaching screws below the windshield.
Under the hood, disconnect and plug the heater hoses at the firewall.
Remove the three nuts and one screw (inside) holding the heater case to the firewall.
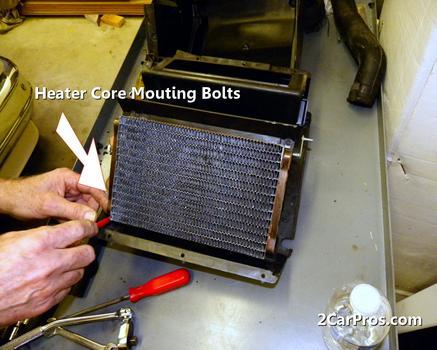
Remove the case from the van. Remove the gasket for access to the screws holding the case together. Remove the temperature cable support bracket. Remove the screws and separate the case. Remove the heater core.
INSTALLATION:
Install the heater core.
Assemble the case and fasten the screws.
Install the temperature cable support bracket.
Position the gasket, then install the case in the van.
Fasten the three nuts and one screw (inside) holding the heater case to the firewall.
Connect and plug the heater hoses at the firewall.
Fasten the two defroster duct-to-firewall attaching screws below the windshield.
Install the heater distributor duct.
Connect the temperature cable and vacuum hoses at the case.
Install the vacuum actuator at the kick panel.
Install the lower right instrument panel bracket.
Fasten the radio support bracket screw.
Fasten the upper and lower instrument panel attaching screws.
Fasten the steering column-to-instrument panel bolts.
Install the engine cover.
Connect the battery ground cable.
Refill the cooling system as necessary.
Let me know if you still need more assistance with this project.
Hope this helps.
Thanks for using 2carpros. Com !
SPONSORED LINKS
Thursday, January 8th, 2009 AT 1:20 AM


