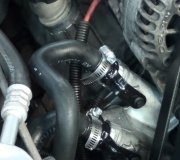
Not familiar with the Tempo, it lists two engines, 2.3 and 3.0, remember sometimes there's always an extra or two that may have to be taken care of to do the job once you get into it, here's both engines from what I have:
Water Pump
2.3L Engine
Removal
1. Drain engine coolant.
2. Disconnect battery ground cable.
3. Loosen water pump idler puller and remove belt from water pump pulley.
4. Disconnect heater hose from water pump inlet tube.
5. Remove A/C hose bracket from cylinder block.
6. Disconnect water pump inlet tube.
7. Remove three water pump bolts.
Installation
NOTE:
Lightly oil all bolt and nut threads before installation except those specifying special sealant.
1. Clean both gasket mating surfaces on water pump and cylinder block.
2. Coat new gasket on both sides with Perfect Seal Sealing Compound B5A-19554-A (ESE-M4G115-A and ESR-M18P2-A) or equivalent water resistant sealer and position on cylinder block.
3. Install three water pump bolts. Tighten to 20-30 N-m (15-22 lb-ft).
NOTE:
Lubricate O-ring with Silicone Lubricant (COAZ-19553-AA or ESR-M13P4-A) or equivalent prior to installation.
4. Connect water pump inlet tube using new O-ring.
5. Connect heater hose to water pump inlet tube.
6. Attach A/C hose bracket to cylinder block.
7. Install water pump belt on pulley and adjust tension to specification. Refer to ¬ Section 03-05¬.
8. Connect battery ground cable.
9. Replace engine coolant. Refer to ¬ Coolant Refill¬ procedures. Operate engine until normal operation temperature is reached. Check for leaks and check coolant level.
3.0L Engine
Removal
1. Disconnect battery ground cable.
2. Drain engine cooling system.
3. Remove 4K accessory drive belt. Refer to ¬ Section 03-05¬.
4. Remove water pump to front cover hose.
5. Raise vehicle. Refer to ¬ Section 00-02¬.
6. Loosen and remove retaining nut from upper bracket and bolt from lower bracket. Gently grasp tube at water pump end and pull tube out of water pump. Remove lower water pump tube.
7. Lower vehicle.
8. Remove heater hose from rear of water pump.
9. Remove water pump pulley shield.
10. Remove water pump from bracket.
Installation
NOTE:
Lightly oil all bolt and stud threads before installation.
1. If replacing water pump, transfer pulley to new pump. Tighten retaining bolts to 20-30 N-m (15-22 lb-ft).
2. Align water pump to bracket. Install two retaining bolts and one stud bolt. Tighten to 20-30 N-m (15-22 lb-ft).
3. Raise vehicle on hoist.
4. Install water pump inlet tube. Lubricate water pump end of tube with silicone lubricant COAZ-19553-AA (ESR-M13P4-A) or equivalent before inserting into water pump. Install retaining nut to water pump inlet tube bracket and stud bolt and tighten to 7 N-m (5 lb-ft). Install lower tube bracket retaining bolt and tighten to 8-12 N-m (71-106 lb-in).
5. Lower vehicle.
6. Install water pump pulley shield. Tighten retaining nut to 9-14 N-m (7-10 lb-ft).
7. Install heater hose to rear of pump. Tighten hose clamp to 2.3-3.4 N-m (20-30 lb-in).
8. Install water pump to front cover hose. Tighten retaining clamps to 2.1-4.1 N-m (19-37 lb-in).
9. Install 4K drive belt.
10. Fill and bleed cooling system.
11. Connect battery ground cable.
12. Start engine and check for coolant leaks
Friday, April 13th, 2007 AT 10:53 AM


