Hi,
Luckily, this water pump isn't too bad to replace. I can't even begin to tell you how many are driven by the timing belt.
Regardless, here is a link that shows in general how a water pump is replaced:
https://www.2carpros.com/articles/water-pump-replacement
Here are the directions specific to your vehicle. The attached pics correlate with the directions.
_________________________________________________________________
2011 Ford Truck F 150 4WD V6-3.7L
Coolant Pump
Vehicle Engine, Cooling and Exhaust Engine Water Pump Service and Repair Removal and Replacement Coolant Pump
COOLANT PUMP
Coolant Pump - 3.5L GTDI, 3.7L
MaterialItem .................... Specification
Motorcraft(R) Specialty Orange Engine Coolant
VC-3-B (US);
CVC-3-B (Canada) .................... WSS-M97B44-D
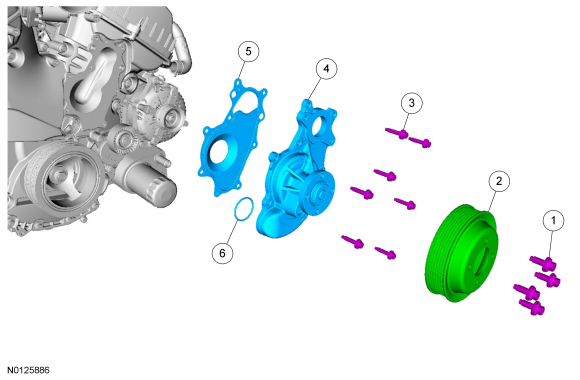
pic 1
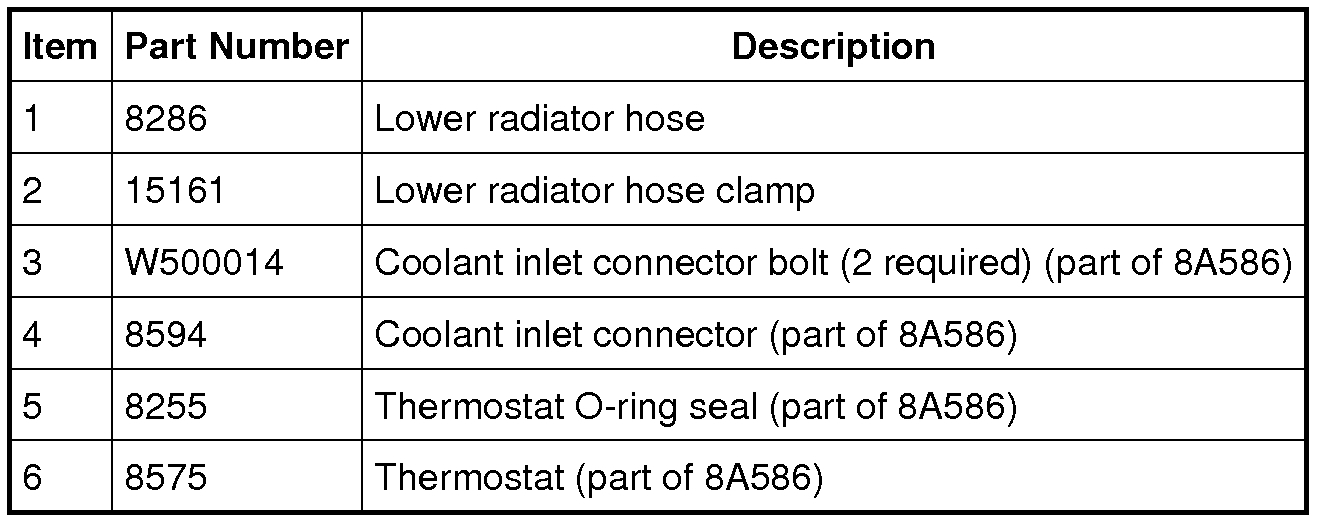
Item Part Number .................... Description
1 W503291 .................... Coolant pump pulley bolt - 25 Nm (18 lb-ft) (4 required)
2 8A528 .................... Coolant pump pulley
3 W503278 .................... Coolant pump bolt (7 required)
4 8501 .................... Coolant pump
5 8507 .................... Coolant pump gasket (part of 8501)
6 8565 .................... Coolant pump O-ring seal (part of 8501)
Removal
1. Remove the air cleaner outlet pipe.
2. Loosen the 4 coolant pump pulley bolts.
3. Remove the accessory drive belt.
4. NOTICE: Cover the A/C compressor belt to prevent coolant contamination of the belt.
Completely cover the A/C compressor belt with waterproof plastic.
5. Remove the thermostat housing. For additional information, refer to Thermostat Housing 3.5L GTDI or Thermostat Housing 3.7L.
6. Remove the 4 bolts and the coolant pump pulley.
7. Remove the 7 bolts and the coolant pump.
Remove and discard the gasket and the O-ring seal in the coolant pump.
Installation
1. Install a new O-ring seal in the coolant pump and lubricate it with clean engine coolant.
2. Position a new gasket, press the coolant pump over the channel cover plate snout protruding from the engine front cover and install the 7 bolts finger tight.
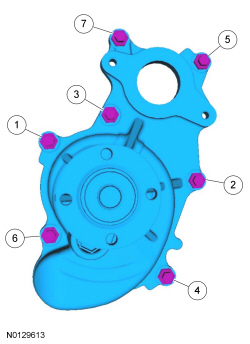
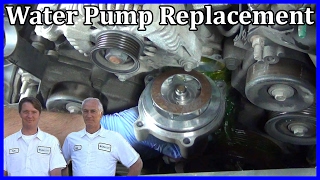
3. Tighten the coolant pump bolts in the sequence shown in 2 stages.
Stage 1: Tighten to 10 Nm (89 lb-in).
Stage 2: Tighten an additional 45 degrees.
pic 2
4. Position the coolant pump pulley and install the 4 bolts finger tight.
5. Install the thermostat housing. For additional information, refer to Thermostat Housing 3.5L GTDI or Thermostat Housing 3.7L.
6. Remove the plastic from the A/C compressor belt.
7. Install the accessory drive belt.
8. Tighten the 4 coolant pump pulley bolts.
Tighten to 25 Nm (18 lb-ft).
9. Install the air cleaner outlet pipe.
10. Fill and bleed the cooling system. For additional information, refer to Cooling System Draining, Filling and Bleeding.
_____________________________________________________
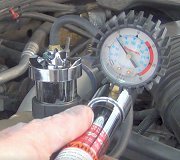
If you haven't already, this is a good time to replace the thermostat and flush the radiator and engine block.
https://www.2carpros.com/articles/replace-thermostat
https://www.2carpros.com/articles/coolant-flush-and-refill-all-cars
____________________________________________________
I don't know if you want them, but here are the directions specific to your vehicle for the thermostat.
2011 Ford Truck F 150 4WD V6-3.7L
Thermostat
Vehicle Engine, Cooling and Exhaust Cooling System Thermostat Service and Repair Removal and Replacement Thermostat
THERMOSTAT
Thermostat - 3.7L
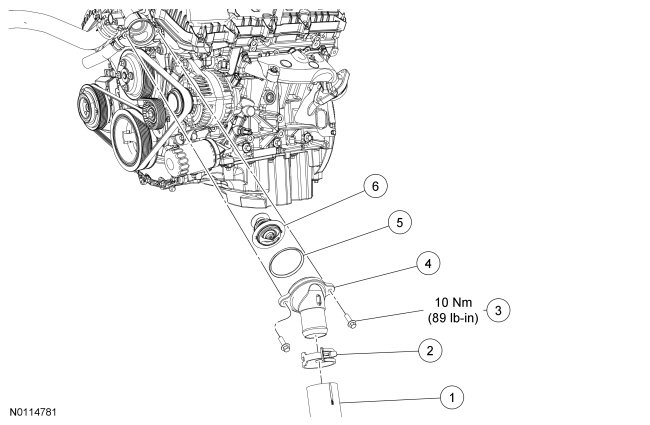
pic 3
pic 4
pic 5
Removal and Installation
1. Drain the cooling system. For additional information, refer to Cooling System Draining, Filling and Bleeding See: Cooling System > Procedures > Cooling System Draining, Filling and Bleeding.
2. Remove the air cleaner outlet pipe. For additional information, refer to Intake Air Distribution and Filtering See: Air Cleaner Housing > Exploded Views > Intake Air System Components - Exploded View.
3. NOTICE: Cover the accessory drive belts to prevent coolant contamination of the belts.
Completely cover the accessory drive belts with waterproof plastic.
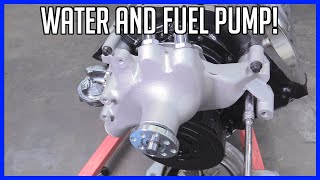
4. If installing a new coolant inlet connector, release the clamp and disconnect the lower radiator hose.
5. Remove the bolts and the coolant inlet connector.
- To install, tighten the bolts to 10 Nm (89 lb-in).
6. Remove the thermostat and the thermostat O-ring seal.
- Discard the O-ring seal.
7. To install, reverse the removal procedure.
- Use a new O-ring seal and lubricate it with clean engine coolant.
8. Fill and bleed the cooling system. For additional information, refer to Cooling System Draining, Filling and Bleeding See: Cooling System > Procedures > Cooling System Draining, Filling and Bleeding.
___________________________________________
Make sure to inspect radiator hoses and heater hoses. If they need replaced, do it when everything is drained from the system.
I hope this is helpful. Let us know if you have other questions.
Take care,
Joe
Images (Click to make bigger)
SPONSORED LINKS
Friday, May 7th, 2021 AT 11:16 AM