Hi,
Here are the directions for replacing the timing chain on a 2.4L The attached pictures correlate with the directions.
________________________________-
2007 Dodge Caliber L4-2.4L VIN K
Removal - Timing Chain
Vehicle Engine, Cooling and Exhaust Engine Timing Components Timing Chain Service and Repair Removal and Replacement Timing Chain Removal - Timing Chain
REMOVAL - TIMING CHAIN
TIMING CHAIN
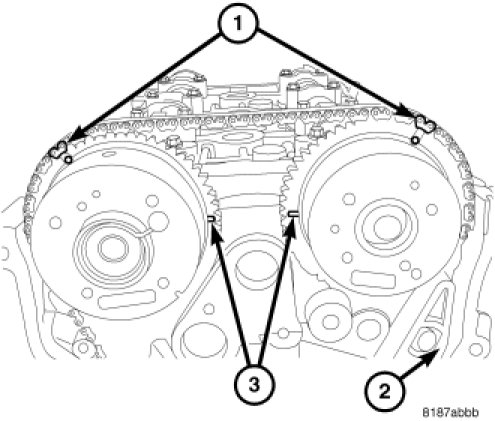
pic 1
1. Set engine to TDC.
2. Remove timing chain cover.
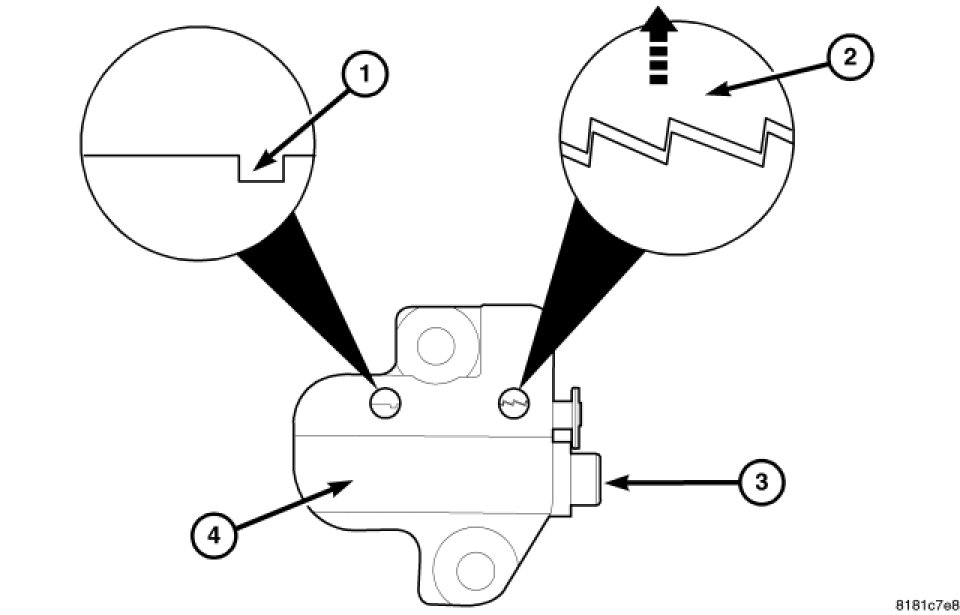
Pic 2
NOTE: If the timing chain plated links can no longer be seen, the timing chain links corresponding to the timing marks must be marked prior to removal if the chain is to be reused.
3. Mark chain link (1) corresponding to camshaft timing mark.
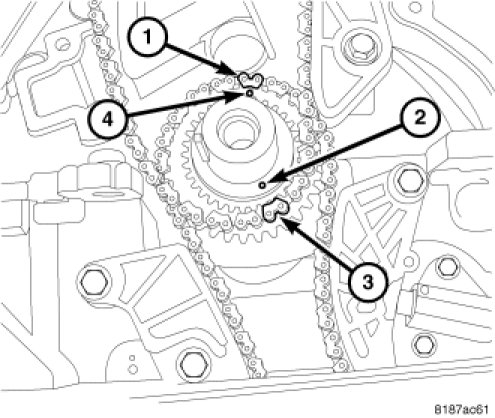
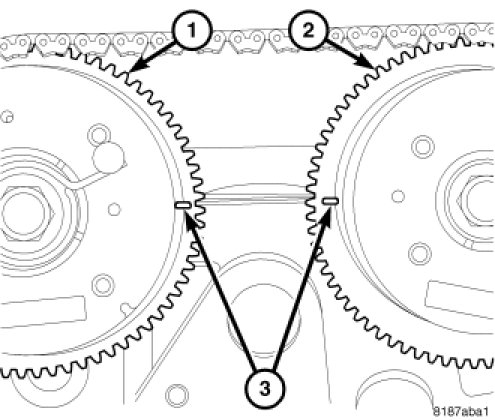
Pic 3
4. Mark chain link (3) corresponding to crankshaft timing mark (2).
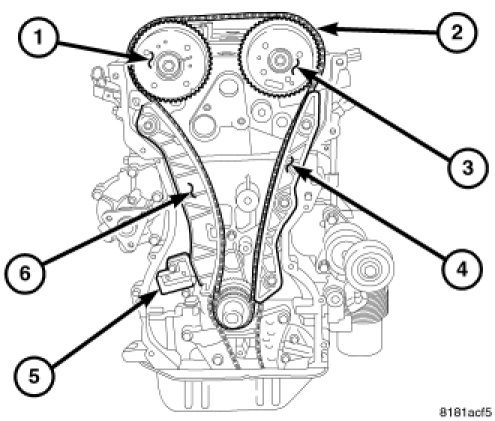
Pic 4
5. Remove timing chain tensioner (5).
6. Remove timing chain (2).
_________________________________
2007 Dodge Caliber L4-2.4L VIN K
Installation - Timing Chain
Vehicle Engine, Cooling and Exhaust Engine Timing Components Timing Chain Service and Repair Removal and Replacement Timing Chain Installation - Timing Chain
INSTALLATION - TIMING CHAIN
TIMING CHAIN
pic 5
1. Verify that the crankshaft sprocket keyway is at the 9 o'clock position.
Pic 6
2. Align camshaft timing marks (3) so they are parallel to the cylinder head and aligned each other as shown.
Pic 7
3. Install timing chain guide (4) and tighten bolts to 12 Nm (105 in. Lbs.).
Pic 8
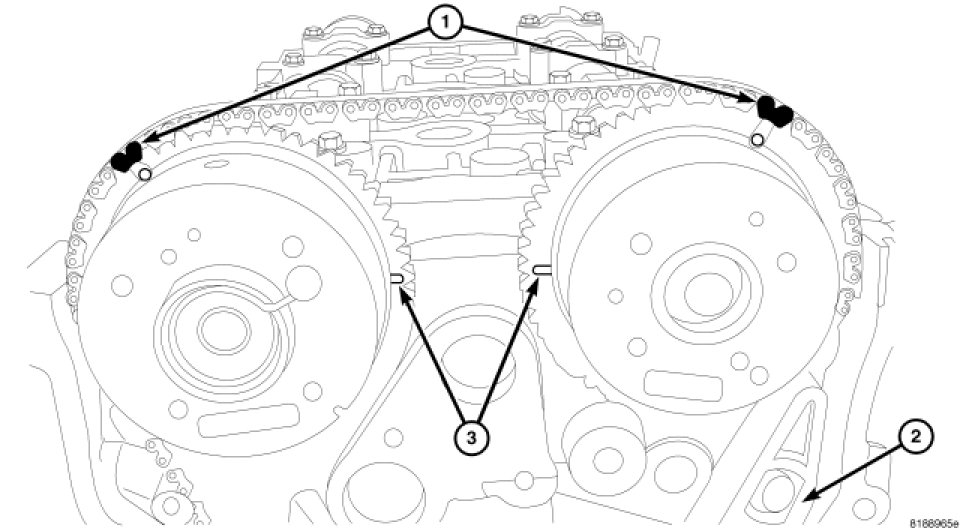
4. Install timing chain so plated links on chain align with timing marks on camshaft sprockets (1).
Pic 9
5. Align timing mark on the crankshaft sprocket (2) with the plated link (3) on the timing chain. Position chain so slack will be on the tensioner side.
Pic 10
NOTE: Keep the slack in the timing chain on the tensioner side.
6. Install the moveable timing chain pivot guide (6) and tighten bolt to 12 Nm (105 in. Lbs.).
Pic 11
7. Reset timing chain tensioner (4) by lifting up on ratchet (2) and pushing plunger (3) inward towards the tensioner body (4). Insert Tensioner Pin 8514 into slot (1) to hold tensioner plunger in the retracted position.
Pic 12
8. Install timing chain tensioner (1) and tighten bolts to 12 Nm (105 in. Lbs.).
9. Remove timing Tensioner Pin 8514 (2).
Pic 13
10. Rotate the crankshaft CLOCKWISE two complete revolutions until the crankshaft is repositioned at the TDC position with the key way at the 9 o'clock position.
Pic 14
11. Verify that the camshafts timing marks (3) are in the proper position.
12. Install front timing chain cover.
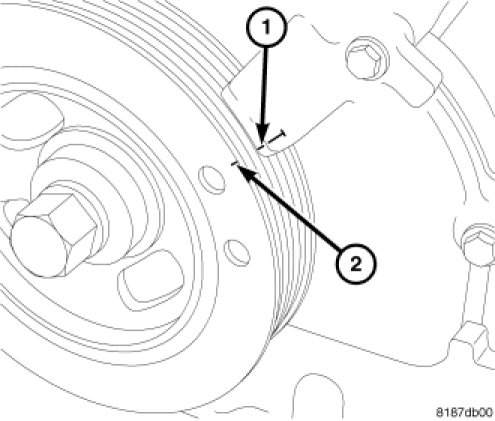
Pic 15
13. Install the balancer and verify that balancer mark (2) and cover mark (1) are aligned.
14. Connect negative battery cable.
15. Fill with oil, start engine and check for leaks.
________________________
I hope this helps. Let me know if you have other questions.
Take care and God Bless,
Joe
Images (Click to make bigger)
SPONSORED LINKS
Sunday, February 7th, 2021 AT 7:54 PM