TIMING BELT: REMOVAL & INSTALLATION
Removal
1. Disconnect negative battery cable. Disconnect intake air temperature sensor connector from
intake air duct. Disconnect the air intake tube from the throttle body. Disconnect the breather
tube from the valve cover. Remove the air filter housing.
2. Raise and support the vehicle. Remove right front wheel. Remove right front splash shield
from wheel well. Remove serpentine accessory drive belt.
3. Remove crankshaft pulley bolts. It is NOT necessary to remove crankshaft sprocket center bolt.
Remove crankshaft pulley. Lower vehicle.
4. Support engine assembly from above with Support Fixture (J-28467-B).
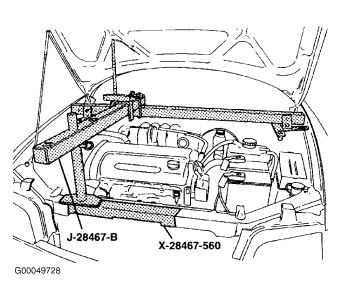
Remove
engine mount bracket from timing belt end of engine.
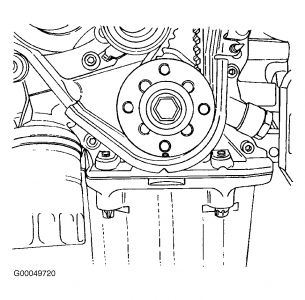
5. Remove front timing belt cover. Using crankshaft center bolt, rotate crankshaft one full turn
clockwise (as viewed from timing belt end of engine).
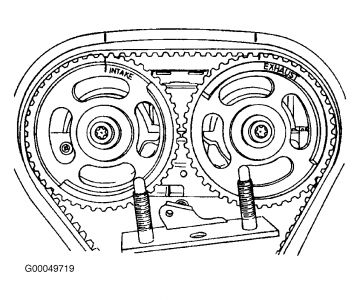
6. Align mark on crankshaft sprocket with notch at bottom of rear timing belt cover.
Align camshaft sprocket timing marks with notches on valve cover.
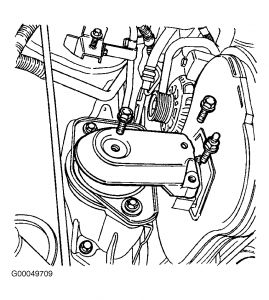
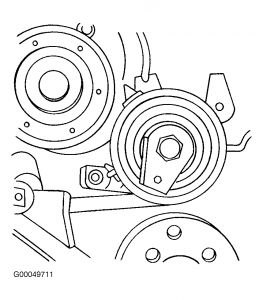
7. Loosen the automatic tensioner bolt. Use an Allen wrench to rotate tensioner and relieve
tension on timing belt.
CAUTION: This application is an interference engine. Do not rotate camshaft
or crankshaft when timing belt is removed, or engine damage
may occur.
CAUTION: Engine damage could result if camshaft sprockets are not
properly aligned with notches on valve cover.
Installation
1. Ensure crankshaft and camshaft timing timing marks are still aligned. Install the timing belt.
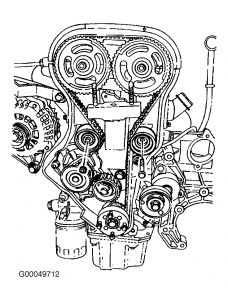
Turn the timing belt tensioner clockwise to tension the timing belt. Turn tensioner
until the pointer aligns with the notch on the rear timing belt cover. Tighten automatic
tensioner bolt. See TORQUE SPECIFICATIONS .
2. Using crankshaft center bolt, turn crankshaft clockwise (as viewed from timing belt end of
engine) 2 full revolutions. Ensure timing belt tensioner pointer is still aligned with notch.
3. If timing belt tensioner is correctly aligned, install timing belt cover. Install the engine mount
bracket on the timing belt end of engine. Install crankshaft pulley. Install serpentine accessory
drive belt. Install right front splash shield. Install right front wheel.
4. Install air filter housing. Connect air intake temperature sensor connector. Connect negative
battery cable.
TORQUE SPECIFICATIONS
Application Ft. Lbs. (N.m)
Camshaft Sprocket Bolt Step 1 37 (50) Step 2 Plus 60
Degrees Step 3 Plus 15 Degrees
Crankshaft Pulley Bolt 15 (20)
Crankshaft Sprocket Center Bolt Step 1 96 (130) Step 2 Plus 40-50 Degrees
Engine Mount Bracket Bolt 44 (60)
Timing Belt Idler Pulley Bolt/Nut 18 (25)
Timing Belt Tensioner Bolt 18 (25)
Water Pump Bolt 15 (20)
Wheel Lug Nuts 88 (120)
SPONSORED LINKS
Monday, December 22nd, 2008 AT 11:13 PM