Welcome to 2CarPros.
It sounds like the side rails are bent. Not being there to actually has happened, I'm going to suggest two things. First, remove the rails (which is a nightmare), determine what is bent and try to straighten them. Or have the framing replaced, which won't be cheap. Honestly, I'm not sure where you are located, so I have no idea who can fix it for you.
______________________________
Here are the directions for frame rail removal and replacement. They include adjustments and how it works. Basically, total removal procedure. The attached pictures correlate with these directions.
Convertible Top Assembly-Side Rail, Folding Top
Vehicle Body and Frame Roof and Associated Components Convertible Top Service and Repair Procedures Removal and Installation Convertible Top Assembly-Side Rail, Folding Top
CONVERTIBLE TOP ASSEMBLY-SIDE RAIL, FOLDING TOP
REMOVAL
1. Remove the side quarter trim panel.
Picture 1
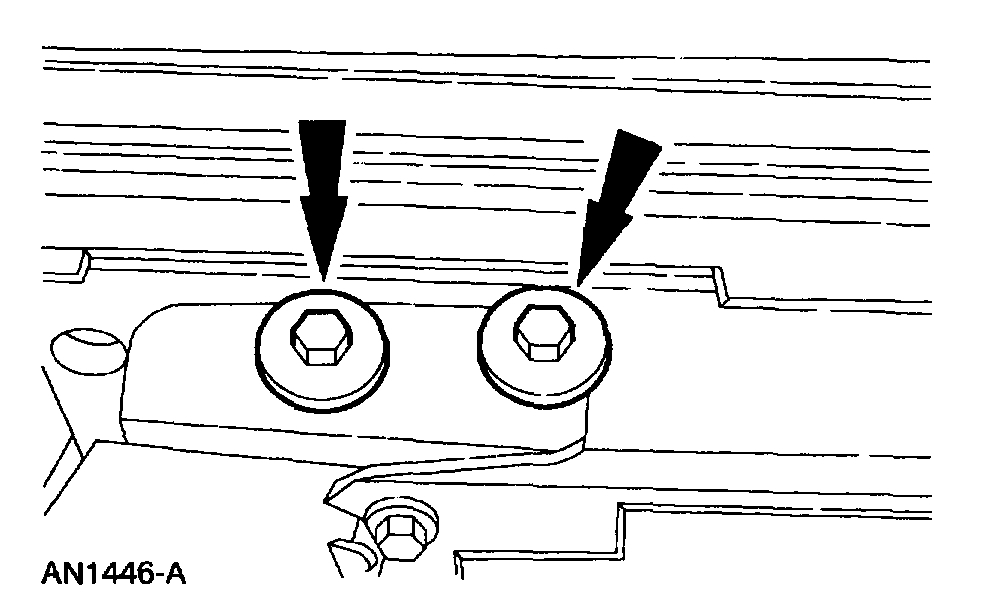
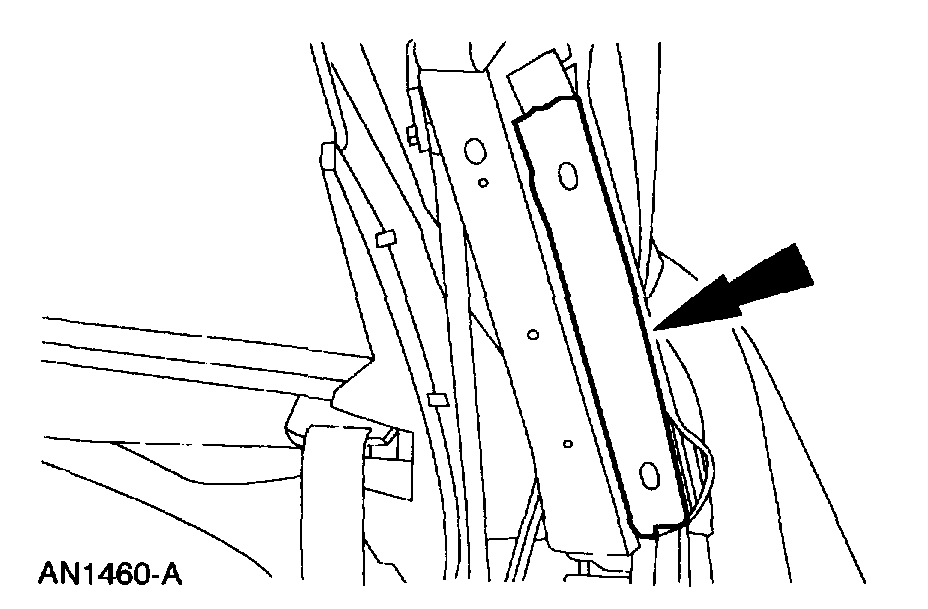
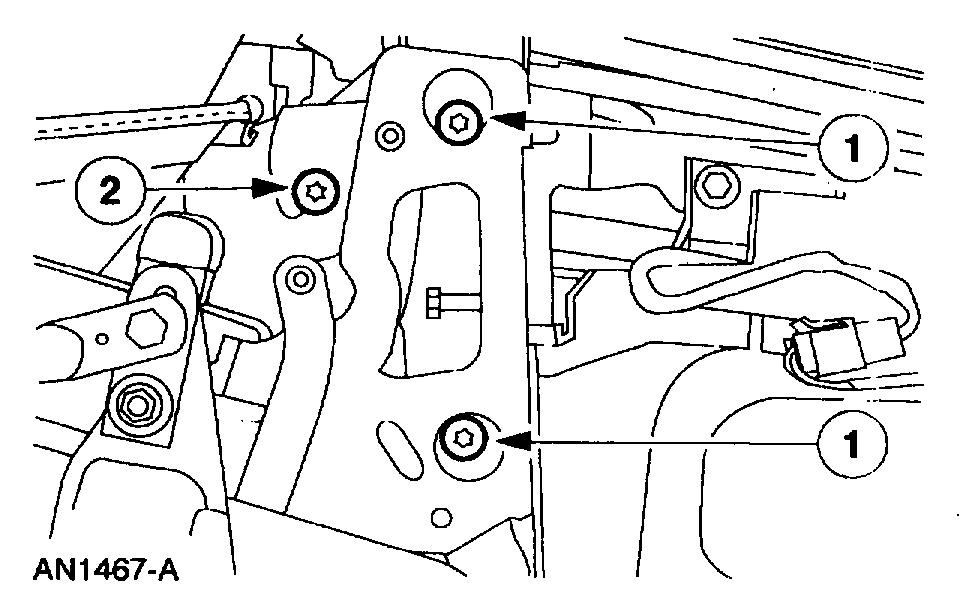
2. If necessary, remove the bolts.
Picture 2
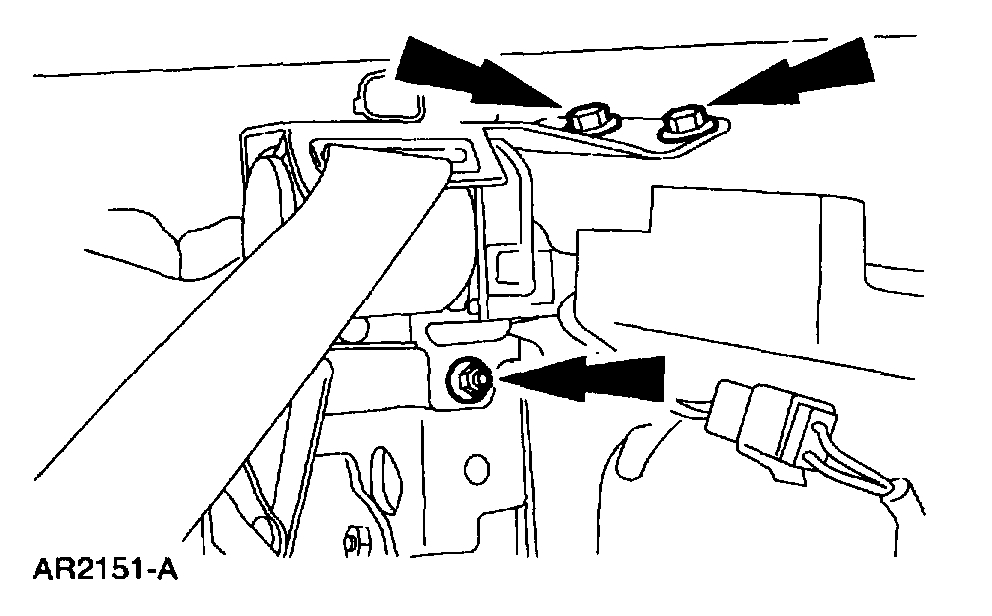
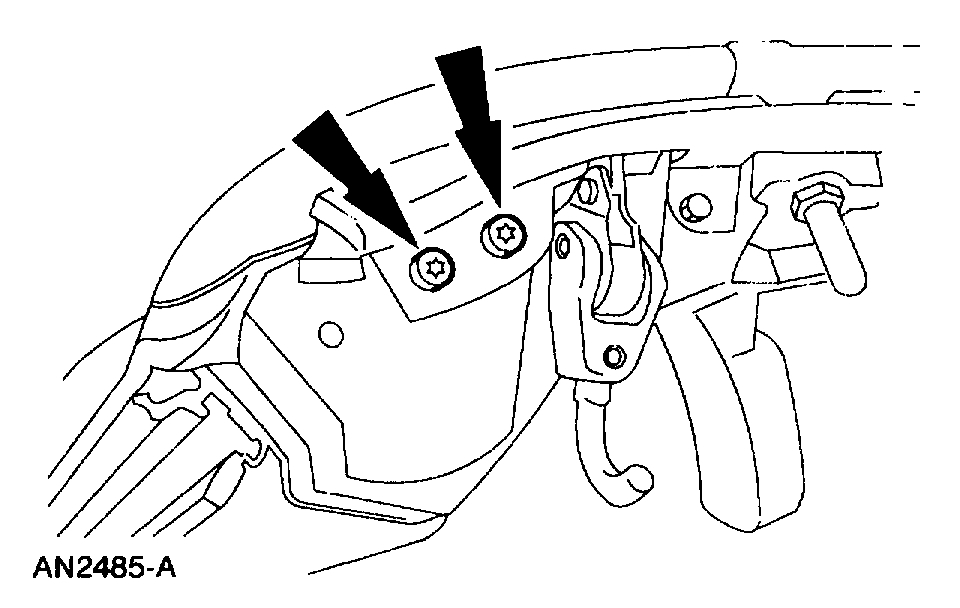
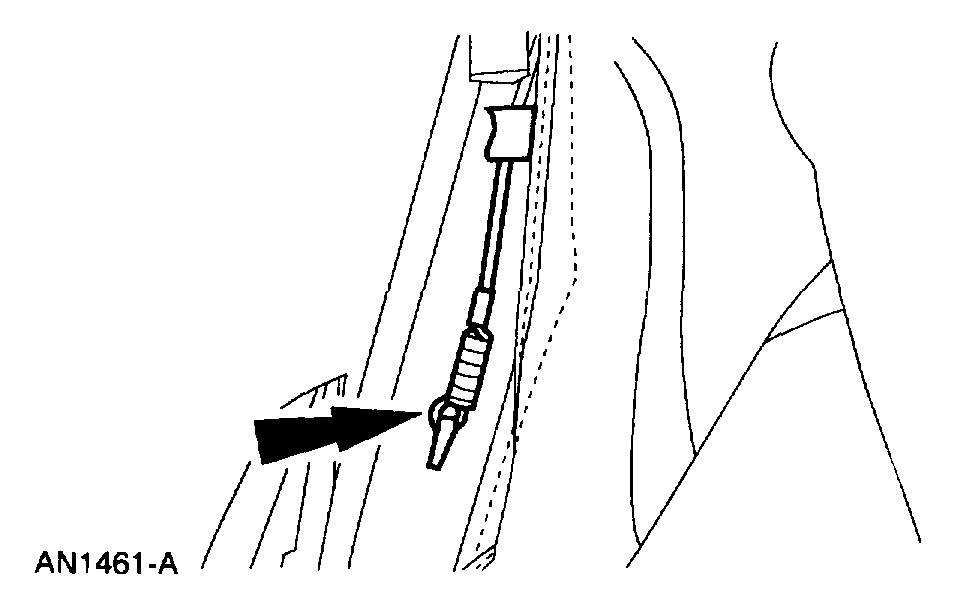
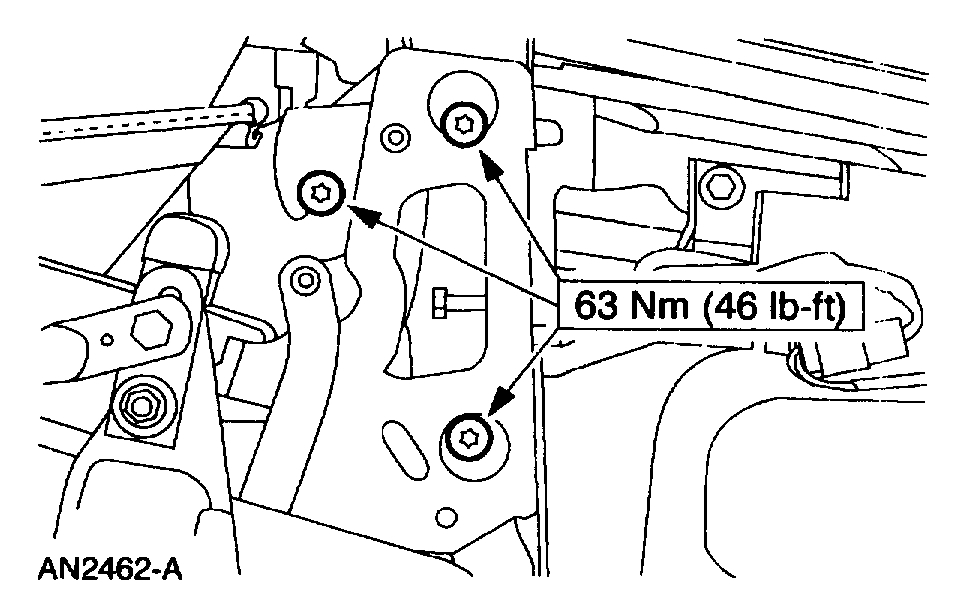
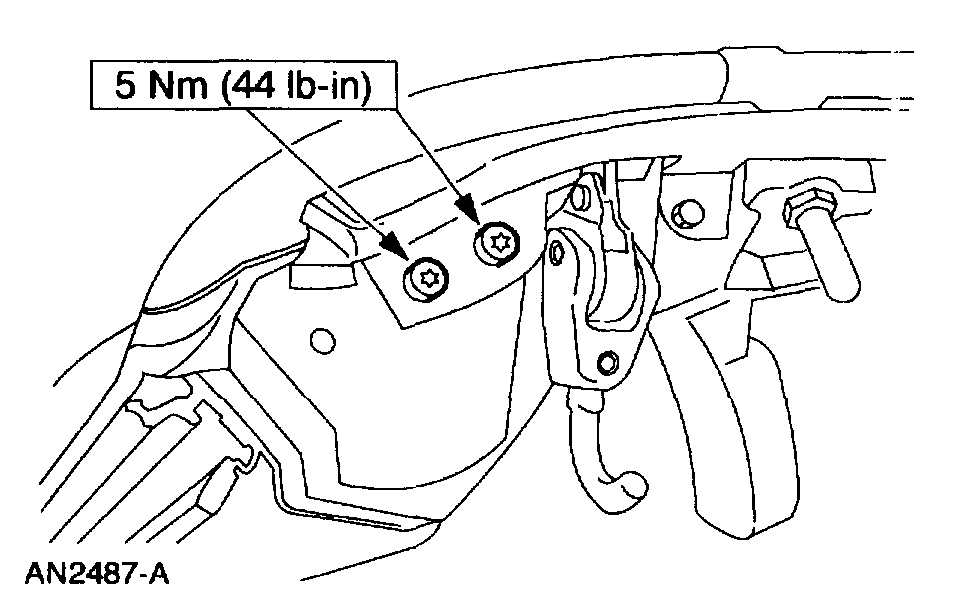
3. Remove the nut and bolts and position the front safety belt retractor aside.
Picture 3
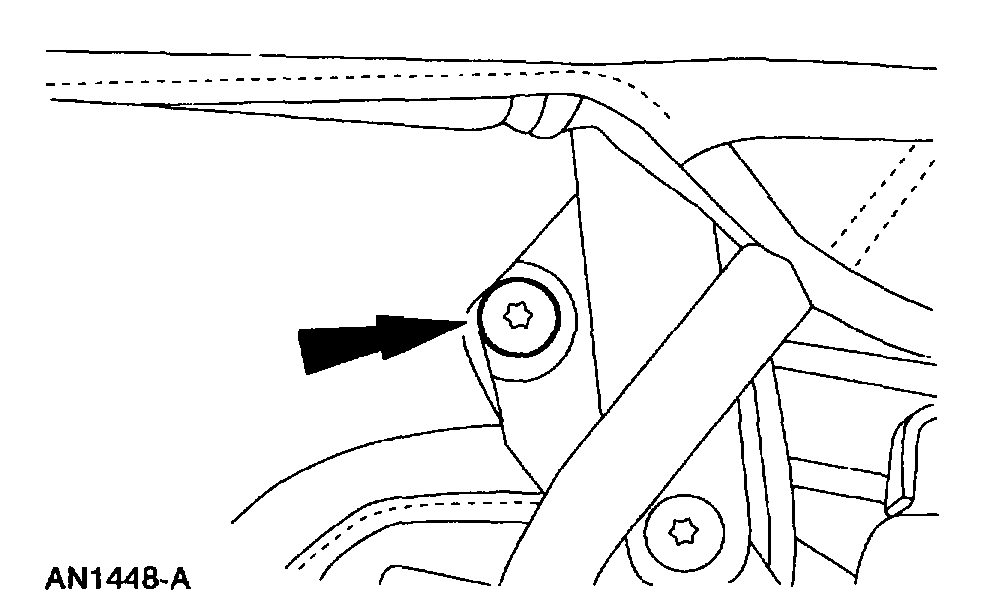
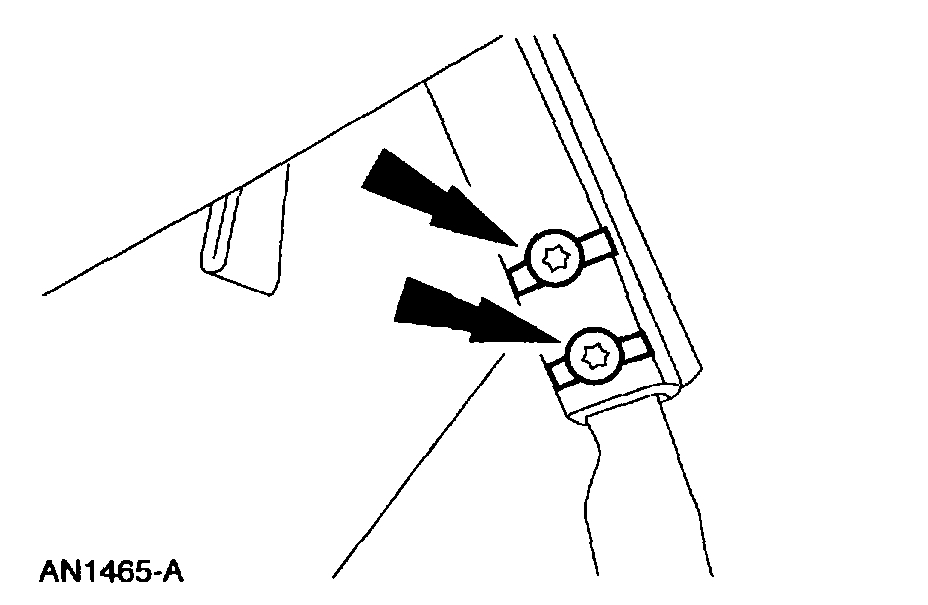
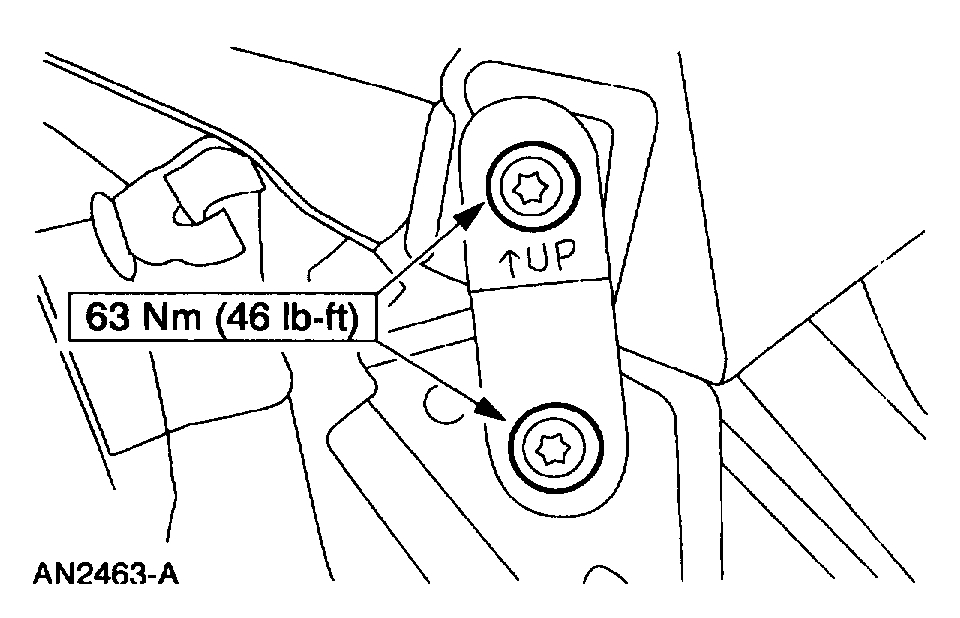
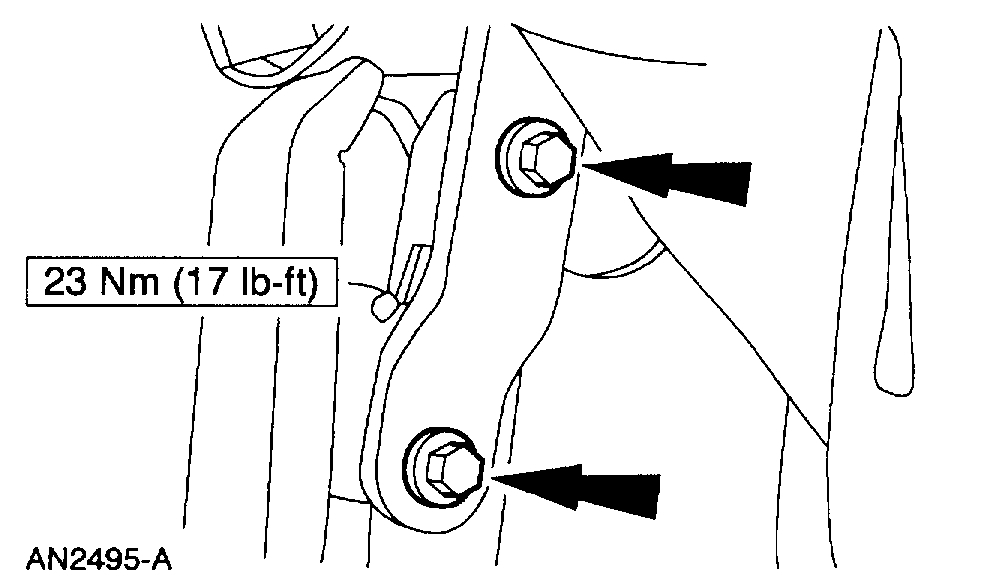
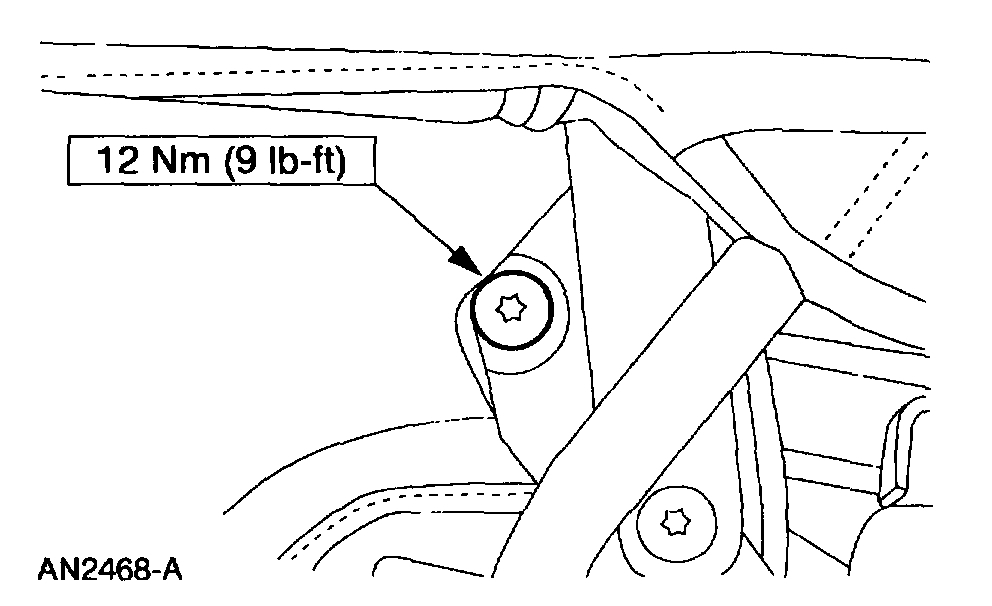
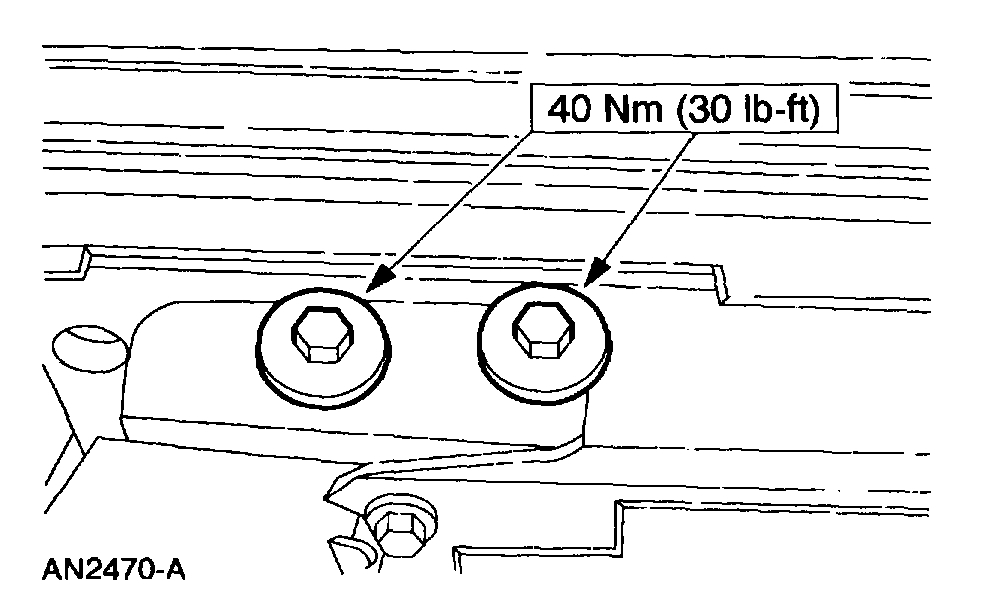
4. Remove the two cylinder rod mounting bolts.
Picture 4
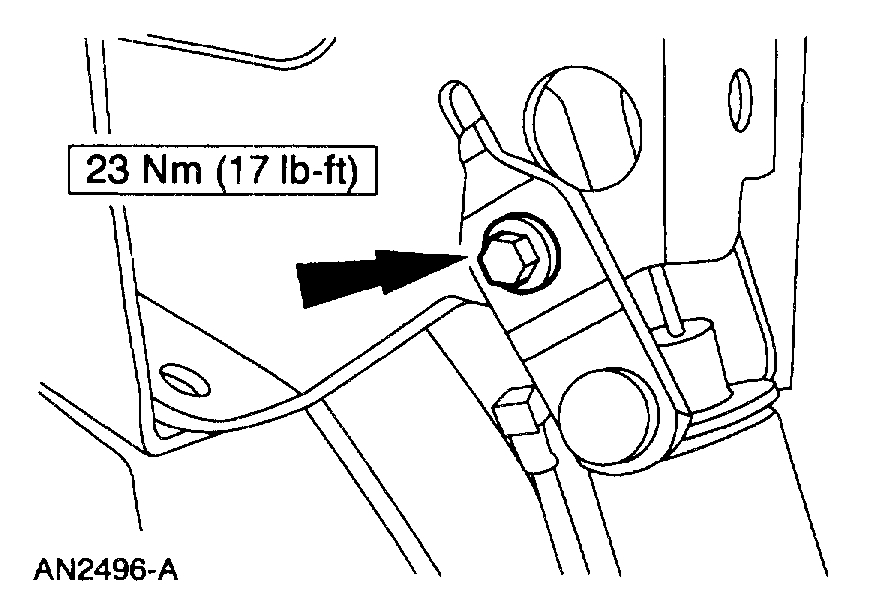
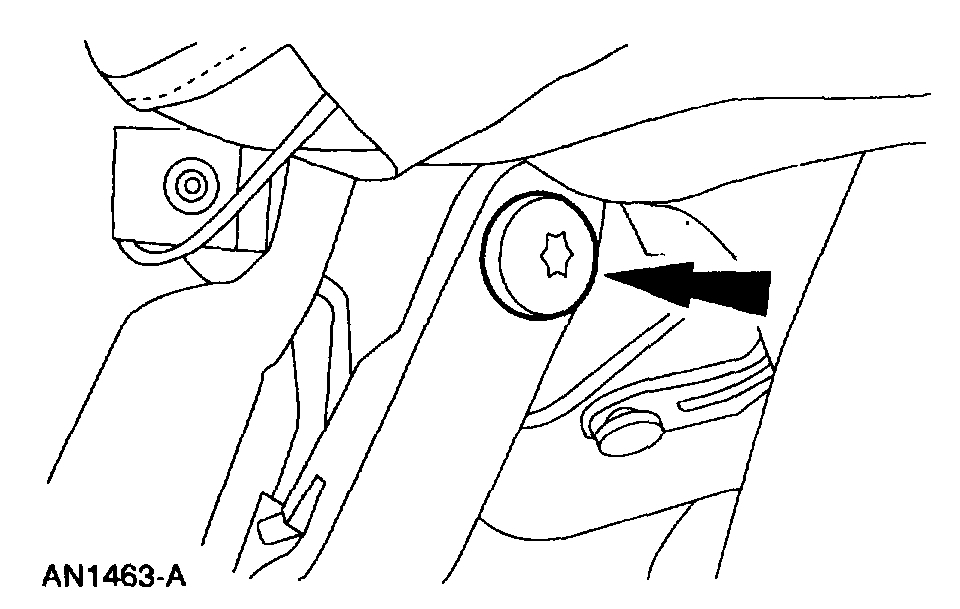
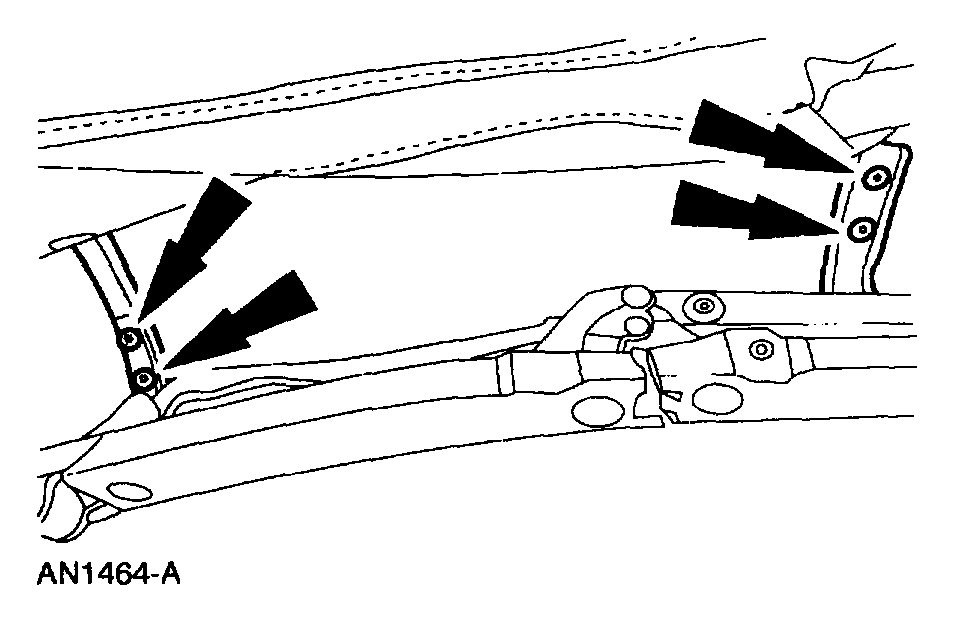
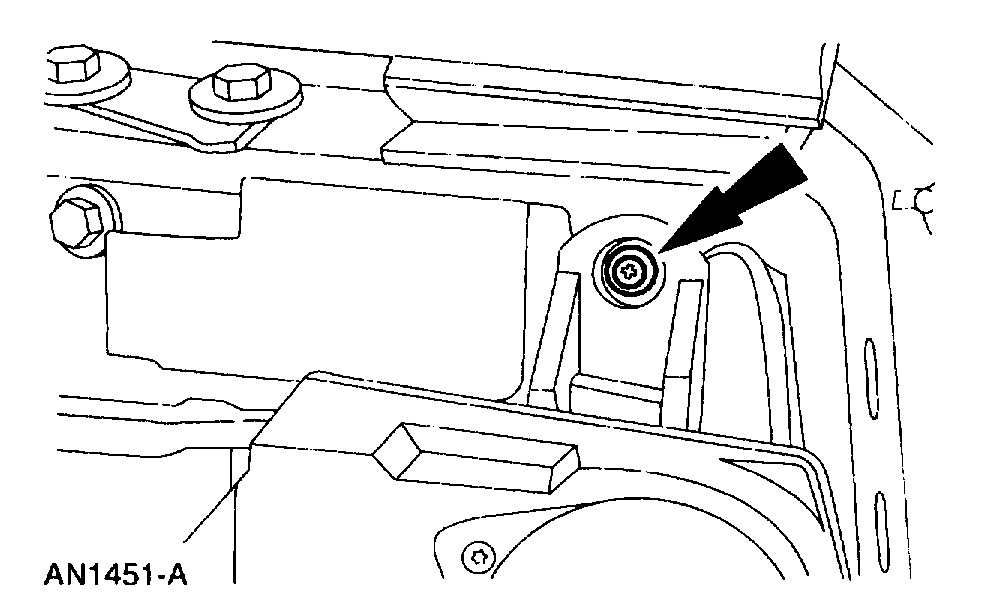
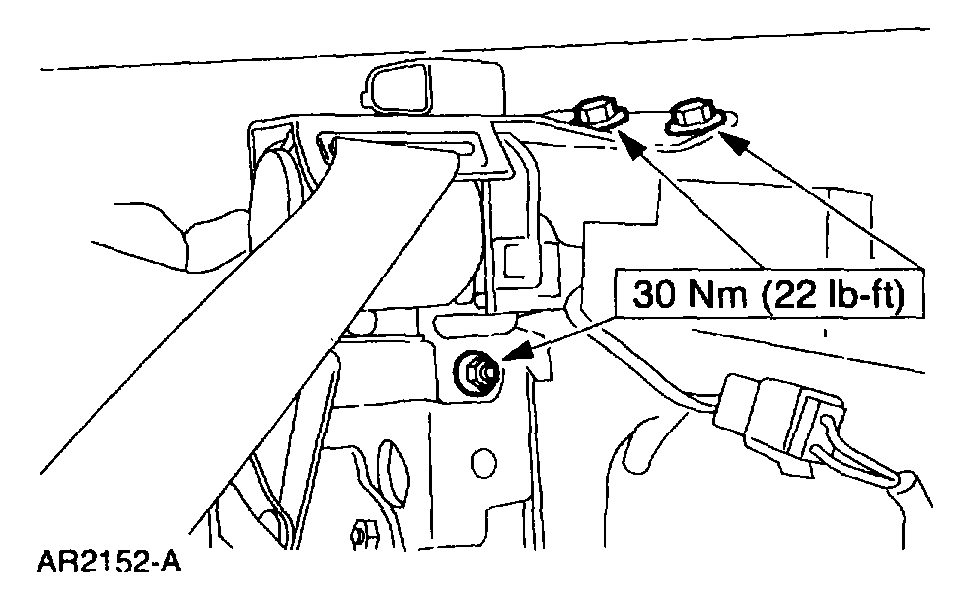
5. Remove the cylinder rod mounting nut.
Picture 5
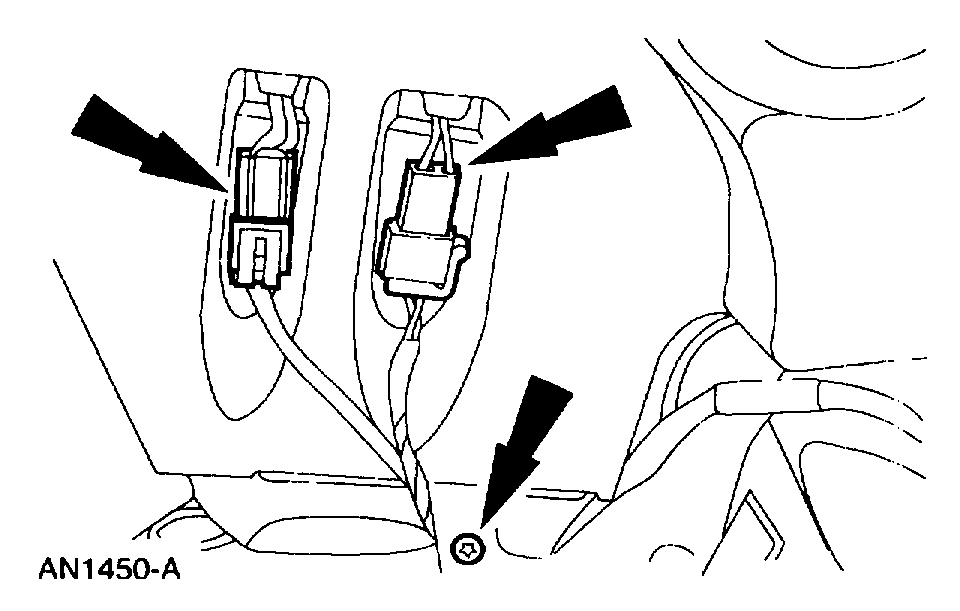
6. Remove the screw and disconnect the two electrical connectors.
Picture 6
7. Remove the screw.
8. Remove the speaker.
Picture 7
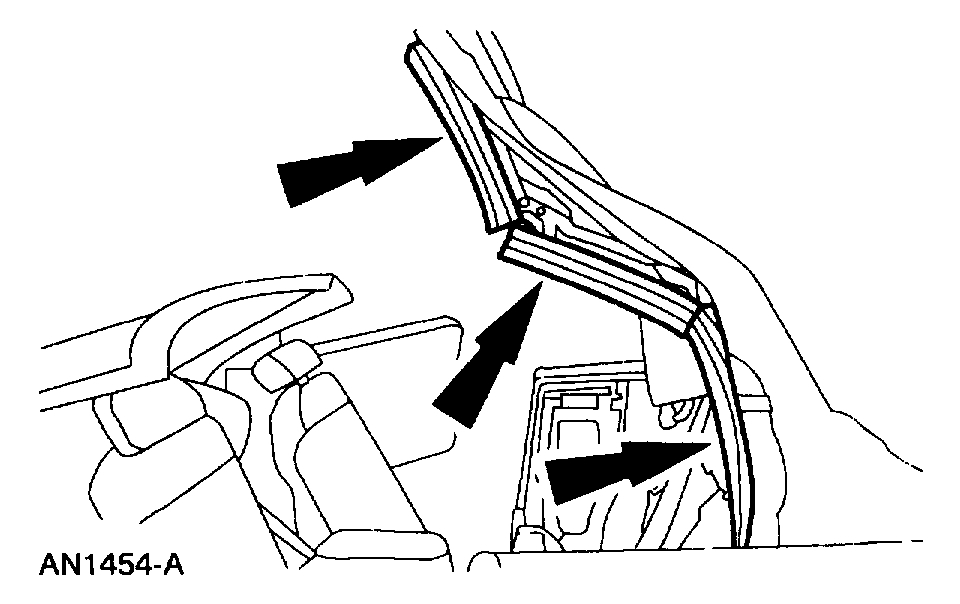
9. Remove the screws and the front seal.
Picture 8
10. Remove the rail seals.
Picture 9
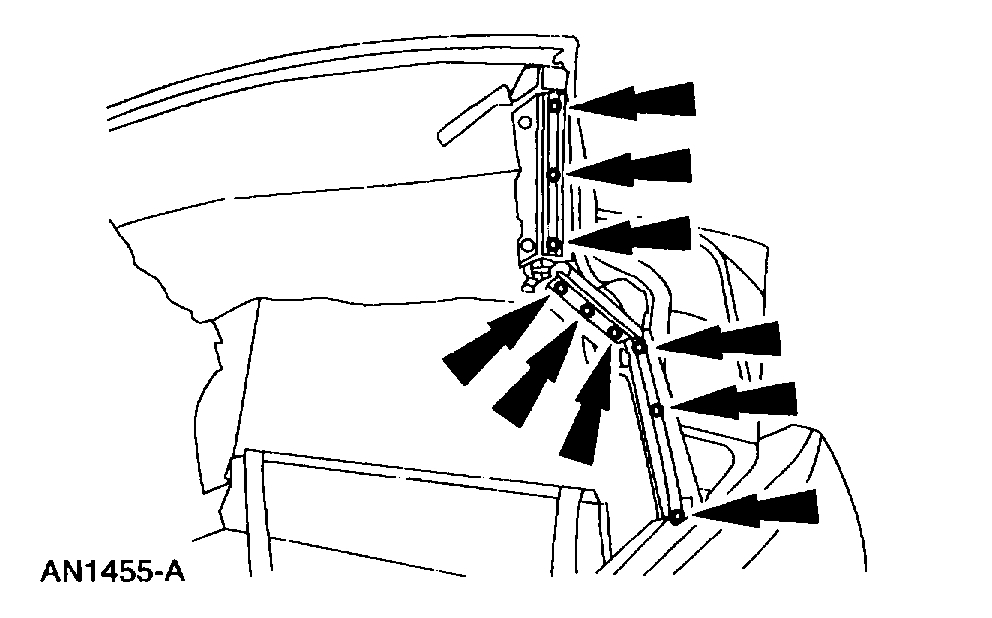
11. Remove the rail seal retainers.
Picture 10
12. Remove the headliner pin-type retainers.
Picture 11
13. Remove the headliner screws.
Picture 12
14. Remove the speed nut.
Picture 13
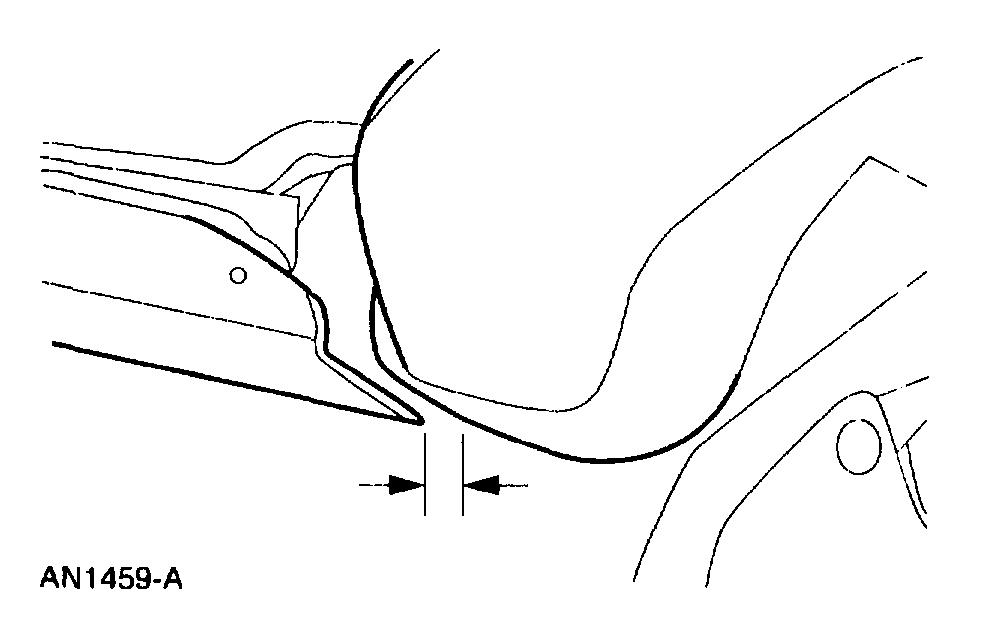
15. Measure the gap between the front of the side rail and the header. Record the figure and the position of the folding top.
Picture 14
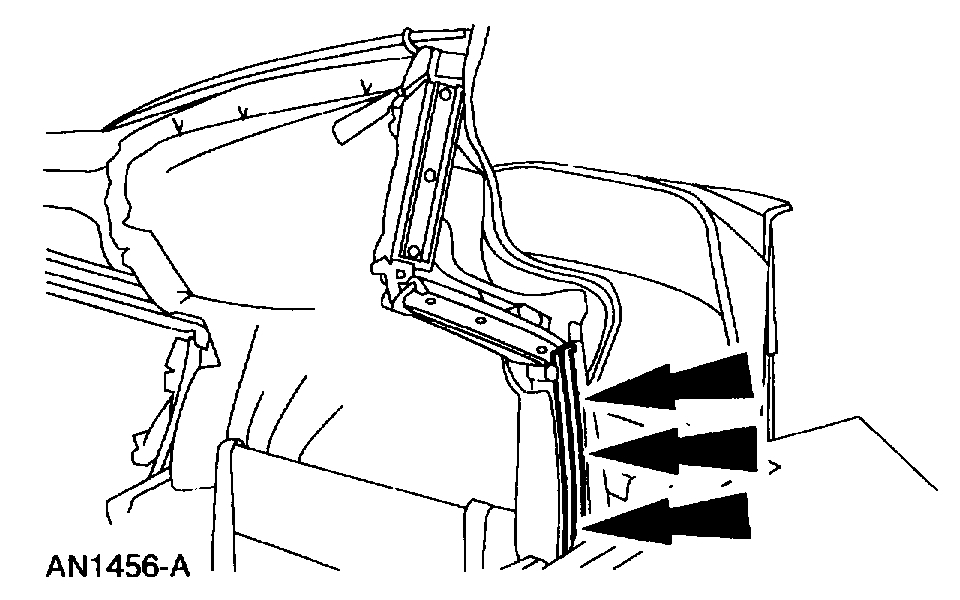
16. Separate the vinyl top cover flap from the rear rail.
Picture 15
17. Disconnect the side tension cable from the rear rail.
Picture 16
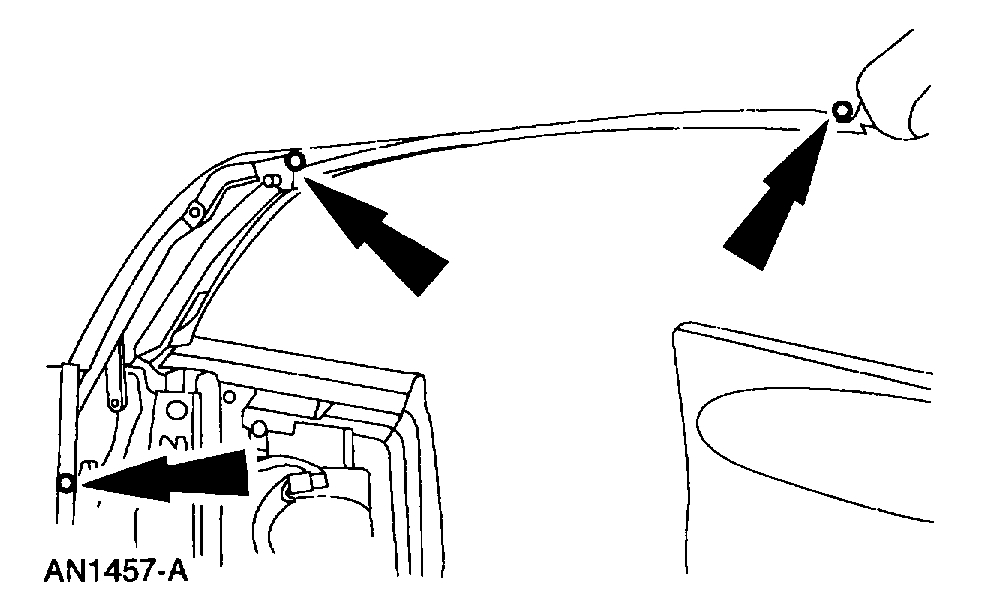
18. Remove the two bolts.
Picture 17
19. Loosen the bolt, but do not remove it.
20. Position the folding top in the full up position.
NOTE: Do not latch the folding top after re-positioning.
Picture 18
21. Disconnect the number two and number three bows from the side rail assembly.
Picture 19
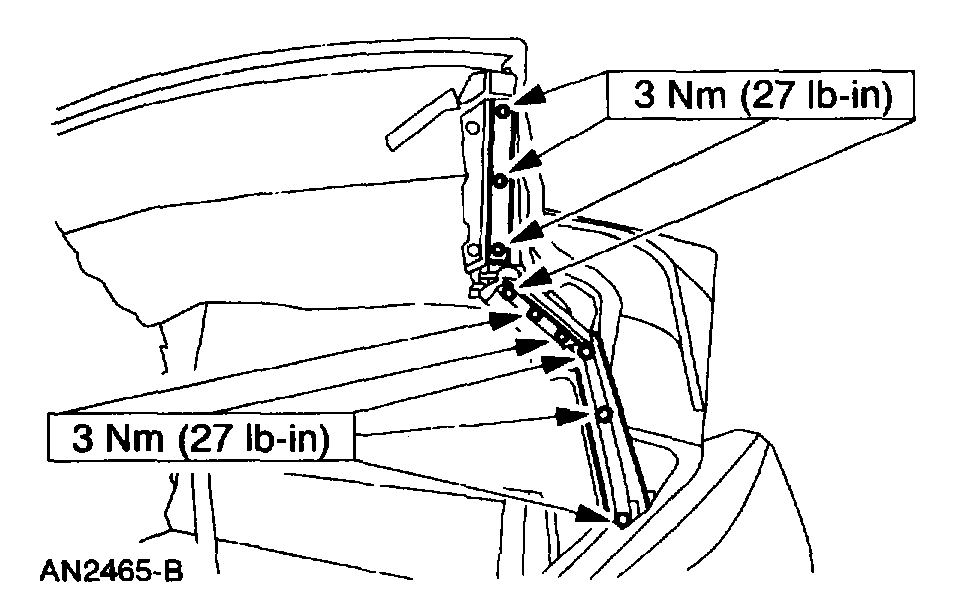
22. Remove the screws.
NOTE: Mark the centerline locations for the number four bow screws.
Picture 20
23. Disconnect the mounting bracket.
1 Loosen the bottom bolt.
2 Remove the upper bolt.
Picture 21
24. Remove the side rail.
1 Remove the two bolts.
2 Loosen the bolt.
INSTALLATION
picture 22
1. Position the side rail and install the bolts.
Picture 23
2. Connect the mounting bracket and install the bolts.
NOTE: Tighten the bottom bolt first.
Picture 24
3. Tighten the bolt.
NOTE: Line up the marks in the number four bow.
Picture 25
4. Connect the number two and number three bows to the side rail assembly.
Picture 26
5. Tighten the bolt.
Picture 27
6. Hand-tighten the two bolts.
Picture 28
7. Adjust the gap between the front of the side rail and the header to the previously recorded dimensions.
Picture 29
8. Tighten the bolts.
Picture 30
9. Connect the cable to the rear rail.
Picture 31
10. Attach the vinyl top cover flap to the rear rail.
Picture 32
11. Install the speed nut.
Picture 33
12. Install the headliner screws.
Picture 34
13. Attach the headliner pin-type retainers.
Picture 35
14. Install the rail seal screws.
Picture 36
15. Install the rail seals.
Picture 37
16. Install the screws and the front seal.
17. Install the speaker.
Picture 38
18. Install the screw.
Picture 39
19. Install the screw and connect the electrical connectors.
Picture 40
20. Position the cylinders and install the nuts.
Picture 41
21. Install the two cylinder rod mounting bolts.
Picture 42
22. Install the front safety belt retractor.
Picture 43
23. Install the bolts.
24. Install the side quarter trim panel.
______________________
Let me know if I can help.
Take care,
Joe
Images (Click to make bigger)
Saturday, April 13th, 2019 AT 8:16 PM