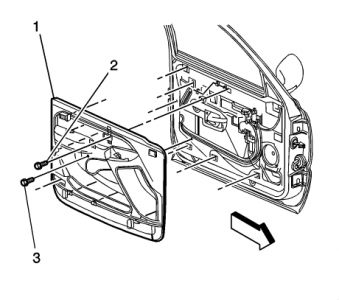
Unfortunately it has that harness, or you would probably only have to remove the upper extension. That upper extension(triangle) is held with three clips, and just pulls away. There are two procedures on trim panel removal based on options. here are both.
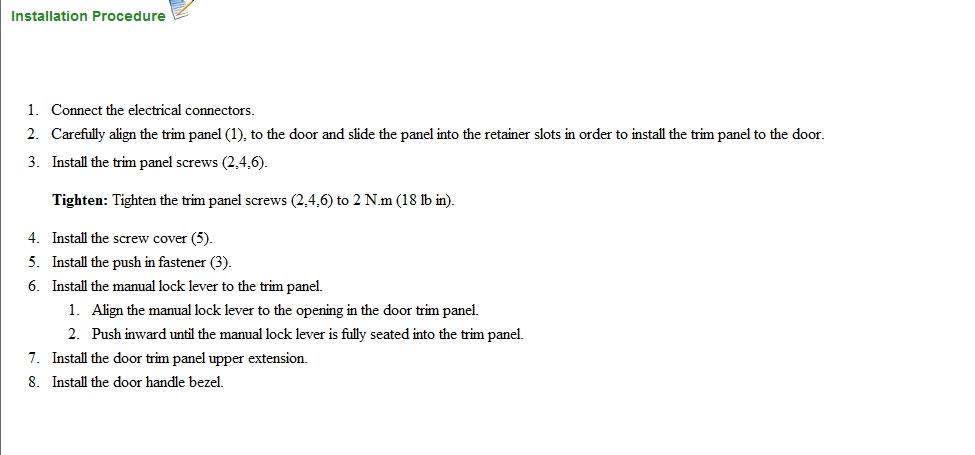
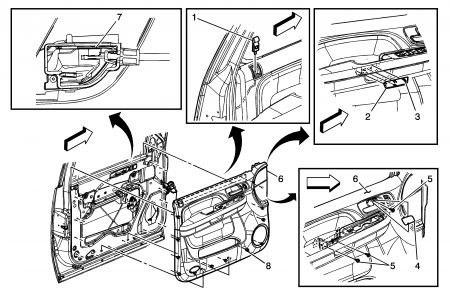
Front Side Door Trim Panel Replacement (SLT, A95)
Callout
Component Name
Preliminary Procedures
Remove the door upper trim panel. Refer to Upper Extension Trim Panel Replacement.
Remove the door window control switch. Refer to Door Lock and Side Window Switch Replacement - Driver Side and Door Lock and Side Window Switch Replacement - Passenger Side.
1
Front Side Door Locking Rod Knob Assembly
Tip
Lower the window.
Ensure the locking rod is in the unlocked position.
Use a flat-bladed tool to disengage the detent tab and then remove the knob by pulling upward.
When re-installing, push the knob down until the detent tab touches the locking rod opening cover.
Push the detent tab in to lock the knob to the locking rod.
2
Front Side Door Trim Panel Cover
3
Front Side Door Trim Panel Cover Retainer (Qty: 3)
4
Front Side Door Inside Handle Bezel Cover
5
Front Side Door Trim Panel Bolt (Qty: 3)
Caution: Refer to Fastener Caution in the Preface section.
Tighten
9 N ·m (18 lb in)
6
Front Side Door Trim Panel Assembly
Tip
Disconnect the electrical connectors.
There are 2 hooks located on the lower portion of the door trim panel that are being used for service and manufacturing installation.
If these hooks are damaged during either removal or installation of the door trim panel, replacement of the panel is not required.
When installing the trim panel start at the lock knob, pushing down and outward moving toward the upper front.
7
Front Side Door Cable Retainer
Tip
Depress both tabs to remove cable and pull cable rearward out of handle assembly.
When reinstalling cable make sure that it is fully seated past the guide tab.
8
Front Side Door Trim Panel Retainer (Qty: 12)
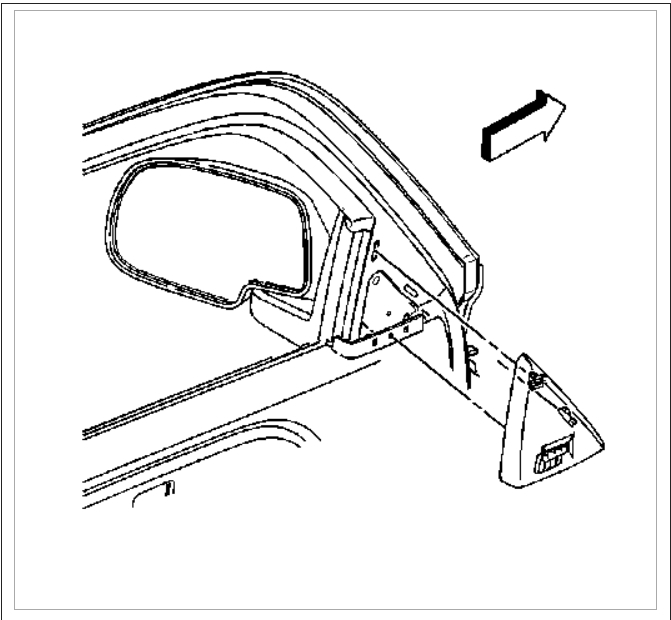
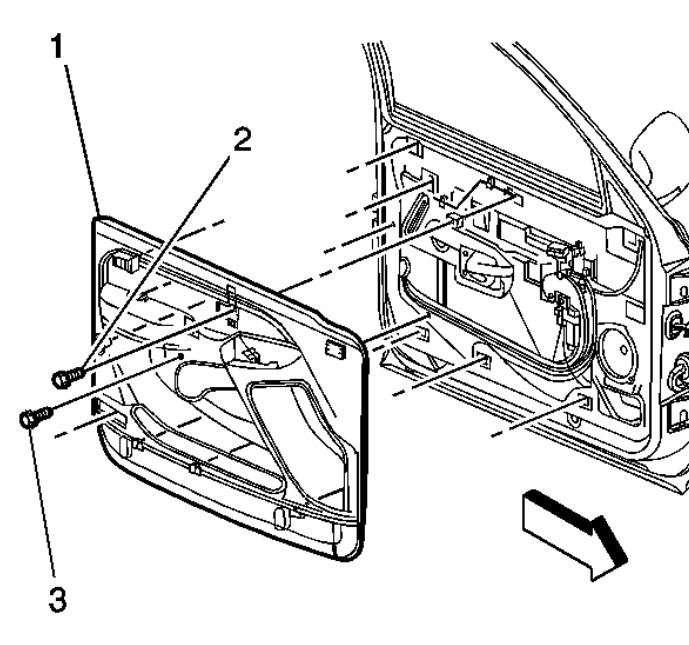
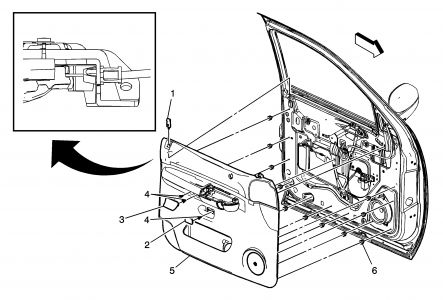
Front Side Door Trim Panel Replacement (Except YE9 or SLT)
Callout
Component Name
Preliminary Procedures
Remove upper extension trim panel. Refer to Upper Extension Trim Panel Replacement.
Remove door pull handle. Refer to Front Side Door Pull Handle Replacement.
Remove door lock and window control switch (if equipped). Refer to Door Lock and Side Window Switch Replacement - Driver Side and Door Lock and Side Window Switch Replacement - Passenger Side.
Remove the door window regulator handle (if equipped). Refer to Door Window Regulator Handle Replacement.
1
Front Side Door Locking Rod Knob Assembly
Tip
Lower window.
Ensure locking rod is in the unlocked position.
Use a flat-bladed tool to disengage detent tab and then remove knob by pulling upward.
When re-installing, push knob down until detent tab touches locking rod opening cover.
Push detent tab in to lock knob to locking rod.
2
Front Side Door Release Handle Cover
3
Front Side Door Armrest Opening Cover
4
Front Side Door Trim Panel Bolt (Qty: 3)
Caution: Refer to Fastener Caution in the Preface section.
Tighten
9 N ·m (18 lb in)
5
Front Side Door Trim Panel Assembly
Tip
Depress both tabs to remove cable and pull cable rearward out of handle assembly.
When reinstalling cable make sure that it is fully seated past the guide tab.
There are two hooks located on the lower portion of the door trim panel that are being used for service and manufacturing installation.
If these hook are damaged during either removal or installation of the door trim panel, replacement of the panel is not required.
6
Front Side Door Trim Panel Retainer (Qty: 11)
Sep 27, 2018 at 3:12 PM
(Merged)