Hello. Thanks for the donation. Much appreciated
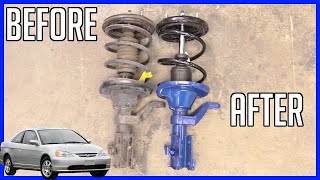
I have come across this a couple of times. Grease the top and bottom caliper guides and I usually install a brake service kit (pad retaining plates and new top and bottom seals)it comes with the grease ! Also see this TSB. Hope this helps. Let me know
BRAKE NOISE/CREAK DURING SLOW SPEED BRAKING (LUBRICATE BRAKE CALIPER)
TECHNICAL SERVICE BULLETIN
Reference Number(s): 04-05-23-004, Date of Issue: September 20, 2004
CHEVROLET:1999-2003 Malibu; 2004 Malibu Classic
OLDSMOBILE:1999-2004 Alero
PONTIAC:1999-2004 Grand Am
SECTION:05 - Brakes
Related Ref Number(s): 04-05-23-004
ARTICLE BEGINNING
CONDITION
Some customers may comment on a creak type noise occurring when applying the brakes. It is usually heard only during slow speed brake maneuvers. If this condition exists, it should be able to be duplicated when the vehicle is not moving by depressing the brake and listening for the noise from the wheel-well/caliper area.
CAUSE
This condition may be caused by a caliper piston to seal interface issue during brake apply. If the caliper is removed and the piston is pushed back, the noise may be eliminated. This is usually only a temporary fix.
CORRECTION
DO NOT REPLACE CALIPER.
To repair this condition, lubricate the entire circumference of the seal at the caliper piston interface using Kluber Fluid and the following procedure:
Remove the wheel and reinstall two lug nuts. This will hold the rotor to the bearing surface so debris does not fall between the surfaces and cause lateral runout (LRO).
Remove the bottom bolt from the caliper assembly without disturbing the hydraulic system.
Swing the caliper assembly up so the caliper assembly is facing upward.
Fig. 1: Caliper Assembly Facing Upward
Thoroughly clean the piston boot with GM approved Brake Clean. Pay particular attention to the area where the boot interfaces with the piston.
Using compressed air, dry the piston/boot area.
Remove the cap from the tip of the bottle and carefully insert the tip, P/N 89022161, between the boot and piston, inward of the piston boot groove.
Fig. 2: Lubricant Application Point
From the top side of the piston (reference diagram), inject the lubricant. With the caliper in the tilted position, the lubricant will flow down and work its way around the entire circumference of the seal. Let the caliper body assembly remain in this position for a minimum of 2 minutes to allow for the fluid to completely work its way around the seal.
Push the piston into the seal to ensure the lubricant is on both the piston and seal surface.
Wipe away any excessive fluid.
Reassemble the caliper to the vehicle. Tighten the caliper bolts to 31 N.M (23 lb ft).
Repeat steps 1- 9 on the opposite side of the vehicle, if necessary.
Pump the brake pedal to push the caliper piston back into place.
Reinstall the wheel and test drive the vehicle to verify repair.
PARTS INFORMATION
PARTS INFORMATION
Part NumberDescription
89022161Service Kit - Kluber Fluid
SPONSORED LINKS
Sunday, January 25th, 2009 AT 5:55 AM