1990 Buick Electra Brake fluid not getting to left rear or

Tiny
WULFN1
  • MEMBER
  • 1990 BUICK ELECTRA
1990 Buick Electra

Hi guys.
Hoping someone here has heard of this issue or had it themselves.
Originally replaced damaged brake line. After replacement, brakes were spongy and forcing right front brake to absorb the full force of the braking.
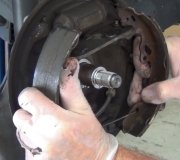
Bought new brake SHOES and installed. After installation could not get fluid to the brakes to bleed them. Brakes refuse to move. (Believe me this is NOT my first brake job did it right and re-did it just in case after it didn't work) Replaced master cylinder, still nothing. Replaced brake cylinder, nothing. Replaced one of the plastic tubes going from the resevoir. Have held off from replacing the other plastic tube at this point am trying to troubleshoot the issue.
Any suggestions? I am at my wits end. I have never experienced this issue in the past and I change brakes on various makes and models on a regular basis. (The one in the family with mechanical skills, a garage and tools. Whoopee for me)
Do you
have the same problem?
Yes
No
Saturday, August 14th, 2010 AT 7:50 AM

15 Replies

Tiny
MERLIN2021
  • MECHANIC
  • 17,250 POSTS
BLEEDING FRONT BRAKES The front brakes can be bled in conventional manner or by pressure bleeding. The manufacturer recommends pressure bleeding front brakes with a minimum of 20 psi (1.4 kg/cm 2 ). BLEEDING FRONT BRAKES WITH PRESSURE BLEEDER 1. Bleed front brakes only when rear brakes have been bled first. Remove reservoir cap. Attach Bleeder Adapter (J-35798) to reservoir. Attach bleeding equipment and pressurize system to 20 psi (1.4 kg/cm 2 ). 2. Attach a bleeder hose to one front bleeder valve and submerge other end of hose in a container of clean brake fluid. Open bleeder valve. 3. Allow fluid to flow until no air is seen coming out end of hose. Close bleeder valve. Repeat procedure for other front brake. Fill reservoir to maximum level with accumulator fully charged. BLEEDING REAR BRAKES Bleeding the rear brakes requires a fully charged accumulator. The manufacturer does NOT recommend bleeding rear brakes by using a pressure bleeder. Bleeding Rear Brakes With Fully Charged Accumulator 1. Turn ignition on. Allow system to become fully charged. Pump motor will stop when system is fully charged. Attach a bleeder hose to one rear bleeder valve and submerge other end of hose in a container of clean brake fluid. Open bleeder valve. 2. With ignition on, slightly depress brake pedal for at least 10 seconds. Continue procedure until there is no more air coming out of hose. Repeat procedure for other rear brake. Fill reservoir to maximum level with a fully charged accumulator. CAUTION: Care must be exercised when opening rear caliper bleeder screws, due to extremely high pressure available from a fully charged accumulator at bleeder screws.
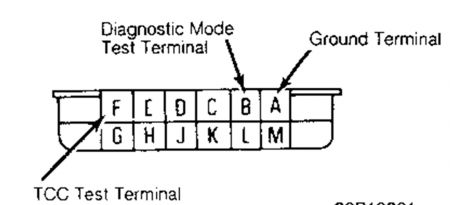
If it's an ABS problem read the codes this way:
ABS DIAGNOSTIC CODES 1. With ignition off, ground ALDL connector (pin H), located under dash on driver's side of vehicle. Turn ignition switch to "RUN" and count "ANTI--LOCK" lamp flashes. This is the first digit of the trouble code. The lamp will pause (remain off) for 3 seconds then begin flashing the second digit of the code. If lamp turns on for 4 seconds then turns off, no trouble codes are present, return to FUNCTION CHECK. 2. Leave ignition in "RUN" position. After the first code has been displayed, record code and unground ALDL. Ground connector a second time and repeat counting flashes as in step 1). This will be the second code. Record second code and repeat step 2) until there are no more codes. 3. Repair indicated problem before clearing codes. All codes must be displayed before EBCM will clear memory. Drive vehicle above 18 MPH. Display codes and repeat step 3) until no more codes display.


https://www.2carpros.com/forum/automotive_pictures/62217_ALDL_7.jpg


Jump A to H and count the flashes,
Cross these two terminals , then turn the key on. Count the flashes, a 22 will flash as 2 flashes then a short pause, then 2 flashes, if more than one code is stored, the pause will be longer. The codes will display three times and end with 12. Write them down and post here. This connector is right under the left side of the dash...
Was this
answer
helpful?
Yes
No
Saturday, August 14th, 2010 AT 8:34 AM
Tiny
WULFN1
  • MEMBER
  • 9 POSTS
Ok, this particular model does not have ABS.
I will get the codes for you asap. Am currently at work, and cannot access my vehicle.

Also, the answer suggests I bleed the rear brakes first. I cannot get fluid to the rear brake. So I haven't been able to bleed them. Through the steps in the haynes manual for this vehicle I checked the front left brake and at that point found that it was also not moving nor receiving fluid.
My son suggested I check the instructions for the rear cylinder I replaced. In those instructions it suggests that the cylinder may need to be adjusted and gives instructions as to what to do, but does not include information as to what adjustment to make if you are NOT receiving fluid to the brake. That is my issue at present. Finding out WHY I can't get fluid out to that brake. Having replaced nearly all the lines from the resevoir out to the brake, I cannot understand why I am not getting anything.
Was this
answer
helpful?
Yes
No
Saturday, August 14th, 2010 AT 8:46 AM
Tiny
WULFN1
  • MEMBER
  • 9 POSTS
Well I have to say this information didn't help much, as every step quoted I have already done twice. I have now done it three times.

No change in the issue first written about. And the codes thing, don't have ABS brakes. Not going to give me ABS brake codes
Was this
answer
helpful?
Yes
No
Saturday, August 14th, 2010 AT 12:00 PM
Tiny
MERLIN2021
  • MECHANIC
  • 17,250 POSTS
You can try gravity bleeding, just open all bleeders, wait, when they start to drip close bleeders. This may take a while but it will work, just dont let the master run dry. Or open a rear bleeder, lets start at right rear, put your finger over the bleeder, and have someone SLOWLY depress the pedal 3/4 of the way down. Keep finger on the bleeder, now let the pedal up, wait 15 seconds, repeat this until fluid is obtained at rear, quick take up master cylinders require a wait time between pumps, and also NO pumping, just push and release. Did you bench bleed the master cylinder? All air gone when cracking the master lines?
BLEEDING HYDRAULIC BRAKE BLEEDING Hydraulic system bleeding is necessary any time air has been introduced into system. Bleed brakes at all 4 wheels if master cylinder lines have been disconnected or master cylinder has run dry. Bleeding may be done either by using pressure bleeding equipment or by manually pumping brake pedal and using bleeder tubes. BLEEDING MASTER CYLINDER 1. Depressurize ABS system (if equipped). Remove power brake reserve by applying brakes several times with the ignition off until all reserve is depleted. Ensure fluid level in master cylinder reservoir is adequate. 2. Loosen front hydraulic line(s) on master cylinder and allow fluid to fill the master cylinder until it begins to flow from the front line connector port. 3. Tighten front brake lines. Depress and hold the brake pedal slowly one time and hold. Loosen the front brake line connection at the master cylinder to purge air from the cylinder. Tighten the brake line and then slowly release the brake pedal. 4. After waiting fifteen seconds, repeat the process, including the fifteen second wait, until all air is purged from the forward end of master cylinder. Repeat process for rear brake line connection(s). MANUAL BLEEDING 1. Depressurize ABS system (if equipped). Fill master cylinder. Install bleeder hose to first bleeder valve to be serviced. Bleeding sequence is RR, LF, LR, RF. Place other end of hose in clean glass jar partially filled with clean brake fluid so end of hose is submerged in fluid. WARNING: ABS systems are under high pressure under normal operating conditions. Before opening the fluid reservoir or before servicing any component of an ABS system, it is mandatory that system pressure be discharged. To discharge system, turn ignition off and pump brake pedal a minimum of 20-25 times using full pedal strokes. When a definite increase in pedal effort is felt, pump pedal 2 more times. NOTE: If master cylinder requires bleeding, it must be done with master cylinder installed on vehicle. NOTE: Before bleeding system, exhaust all vacuum from power unit by depressing brake pedal several times. Bleed master cylinder if equipped with bleed screws, then bleed wheel cylinders or calipers in sequence. 2. Depress brake pedal slowly through its full travel. Open bleeder valve 3/4-1 turn. Close bleeder valve. Release pedal. Repeat procedure until flow of fluid shows no signs of air bubbles. PRESSURE BLEEDING 1. Depressurize ABS system (if equipped). Clean master cylinder cap and surrounding area, then remove cap. With pressure tank at least 1/3 full, connect to master cylinder using adapters. See Fig. 1. Attach bleeder hose to first bleeder valve to be serviced. Bleeding sequence is RR, LF, LR, RF. Place other end of hose in clean glass jar partially filled with clean brake fluid so end of hose is submerged in fluid. 2. Open release valve on pressure bleeder. Unscrew valve 3/4-1 turn noting fluid flow. When fluid flowing from cylinder to cup is free of bubbles, close bleeder valve securely. Bleed remaining cylinders in correct sequence and in same manner. Remove tool from combination valve. Fig. 1: Pressure Bleeder Installation (Typical) BLEEDING PRESSURES PRESSURE BLEEDING SPECIFICATIONS BLEEDING SEQUENCE BLEEDING SEQUENCE ADJUSTMENTS DISC BRAKE Disc brakes are self-adjusting. Caliper piston seals are designed to retract pistons just enough to allow brake lining to lightly brush disc without any drag. Sliding caliper design compensates for any lining wear. NOTE: Check fluid level in master cylinder frequently during bleeding to insure air does not enter system. NOTE: Before bleeding system, exhaust all vacuum from power unit by depressing brake pedal several times. Bleed master cylinder if equipped with bleed screws, then bleed wheel cylinders or calipers in sequence. Application Psi (kg/cm 2 ) All Models 20-25 (1.40-1.75) Application Sequence All Models RR, LF, LR, RF DRUM BRAKE To adjust brakes after service, apply and release brake pedal a minimum of 25 times. Repeat procedure until clicking sound can no longer be heard from rear brakes. Brakes will now be properly adjusted. NOTE: Adjustment should only be required after relining or replacing shoes, or if length of adjusting screw is changed.
Was this
answer
helpful?
Yes
No
Saturday, August 14th, 2010 AT 12:01 PM
Tiny
WULFN1
  • MEMBER
  • 9 POSTS
Ok, before I do this a fourth time, could you answer me one question?
Why am I having NO PROBLEM bleeding the right front and left rear?

I think what's frustrating me here, is the answers that are obviously being pulled from the books without thought, are textbook standard for the average idiot who's never done this before, like you didn't read my posts and note I have commented several times this is not my first rodeo. I have done all the troubleshooting I can think of and sent my wife to the internet with instructions to find what she could here. And all I have received so far, that I didn't already know how to do, is specs. That I didn't have.
PLEASE read my question, my apologies for any wrong wording or improper "automotive technological terms", as again, this IS STILL being written by my wife who is not nor has she ever been mechanically inclined. She is merely repeating to me what you have written and responding.

What I was hoping for in responses, was information on troubleshooting the issue. Where to go next.
Was this
answer
helpful?
Yes
No
Saturday, August 14th, 2010 AT 12:11 PM
Tiny
CARADIODOC
  • MECHANIC
  • 33,689 POSTS
Hi guys. Pardon me for jumping in here but there's an easy fix for this problem. It's true the answers might be right from a text book or service manual but that's the best way to insure the correct procedure is presented without omitting any important steps. Took merlin2021 a long time to type that too.

Here's a copy / paste version I've used many times for this problem:

On GM vehicles with the step bore master cylinder, imagine a teeter totter that is level, but if it moves one way, it will block the ports for two wheels. The teeter totter moves when one hydraulic circuit builds pressure and the other one doesn't due to a leak or from pedal-bleeding the system. As soon as the pedal is pressed while a bleeder screw is open, the teeter totter moves to block the ports for one front brake and the opposite rear brake. No fluid can be forced out of those two bleeders.

If the system is left like this, one front brake will wear out very quickly and the other side will look like new. People usually ask for advice when they run into worn pads on one wheel for the second or third time. The car will usually not have a brake pull because alignment angles are modified to accommodate loss of one hydraulic circuit on the split-diagonal systems.

The only way I ever found to reset the valve in the master cylinder, (that teeter totter), was to give a quick, short burst of compressed air to one of the bleeder screws that isn't flowing. Don't use so much air that it makes its way up to the master cylinder. A fraction of a second is sufficient. After that, just let it gravity bleed.

The same problem can happen even when the hydraulic system wasn't opened. After installing new front pads, the pistons must be worked out until the pads contact the rotors. One piston will always move first, then, once contact is made with the rotor, pressure will start to build up. That will trip the valve at which point the other piston will never move. Once the burst of air is given and the line gravity bleeds, pressing the pedal no more than half way to the floor will prevent the valve from tripping again.

This same master cylinder can be used with the factory "add-on" ABS system that is bolted directly to the ports of the master cylinder.

Even with normal master cylinders, you should never press the brake pedal more than half way to the floor when pedal bleeding. The lip seals will be torn on the debris and corrosion that build up in the lower half of the bores where they don't normally travel.

Caradiodoc
Was this
answer
helpful?
Yes
No
Saturday, August 14th, 2010 AT 1:40 PM
Tiny
WULFN1
  • MEMBER
  • 9 POSTS
Thanks Caradiodoc,
This might be the same thing the first person helping was saying/typing, but it is giving me something to sink my teeth into. I am going to take what both have posted and try, from the beginning to end, to follow instructions given perfectly. I hadn't considered the problem might be the master cylinder locking up. I've been following rabbit holes in the lines themselves with no success.
I will let you know if this helps.

Merlin, my apologies, I sounded like a spoiled brat. He's at the point where he's ready to take a sledge hammer to my car, and I really need my wheels back! Please consider my apology, and know I was writing out of fear for my crappy little whoop-de-bom.
Was this
answer
helpful?
Yes
No
Saturday, August 14th, 2010 AT 1:49 PM
Tiny
WULFN1
  • MEMBER
  • 9 POSTS
Thank you for your assistance. I will figure this out eventually. I read EVERY LINE myself and nothing in the information you posted initially applied to my 1990 Buick Electra Park Avenue Deluxe model.

Every line incorporated anti lock braking system information none of which applies to this vehicle. The manner in which to bleed the brakes was already known and put into practice prior to this forum post.

I will take into consideration that there is a "teeter totter " effect in the master and follow the instructions to repair that effect.

I believe there is a blockage in one of the lines (my guess is the lines to the RIGHT REAR brake and the LEFT FRONT brake.) If this solution does not remedy the fluid problem and the shoes still do not move when the pedal is depressed, I will blow out the lines one by one and start from scratch once more.
Was this
answer
helpful?
Yes
No
Saturday, August 14th, 2010 AT 3:26 PM
Tiny
CARADIODOC
  • MECHANIC
  • 33,689 POSTS
I would have elaborated more in my previous reply but I had visitors show up. The two blocked lines are real common. Don't go chasing non-existent problems. Just give a short "enema" of compressed air to one of the wheels that isn't bleeding, then let them all gravity-bleed. When fluid starts dripping from one wheel, close the bleeder screw and do the same as each other one starts to bleed. Once all four have bled, pump the brake pedal no more than half way to the floor to push the front pistons out. Once the pads contact the rotors on both sides, you can press the pedal like normal because at that point, both sides will build pressure equally and that valve in the master cylinder will not trip.

To aid in gravity-bleeding, the cover on the reservoir should be loose to allow air in to displace the fluid that is leaving, otherwise a vacuum can build up that prevents the fluid from going down to the wheels. I like to leave the cover on loosely because brake fluid loves to suck moisture out of the air which reduces its boiling point and promotes corrosion of metal parts.

Again, I apologize for butting into an ongoing conversation, but I know how frustrating it can be when you can't figure out the answer. This is so common. Just give it a squirt of air and walk away for a few minutes.

Caradiodoc
Was this
answer
helpful?
Yes
No
Saturday, August 14th, 2010 AT 4:32 PM
Tiny
WULFN1
  • MEMBER
  • 9 POSTS
Caradiodoc,

THANK YOU so much! Your suggestions to try the short enema style clearing of the line, worked! I have gotten the front driver side brake unlocked and fluid flowing beautifully. Am preparing the rear for the procedure now.
I will try bleeding first without any air, because I have already done it on the front. If she works, GOLDEN!
Also, the suggestion to depress the brake slightly instead of all the way as I was taught to do from the beginning, is what works with this model car. (I never would have thought of that. And my wife is the one who pointed out that my brother was mashing the brake when he was in the position to depress when told. I had originally shook my head at the instruction but she's persistant and I have learned to eventually listen. (Yes she is typing ! And might be adding a nice word here and there.) )
Will update after rear procedure.
Thanks,
Billy
Was this
answer
helpful?
Yes
No
Saturday, August 14th, 2010 AT 5:16 PM
Tiny
CARADIODOC
  • MECHANIC
  • 33,689 POSTS
Dandy news. Happy I could help. You don't have to shoot air into the rear. It is sufficient to do it to either one one of the wheels that don't bleed.

I always told my students to never push any brake pedal all the way to the floor, simply because of the corrosion that builds up. The exception would be for a new master cylinder that hasn't had time yet to build up corrosion. One fellow told me off for suggesting his master cylinder was ruined by doing that. He said he had been doing brakes professionally for many years and always pushed the pedal to the floor and never had a problem. 90 percent of the time he might get lucky but it only takes one destroyed master cylinder to ruin your day. Keep in mind too that many of the procedures written in the service manuals pertain to vehicles new enough to still be under warranty. You'll rarely see a paragraph about what to do about rusty parts. Someone should write a book about how to fix old rusty / corroded / jammed / cross-threaded, ... You get the idea. Also, since this is such a common problem, why isn't it mentioned in the service manual?

Caradiodoc
Was this
answer
helpful?
Yes
No
Saturday, August 14th, 2010 AT 5:48 PM
Tiny
WULFN1
  • MEMBER
  • 9 POSTS
"Dandy news. Happy I could help. "
You and me both!
Here's what he did:

He replaced the flex line on the front (we bought a new one the other night thinking it could be an issue with a collapsed or in some other way damaged flex line.) Bled the front driver brake, using your method, worked like a charm.
Went to the right rear, started by gravity bleeding to make sure all was well, when it started to drip, he bled that line too. Just to be on the safe side, we bled all four brakes, because in the beginning of the week he replaced the master thinking that was the issue. He is now test driving to make sure it's not just "in the garage ok".

I'm pretty sure we're finally done with this headache. I am SO glad brake system parts for this vehicle aren't expensive, and now I have a brand new braking system, short of one brake line and the rear flex which seem to be healthy at this time.

Thanks again for all the help! We really appreciated it!
Was this
answer
helpful?
Yes
No
Saturday, August 14th, 2010 AT 6:05 PM
Tiny
MERLIN2021
  • MECHANIC
  • 17,250 POSTS
With a collapsed brake hose, uneven pads wear should have been present, and a locked up caliper. This is easily checked by opening the bleeder, if the wheel spins free the hose is no good, if it stays locked, the caliper is no good. None of this was in the post? Glad it's solved, but my cut and paste answer after my gravity bleed method, is for Electra, both ABS and non ABS.
Was this
answer
helpful?
Yes
No
Monday, August 16th, 2010 AT 2:31 AM
Tiny
WULFN1
  • MEMBER
  • 9 POSTS
Sorry I didn't mention the brake shoes being replaced. Thought I did.
The pads had worn down to dry metal on the rear left wheel, so they were replaced, directly after the worn brake line was replaced and the braking problem wasn't resolved.

That's why we were bleeding them to begin with. I think, after reading your posts and Caradiodoc's posts, that the initial cause of not being able to bleed the left rear and right front brakes, the real problem was my brother inlaw's less than gentle manner of depressing the brake pedal.
Either way, I am grateful the solution to this problem was quick and easy for my husband to implement, as well as inexpensive.
Thanks again for taking the time, it was truly appreciated.
Was this
answer
helpful?
Yes
No
Monday, August 16th, 2010 AT 7:33 AM
Tiny
MERLIN2021
  • MECHANIC
  • 17,250 POSTS
You are welcome! Any further assistance, don't hesitate to ask!
Was this
answer
helpful?
Yes
No
Monday, August 16th, 2010 AT 3:09 PM

Please login or register to post a reply.

Sponsored links