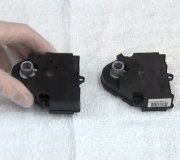
How to replace the entire blend door casing and blend door mount

Tiny
JOHN PAUL KARTES
  • MEMBER
  • 2005 CHEVROLET SUBURBAN
  • 5.3L
  • V8
  • 4WD
  • AUTOMATIC
  • 225,700 MILES
I have replaced the actuator as well as tried to fix the mount of the blend door, but each spring is broken and the door wont move for the third year in a row! How can I replace the entire enclosure so it will work like new?
Monday, May 20th, 2019 AT 4:21 PM

13 Replies

Tiny
JACOBANDNICKOLAS
  • MECHANIC
  • 108,179 POSTS
Welcome to 2CarPros.

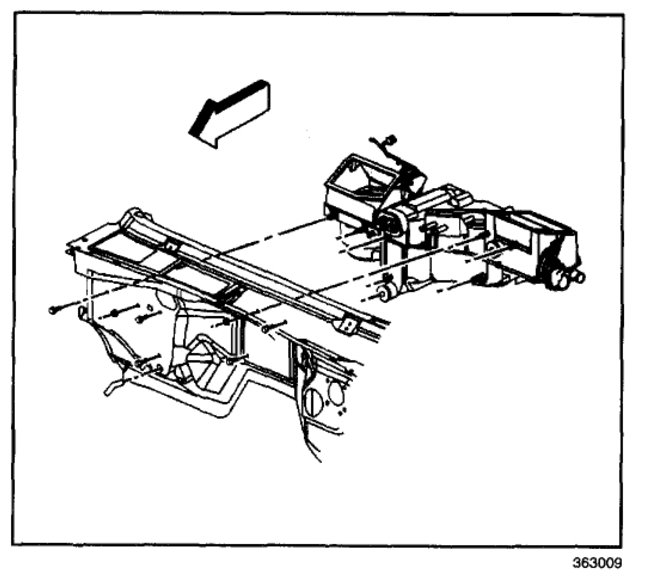
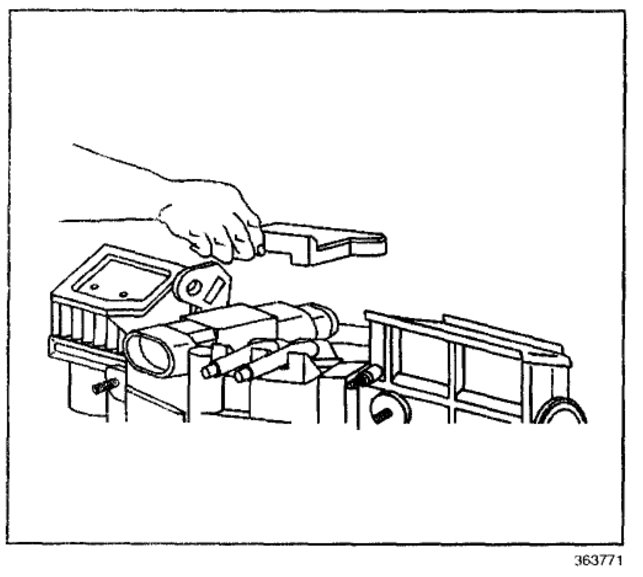
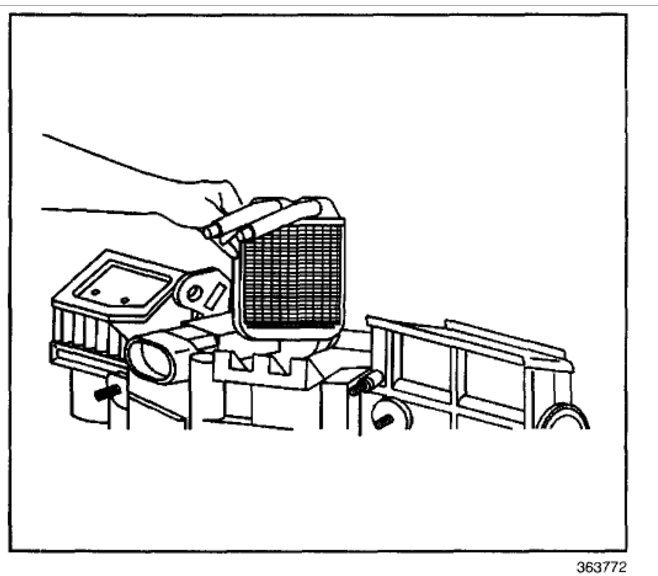
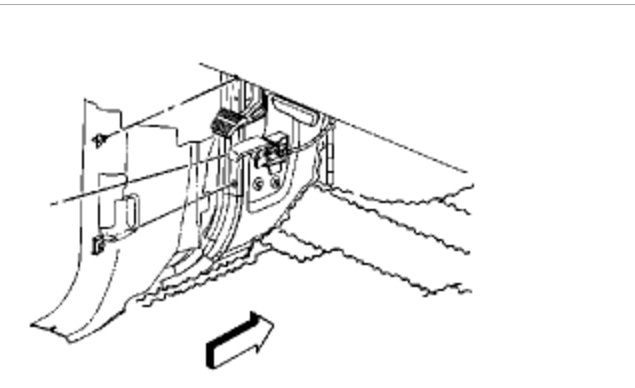
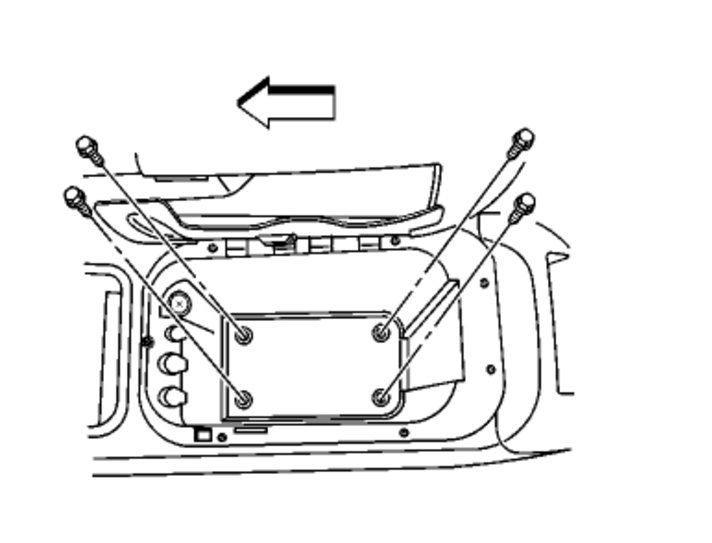
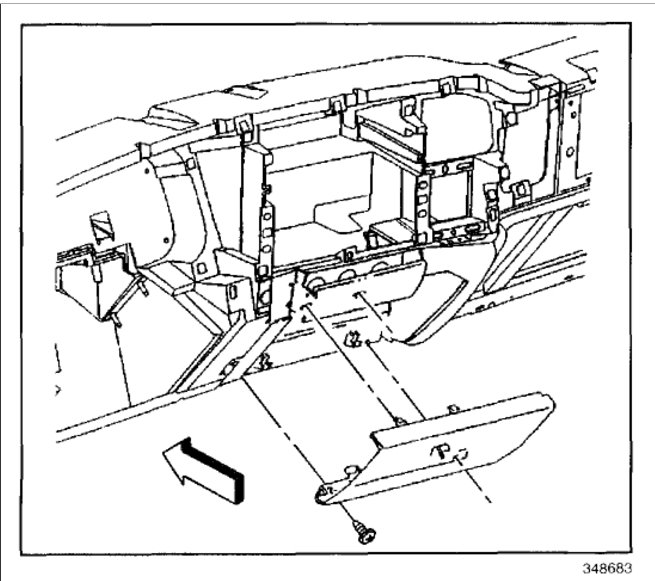
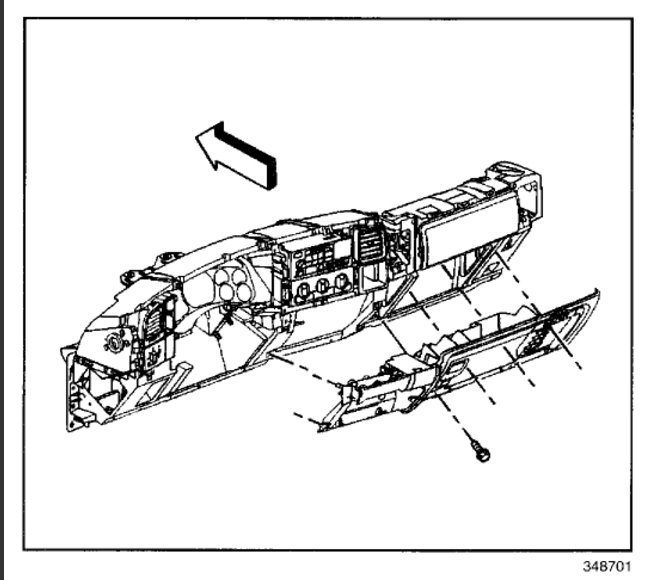
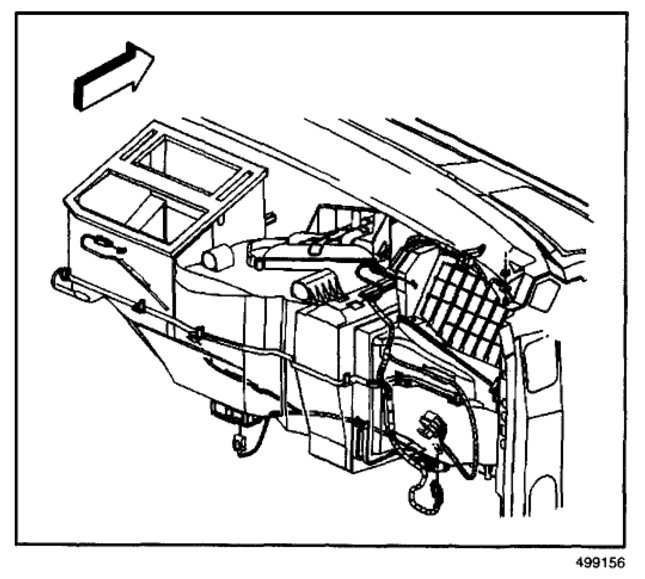
Here are the directions for replacing the HVAC module. The attached pictures correlate with the directions.

________________________________

HVAC MODULE ASSEMBLY REPLACEMENT
Air Conditioning and Heater Module Assembly Removal and Installation

Tools Required
- J 43181 Quick Connect Connector Removal Tool

Removal Procedure

1. Drain the engine coolant.

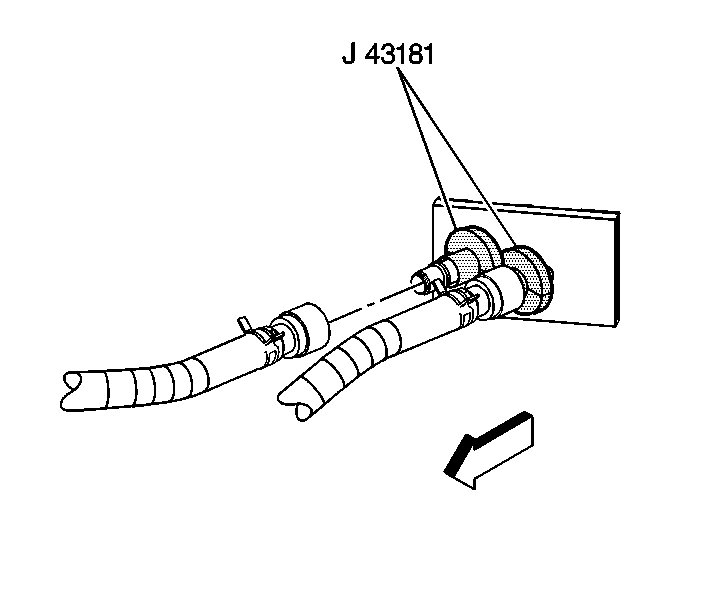
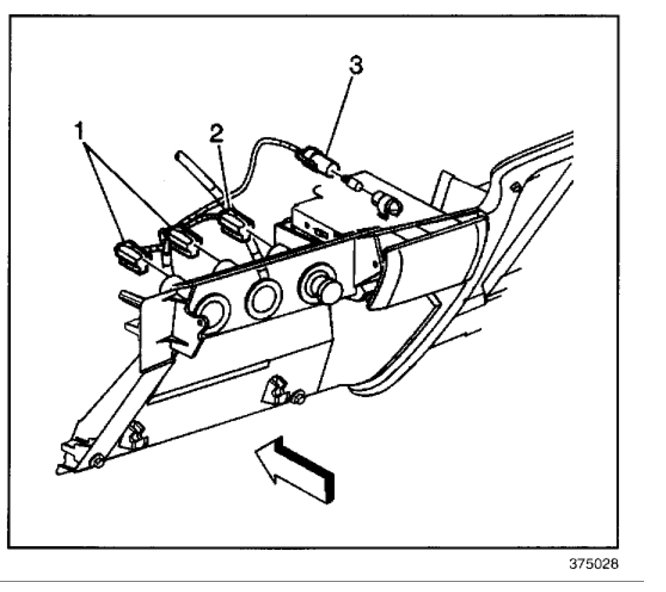
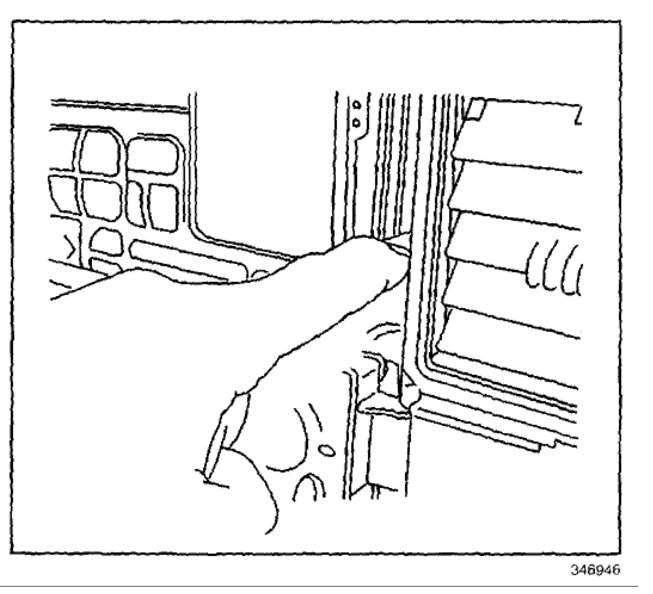
Picture 1

2. Using the J 43181 disconnect the inlet heater hose from the heater core.
2.1. Install the J 43181 to the heater core pipe.
2.2. Close the tool around the heater core pipe.
2.3. Firmly pull the tool into the quick connect end of the heater hose.
2.4. Firmly grasp the heater hose. Pull the heater hose forward in order to disen(gauge) the inlet hose from the heater core.
3. Using the J 43181 disconnect the surge tank outlet hose from the heater core.
3.1. Install the J 43181 to the heater core pipe.
3.2. Close the tool around the heater core pipe.
3.3. Firmly pull the tool into the quick connect end of the heater hose.
3.4. Firmly grasp the heater hose. Pull the heater hose forward in order to disen(gauge) the surge tank outlet hose from the heater core.
4. Remove the accumulator.
5. Remove the instrument panel carrier. See: Dashboard / Instrument Panel > Removal and Replacement
6. Remove the HVAC module drain hose.
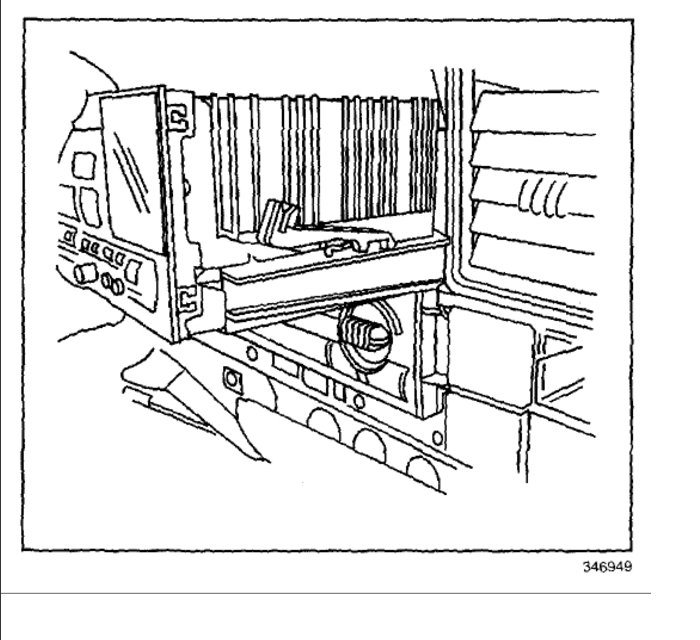
7. Disconnect the electrical harnesses and the ground connections from the HVAC module.

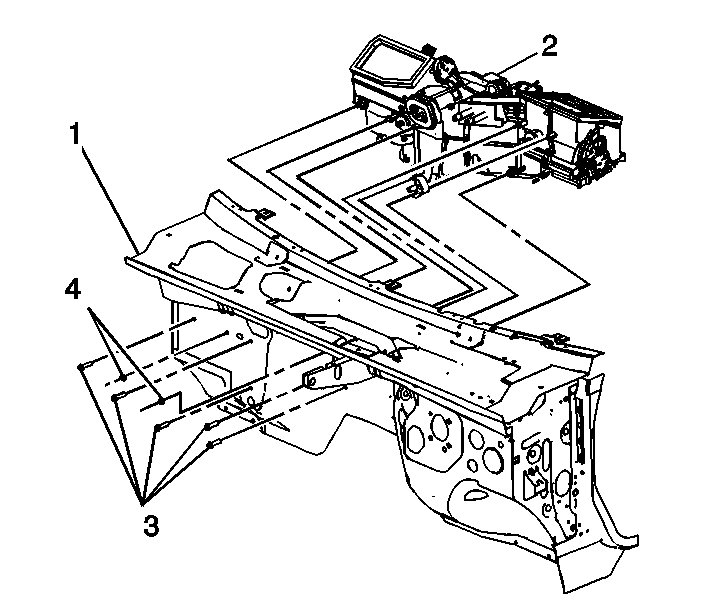
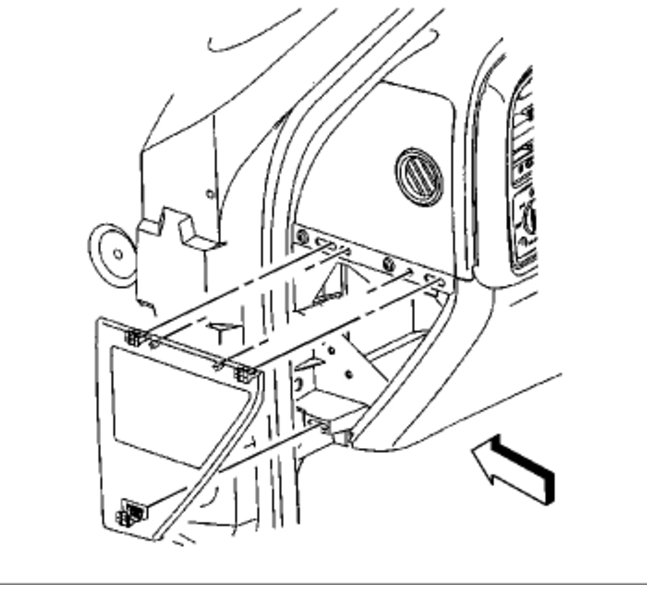
Picture 2

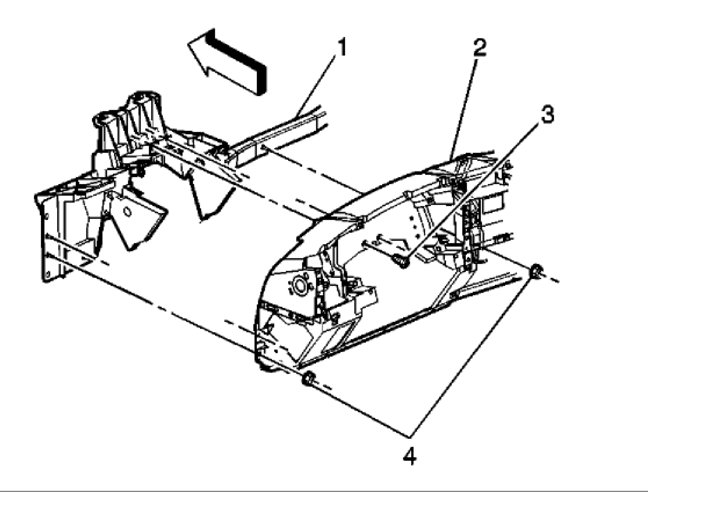
8. Remove the nuts (4) from the HVAC module (2).
9. Remove the bolts (3) from the HVAC module (2).
10. Remove the HVAC module (2) from the vehicle (1).

Installation Procedure

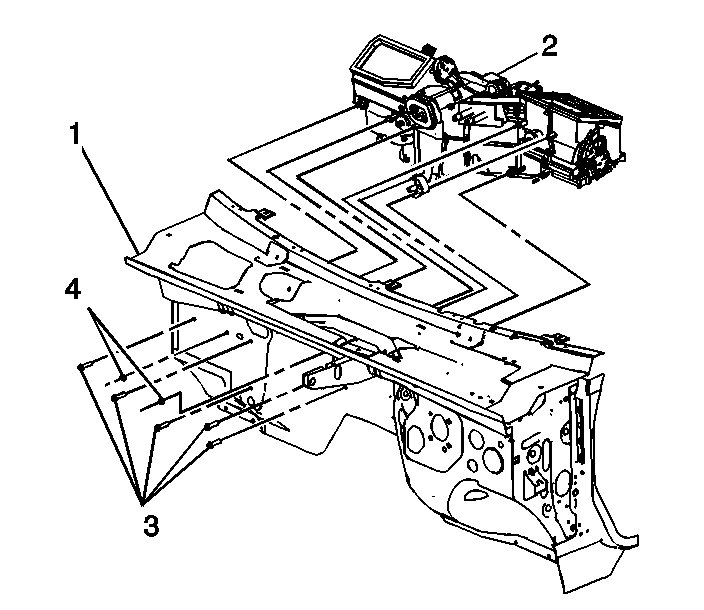
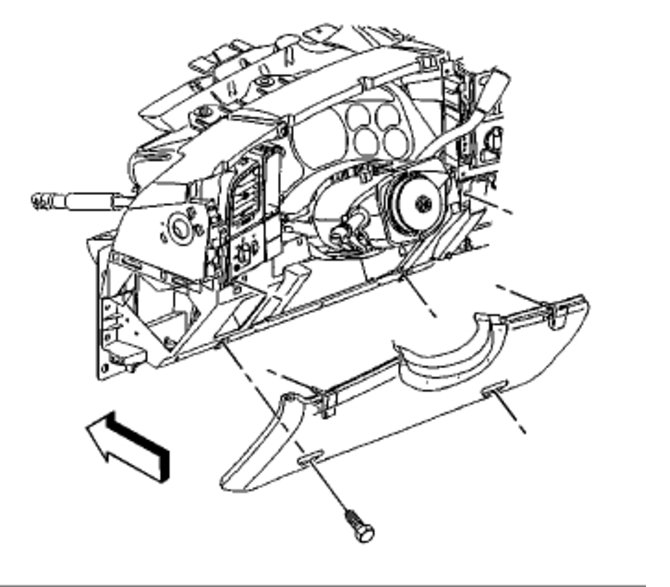
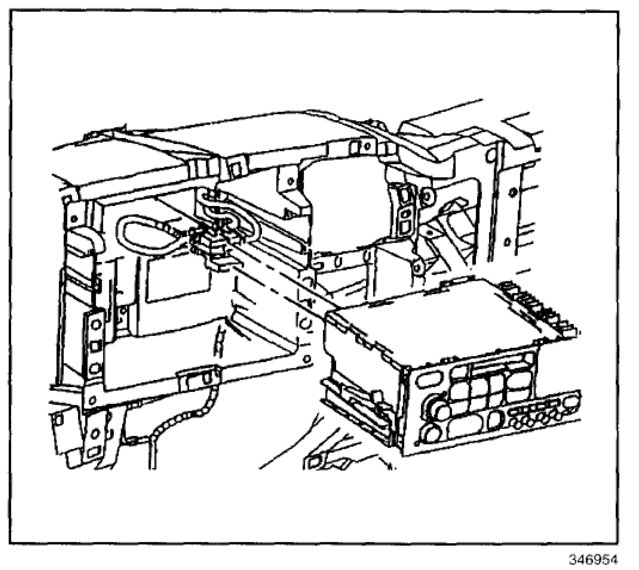
picture 3

1. If replacing the HVAC module, transfer the components from the old HVAC module as necessary.
2. Install the HVAC module (2) to the vehicle (1).

Notice: Use the correct fastener in the correct location. Replacement fasteners must be the correct part number for that application. Fasteners requiring replacement or fasteners requiring the use of thread locking compound or sealant are identified in the service procedure. Do not use paints, lubricants, or corrosion inhibitors on fasteners or fastener joint surfaces unless specified. These coatings affect fastener torque and joint clamping force and may damage the fastener. Use the correct tightening sequence and specifications when installing fasteners in order to avoid damage to parts and systems.

3. Install the nuts (4) to the HVAC module (2).

Tighten
Tighten the nuts to 9 Nm (80 lb in).

4. Install the bolts (4) to the HVAC module (2).

Tighten
Tighten the bolts to 4 Nm (35 lb in).

5. Connect the electrical harnesses and the ground connections.
6. Install the HVAC module drain hose.
7. Install the instrument panel carrier.
8. Install the accumulator.

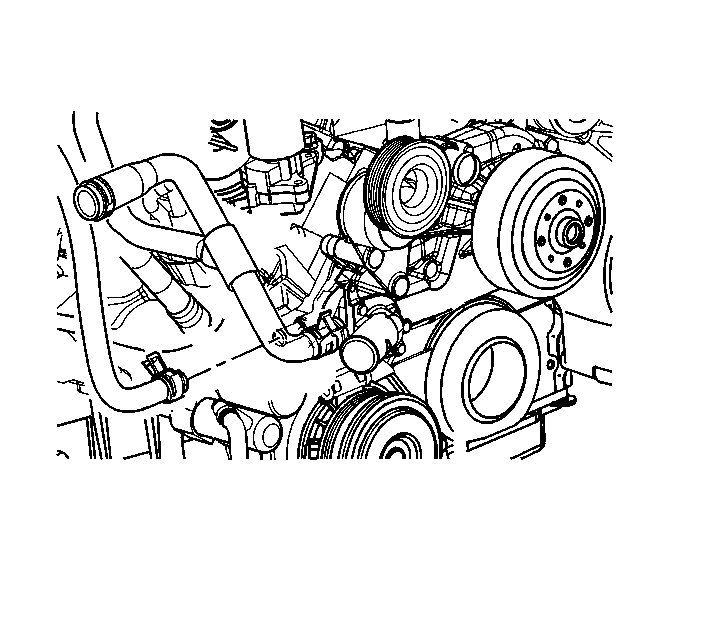
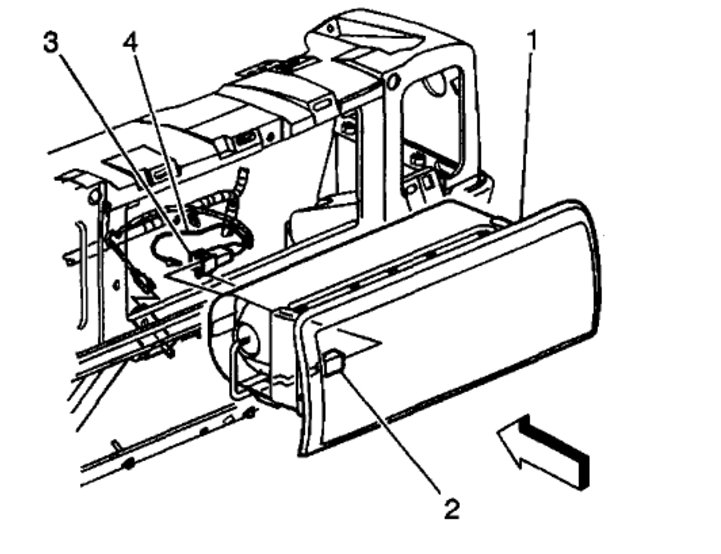
Picture 4

9. Install the surge tank outlet hose to the heater core.
- Firmly push the quick connect onto the heater core pipe until you hear an audible click.
10. Install the inlet heater hose to the heater core.
- Firmly push the quick connect onto the heater core pipe until you hear an audible click.
11. Fill the engine coolant.

______________________________

Let me know if this is what you needed.

Take care,
Joe
Was this
answer
helpful?
Yes
No
+1
Tuesday, May 21st, 2019 AT 8:17 PM
Tiny
JOHN PAUL KARTES
  • MEMBER
  • 3 POSTS
These are the instructions I need, now to find the replacement parts needed to complete this. Any ideas what parts and the parts numbers?
Was this
answer
helpful?
Yes
No
Wednesday, May 22nd, 2019 AT 12:13 AM
Tiny
JACOBANDNICKOLAS
  • MECHANIC
  • 108,179 POSTS
Welcome back:

You are going to have two options, either a dealer or a salvage yard. This isn't going to be an aftermarket part.

Let me know if I can help.
Was this
answer
helpful?
Yes
No
Wednesday, May 22nd, 2019 AT 7:17 PM
Tiny
JOHN PAUL KARTES
  • MEMBER
  • 3 POSTS
Yes, I know and I prefer a dealer that's why I am asking what the part number would be so I can order a new one.
Was this
answer
helpful?
Yes
No
Thursday, May 23rd, 2019 AT 4:25 AM
Tiny
JACOBANDNICKOLAS
  • MECHANIC
  • 108,179 POSTS
Welcome back, John:

Honestly, I tried looking for a number and was unable to get one for this part. I have a private shop and don't work for a dealership. Normally, I can get them from my manuals, but for some reason it is not showing up for this part. I know it has to be available.

I'm really sorry about that. Have you tried contacting a dealer to see if they can get the number / part for you?

Joe
Was this
answer
helpful?
Yes
No
Thursday, May 23rd, 2019 AT 4:25 PM
Tiny
RAULZAMA
  • MEMBER
  • 2 POSTS
  • 2003 CHEVROLET SUBURBAN
  • 5.3L
  • V8
  • 4WD
  • AUTOMATIC
  • 247,000 MILES
My actuator quit. While trying to remove it, the plastic shaft that drives the unit broke. Now I need to replace both the blend door (piece the shaft is attached to?) And the actuator. I'm trying to find a way to fix without removing the entire dash. I'm not opposed to cutting into the dash underneath but don't want to hurt anything else if I do. I have found videos on replacing the actuator but not the piece that turns the actuator. Can you please help?
Was this
answer
helpful?
Yes
No
-1
Thursday, May 23rd, 2019 AT 7:20 PM (Merged)
Tiny
HMAC300
  • MECHANIC
  • 48,601 POSTS
Sorry you have to pull the dash for this unless gm has a repair kit for it with out doing it check at a dealer for that. But you might get the shaft at the dealer then try cutting a hole in the box where the shaft is broken and see if you can get the door out like that then use epoxy to glue the box back together to stop air leaks. You can use tape to hold it in a few places to epoxy one part then the other. That is about the only way I know of doing that.
Was this
answer
helpful?
Yes
No
+3
Thursday, May 23rd, 2019 AT 7:20 PM (Merged)
Tiny
RAULZAMA
  • MEMBER
  • 2 POSTS
Thank you, for your reply I was hoping you had an easyer way or maybe you knew someone that has replace one. I was told the dash would have to come off. Please let me know . Thanks Raul
Was this
answer
helpful?
Yes
No
-1
Thursday, May 23rd, 2019 AT 7:20 PM (Merged)
Tiny
HMAC300
  • MECHANIC
  • 48,601 POSTS
Yes the dash has to come out then the hvac unit itself so it can be split apart to get to the parts. You might get away with splitting the hvac without removing but I kind of doubt it. Sorry
Was this
answer
helpful?
Yes
No
+1
Thursday, May 23rd, 2019 AT 7:20 PM (Merged)
Tiny
ONLY1_MIKEB
  • MEMBER
  • 3 POSTS
Hello I just encountered the same issue, did you find a resolution to your problem? I'm trying to find a way to replace it as well without taking the dash off!
Was this
answer
helpful?
Yes
No
+2
Thursday, May 23rd, 2019 AT 7:20 PM (Merged)
Tiny
KEN L
  • MASTER CERTIFIED MECHANIC
  • 42,895 POSTS
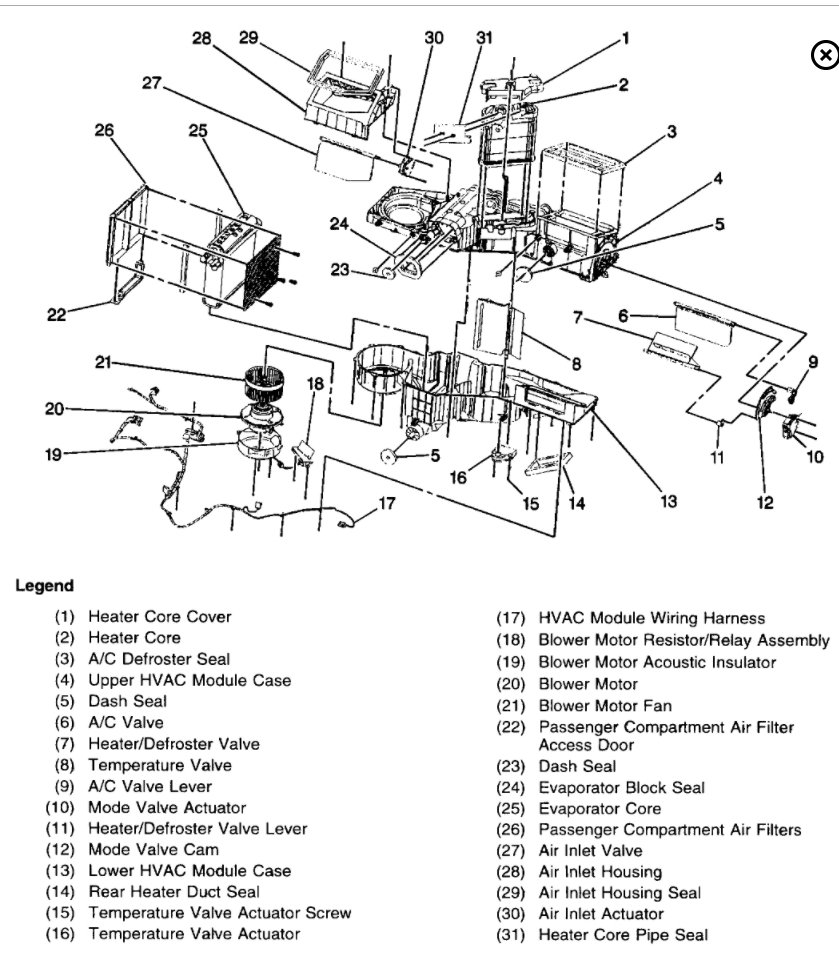
Sorry the dash must come out and the heater plenum to fix the blend door. Here are diagrams to help you get started. Disconnect the battery and vacuum down the AC to be recharged when complete.

https://www.2carpros.com/articles/re-charge-an-air-conditioner-system

Check out the diagrams (Below). Please let us know what happens.

Cheers, Ken
Was this
answer
helpful?
Yes
No
+1
Thursday, May 23rd, 2019 AT 7:20 PM (Merged)

Please login or register to post a reply.

Sponsored links