Hi and thanks for using 2CarPros. Com. If the pads were tight when you removed them, chances are, rust is a problem. What happens often, is the caliper mount which the pads sit in begin to rust. The hardware, which is attached to the mount, is then squeezed by the rust pushing against the hardware causing the pad to tighten to a point where the pads need hammered out of the mount. When replacing pads, I remove the hardware and take a small file and file all the rust, dirt, and corrosion away so the hardware can fit properly and the pads fit easily. Remember, you should be able to easily move the pads in the mount before caliper pressure is applied.
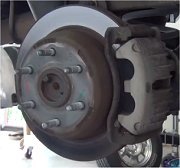
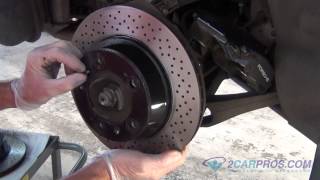
Here are the exact directions specific to your vehicle for rear brake pad replacement. Make sure to do what I suggest above. The pictures attached correlate with these directions and you can see the brake hardware in a couple of the pictures.
CONVERSION CALCULATOR
2009 Pontiac Vibe FWD L4-1.8L
Vehicle � Brakes and Traction Control � Disc Brake System � Brake Pad � Service and Repair � Rear Disc Brake Pads Replacement
REAR DISC BRAKE PADS REPLACEMENT
Rear Disc Brake Pads Replacement (Except All Wheel Drive and GT)
Removal Procedure
Loosen the park brake system. Refer to Parking Brake Adjustment (All Wheel Drive and GT) (See: Parking Brake SystemAdjustments)Parking Brake Adjustment (Except All Wheel Drive and GT) (See: Parking Brake SystemAdjustments). Warning: Refer to Brake Dust Warning (See: Service PrecautionsTechnician Safety InformationBrake Dust Warning).
Warning: Refer to Brake Fluid Irritant Warning (See: Service PrecautionsTechnician Safety InformationBrake Fluid Irritant Warning).
Caution: Refer to Brake Fluid Effects on Paint and Electrical Components Caution (See: Service PrecautionsVehicle Damage Warnings).
Use a siphon in order to remove half of the brake fluid from the master cylinder reservoir.
Raise and support the vehicle. Refer to Lifting and Jacking the Vehicle (See: MaintenanceVehicle LiftingService and Repair).
Remove the rear tire and wheel assembly from the vehicle. Refer to Tire and Wheel Removal and Installation (See: MaintenanceWheels and TiresService and Repair).
Use a wrench in order to hold the caliper slide pins (2, 9). Remove the caliper bolts (1, 10).
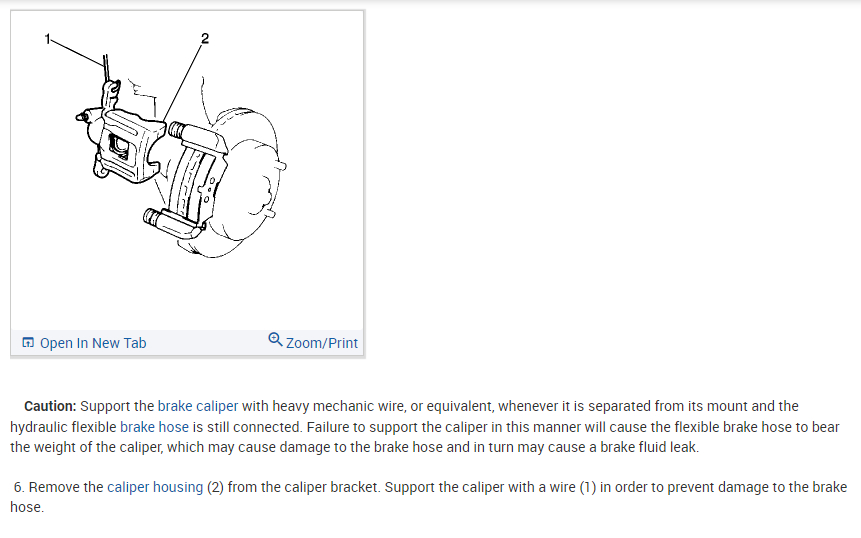
Caution: Support the brake caliper with heavy mechanic wire, or equivalent, whenever it is separated from its mount and the hydraulic flexible brake hose is still connected. Failure to support the caliper in this manner will cause the flexible brake hose to bear the weight of the caliper, which may cause damage to the brake hose and in turn may cause a brake fluid leak.
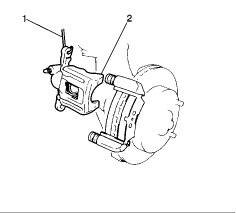
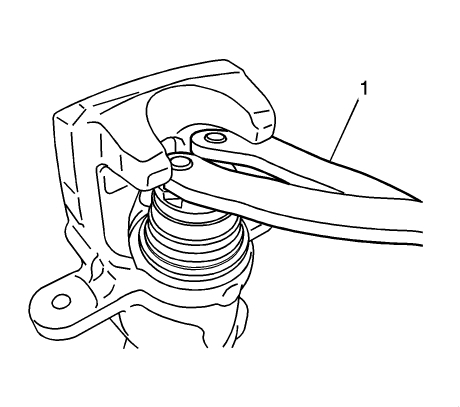
Remove the caliper housing (2) from the caliper bracket. Support the caliper with a wire (1) in order to prevent damage to the brake hose.
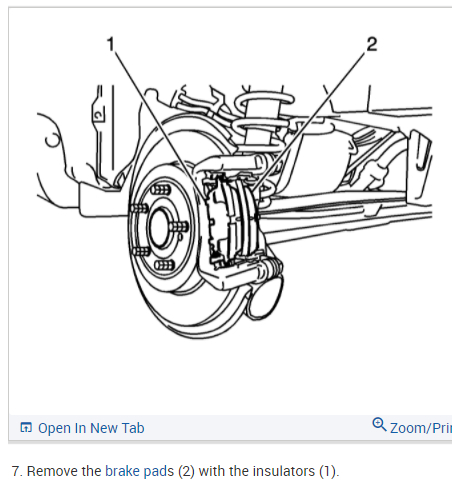
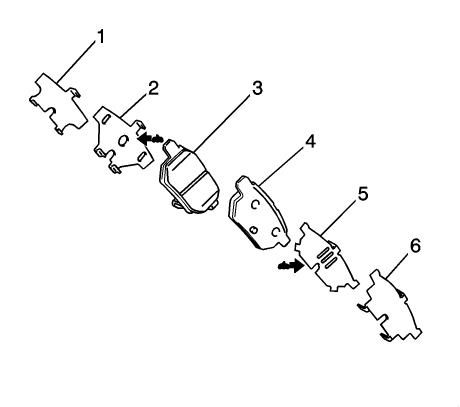
Remove the brake pads (2) with the insulators (1).
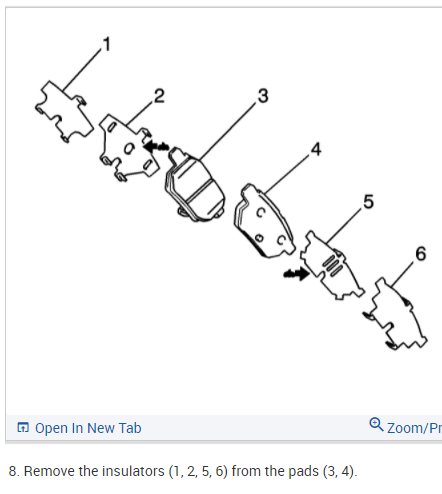
Remove the insulators (1, 2, 5, 6) from the pads (3, 4).
Inspection Procedure
Inspect the brake pads. If replacement is necessary, replace the disc brake pads in axle sets. Refer to Brake Pad Inspection (See: Testing and Inspection).
Clean and inspect the disc brake hardware. Replace components if necessary. Refer to Rear Disc Brake Mounting and Hardware Inspection (See: Testing and InspectionComponent Tests and General Diagnostics).
Clean and inspect the caliper. Repair or replace components as necessary. Refer to Brake Caliper Inspection (See: Brake CaliperTesting and Inspection).
Note: Refinish or replace the rotor ONLY if the condition of the rotor requires service. DO NOT refinish the rotor if the brake pads are the only components requiring service.
Measure the brake rotor thickness. Refinish or replace the rotor as necessary. Refer to Brake Rotor Thickness Measurement (See: Brake Rotor/DiscTesting and InspectionBrake Rotor Thickness Measurement).
Measure the brake rotor thickness variation. Refinish or replace the rotor as necessary. Refer to Brake Rotor Thickness Variation Measurement (See: Brake Rotor/DiscTesting and InspectionBrake Rotor Thickness Variation Measurement).
Inspect the surface of the brake rotor. Refinish or replace the rotor as necessary. Refer to Brake Rotor Surface and Wear Inspection (See: Brake Rotor/DiscTesting and InspectionBrake Rotor Surface and Wear Inspection).
Measure the brake rotor assembled lateral runout. Refinish or replace the rotor as necessary. Refer to Brake Rotor Assembled Lateral Runout Measurement (See: Brake Rotor/DiscTesting and InspectionBrake Rotor Assembled Lateral Runout Measurement).
Installation Procedure
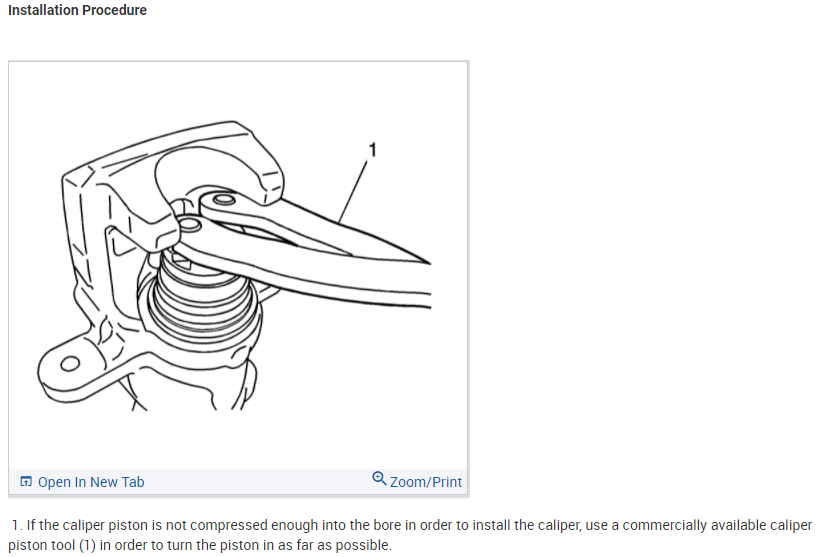
If the caliper piston is not compressed enough into the bore in order to install the caliper, use a commercially available caliper piston tool (1) in order to turn the piston in as far as possible.
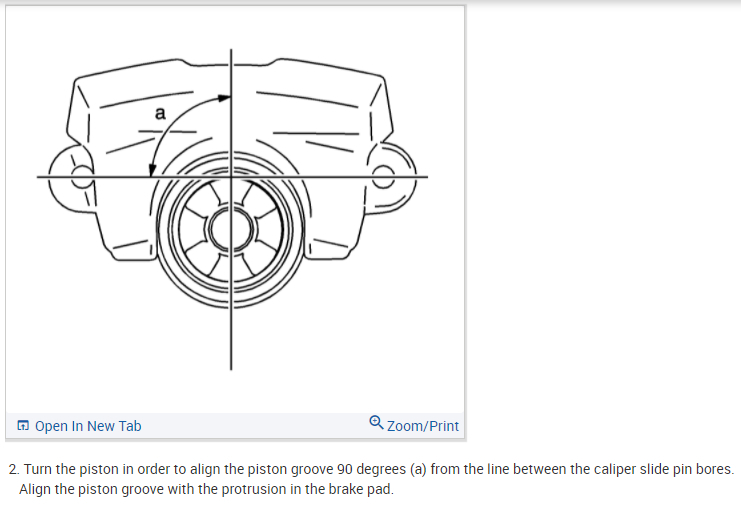
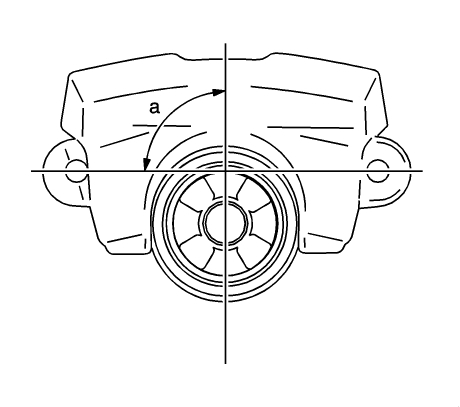
Turn the piston in order to align the piston groove 90 degrees (a) from the line between the caliper slide pin bores. Align the piston groove with the protrusion in the brake pad.
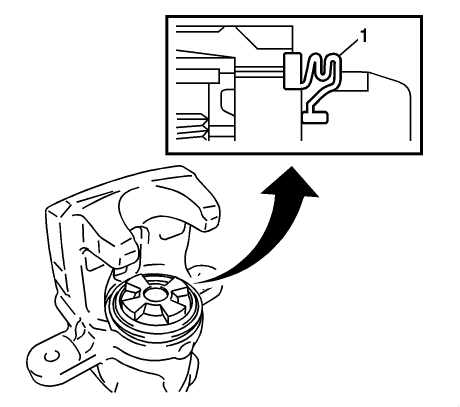
Ensure the cylinder boot (1) is installed in the groove of the piston. If necessary, refer to Rear Brake Caliper Overhaul (All Wheel Drive and GT) (See: Brake CaliperService and RepairOverhaulRear Brake Caliper Overhaul)Rear Brake Caliper Overhaul (Except All Wheel Drive and GT) (See: Brake CaliperService and RepairOverhaulRear Brake Caliper Overhaul).
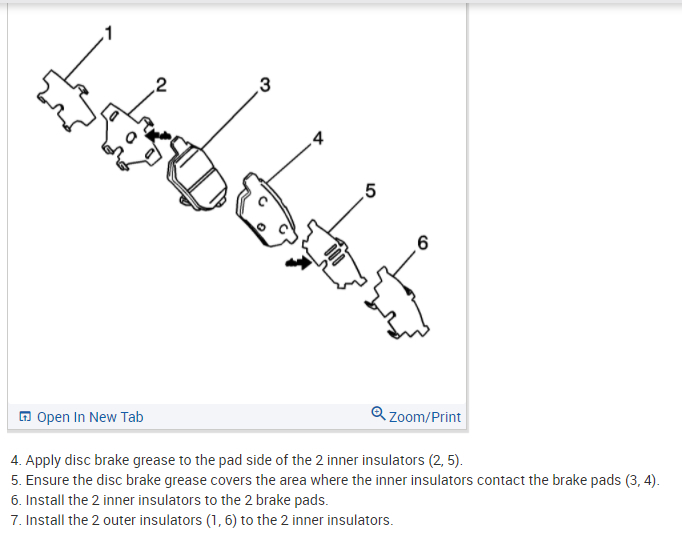
Apply disc brake grease to the pad side of the 2 inner insulators (2, 5).
Ensure the disc brake grease covers the area where the inner insulators contact the brake pads (3, 4).
Install the 2 inner insulators to the 2 brake pads.
Install the 2 outer insulators (1, 6) to the 2 inner insulators.
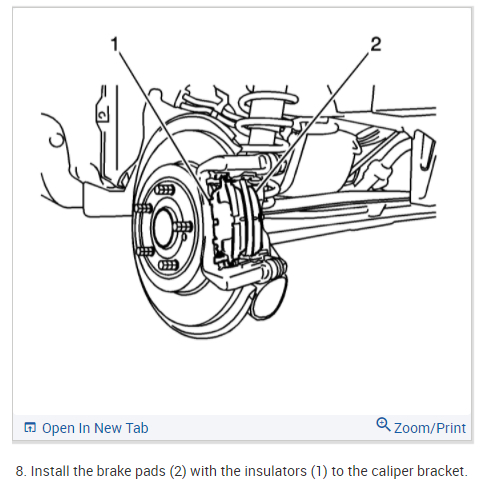
Install the brake pads (2) with the insulators (1) to the caliper bracket.
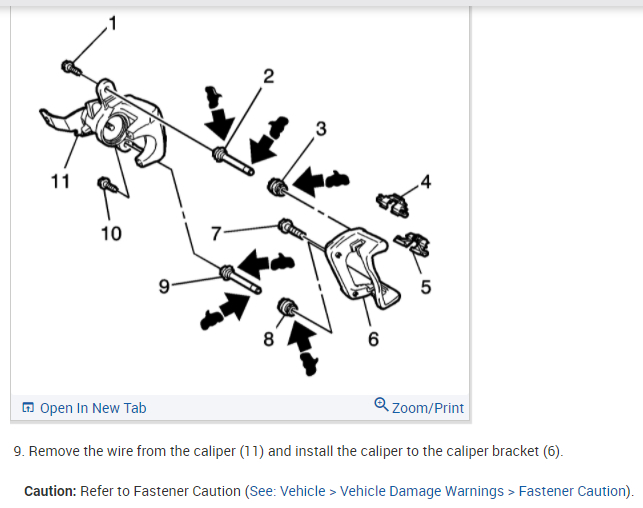
Remove the wire from the caliper (11) and install the caliper to the caliper bracket (6).
Caution: Refer to Fastener Caution (See: Service PrecautionsVehicle Damage WarningsFastener Caution).
Use a wrench in order to hold the caliper slide pins (2, 9). Install the 2 bolts (1, 10) and tighten to 35 Nm (26 lb ft).
Install the rear tire and wheel assembly to the vehicle. Refer to Tire and Wheel Removal and Installation (See: MaintenanceWheels and TiresService and Repair).
Lower the vehicle.
With the engine OFF, gradually apply and release the brake pedal several times in order to position the caliper pistons and the brake pads.
Fill the master cylinder fluid reservoir. Refer to Master Cylinder Reservoir Filling (See: Hydraulic SystemBrake Master CylinderService and RepairProceduresMaster Cylinder Reservoir Filling).
Adjust the park brake system. Refer to Parking Brake Adjustment (All Wheel Drive and GT) (See: Parking Brake SystemAdjustments)Parking Brake Adjustment (Except All Wheel Drive and GT) (See: Parking Brake SystemAdjustments).
Burnish the pads and the rotors. Refer to Brake Pad and Rotor Burnishing (See: Brake Pad and Rotor Burnishing).
I hope this helps. Let me know if you have questions or need additional information.
Take care,
Joe
Images (Click to make bigger)
Wednesday, June 9th, 2021 AT 12:30 PM
(Merged)