LED Dashboard lights conversion

Tiny
WRANGLERGIRL72
  • MEMBER
  • 2005 SATURN ION
  • 4 CYL
  • FWD
  • AUTOMATIC
  • 89,000 MILES
How do I change the dashboard lights on my 2005 Saturn Ion?
Thursday, January 13th, 2011 AT 2:14 AM

3 Replies

Tiny
DRCRANKNWRENCH
  • MECHANIC
  • 3,380 POSTS
To replace the bulbs that are the backlighting for the instruments, there is a bit of work to do so.

First, you will not be able to dim the lights unless you get LEDs with an incorporated adjustment resistor or you can get a separate box to handle dimming for al the lights. Either can be used with the factory dimmer switch.
For the turn signal and hazard indicator bulbs, there is the equivalent for a, "Flashing function". Usually you can find these pretty easily for exterior LEDs such as the brake lights and the turn signal, but the smaller dash bulbs are something you have to make sure of when you purchase them.

Usually dash lights are mainly a bulb number, "194". You can find a good quality LED in many colors for AUTOMETER. The second buld type is also available from them.I cannot recall the number for it. Check out AUTOMETERs' web site. They specialize in high quality aftermarket gauges and will have better explanations for dimming and flashing functions in the dash. They also have dash bulb kits for your specific car.I am pretty sure.

To get to the bulbs, there are a few things that need to be removed to access the bulbs.

The dash around the gage panel must be removed and then the gage assembly can be taken out. Depending on your car, there might be some extra screws and trims that need to be removed.

It takes a little work, but it is worth it. I did the same thing on my car to the gages and it looks great. They are AUTOMETER bulbs and they do not dim. But I don't care.

I hope this helps. I will kep an eye on this post if you have any other questions. I think AUTOMETER is definitely the place to start. They are very helpful over the phone as well and will be better able to answer all your questions since they are the gage experts.

Hope it goes well.
Was this
answer
helpful?
Yes
No
Thursday, January 13th, 2011 AT 2:43 AM
Tiny
SATURNTECH9
  • MECHANIC
  • 30,870 POSTS
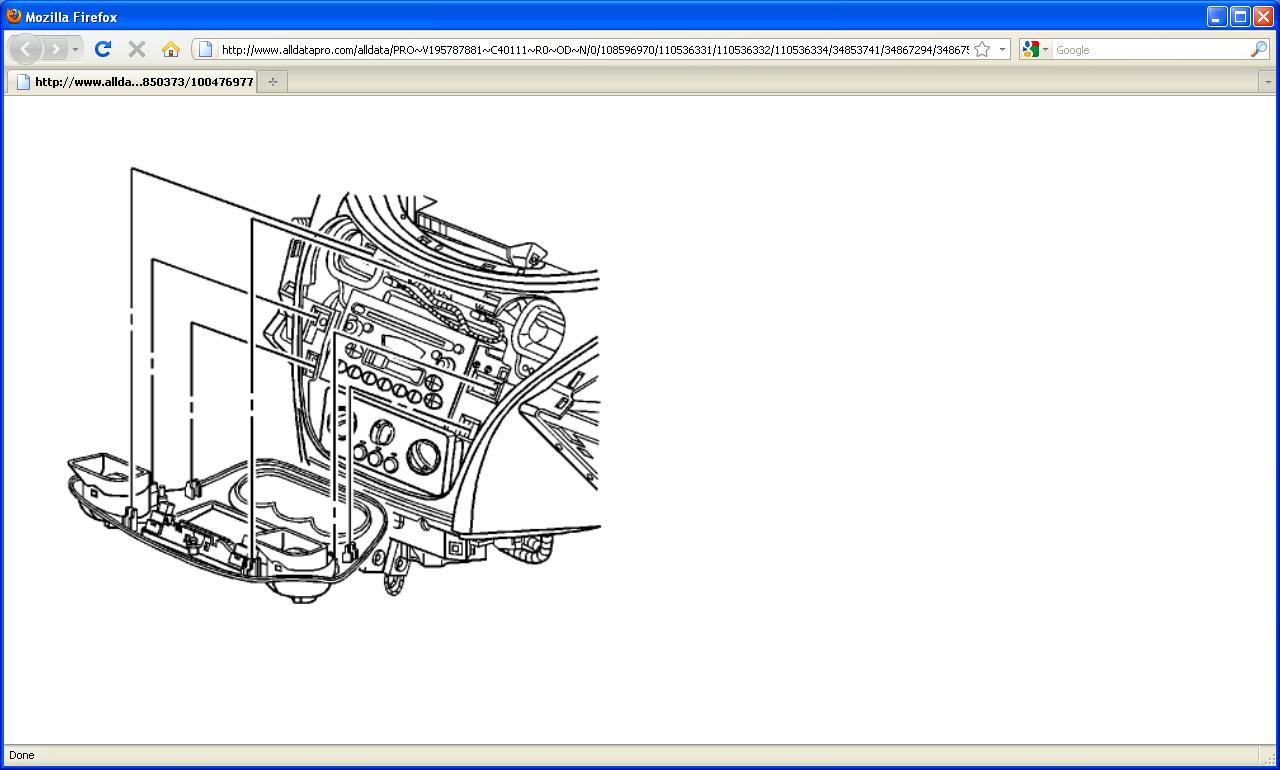
Here's a little more detail on removing the cluster it's a piece of cake. All you do is unsnap the radio/a/c bezel remove the screw's from the bottom of the cluster bezel and the cluster bezel will unsnap off the cluster and there is like 4 screws holding the cluster in. Then the bulbs just twist in and out.
TRIM PLATE BEZEL REPLACEMENT - INSTRUMENT PANEL (I/P) CLUSTER

REMOVAL PROCEDURE

1. Pull out on the accessory trim plate in order to release the retaining fasteners.

2. Disconnect the accessory trim plate electrical connector(s).

3. Remove the screw retaining the cluster trim plate to the center trim panel.
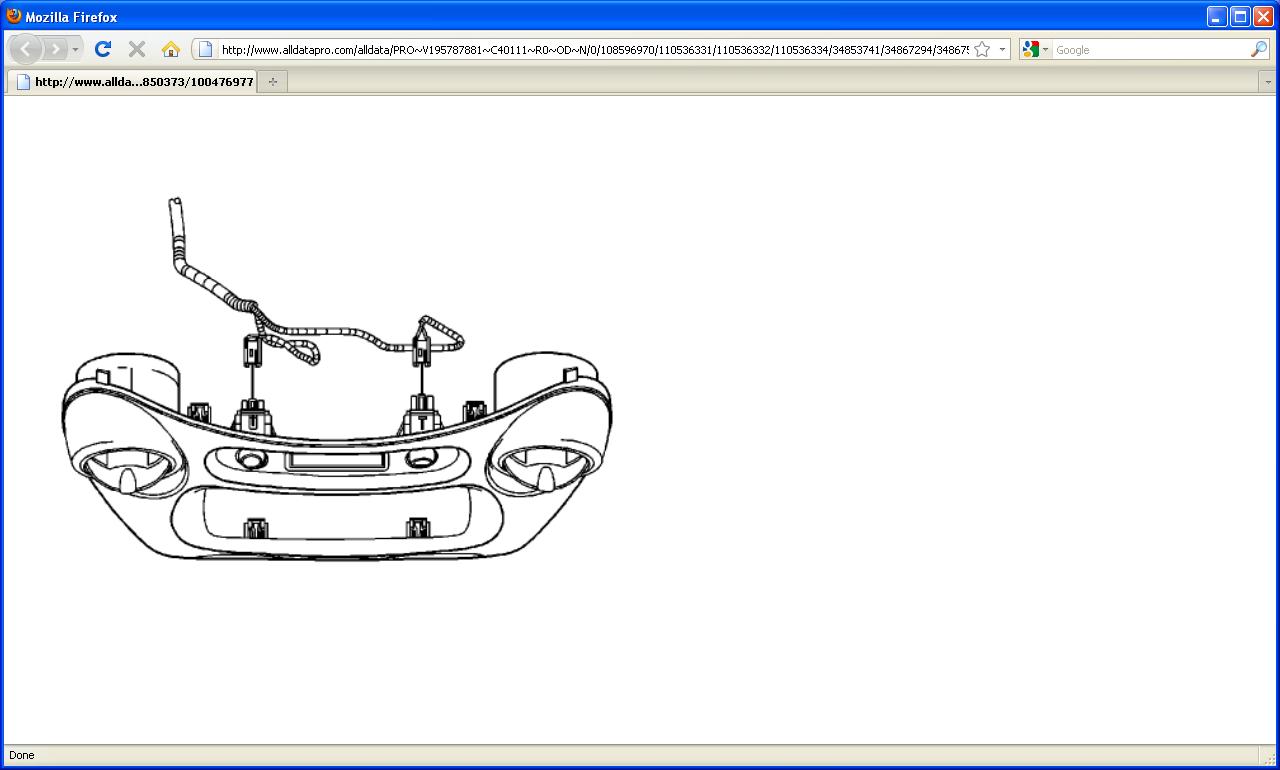
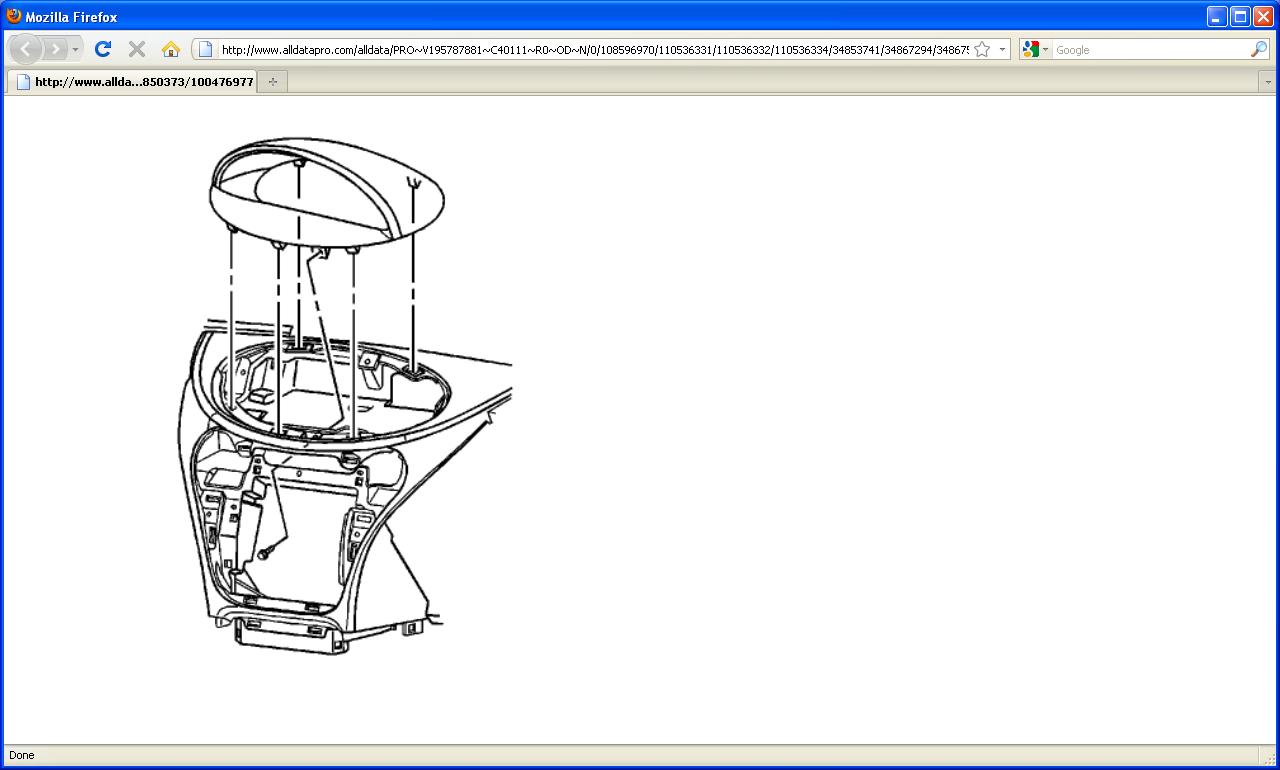
4. Lift up on the cluster trim plate to release the retaining fasteners.
5. Remove the cluster trim plate.

INSTALLATION PROCEDURE

1. Align the retaining fasteners with the center trim panel.
2. Push on the outer edge of the cluster trim plate in order to secure the retaining fasteners.
3. Install the screw retaining the cluster trim plate to the center trim panel.

NOTE: Refer to Fastener Notice in Service Precautions.

Tighten the cluster trim plate screw to 2.5 N.M (22 lb in).

4. Connect the accessory trim plate electrical connector(s).

5. Align the retaining fasteners with the I/P.
6. Push on the outer edge of the accessory trim plate in order to secure the retaining fasteners.
Was this
answer
helpful?
Yes
No
Thursday, January 13th, 2011 AT 2:57 AM
Tiny
DRCRANKNWRENCH
  • MECHANIC
  • 3,380 POSTS
That is excellent reference in regards to removing and replacing the gage assembly. On the back of the assembly the light bulbs twist out in a counterclockwise motion then pull out.

I think you now have the information which I could not provide you.

Now you have all the tools to make this a simple task.

You'll love the results and everyone will wonder, " where did she get that customized?"

Let me know how it went I'm interested to see what color and attach some pictures.

Take care.
Was this
answer
helpful?
Yes
No
Thursday, January 13th, 2011 AT 7:48 PM

Please login or register to post a reply.

Sponsored links