Good evening,
There is no way to remove it without dropping the compressor. I have tried this many times and had no success.
It must be released to drop the alternator.
Roy
ALTERNATOR
Removal and Installation
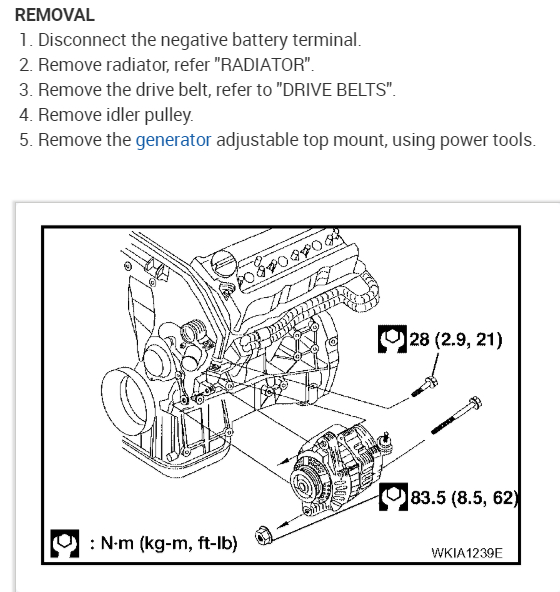
REMOVAL
1. Disconnect the battery cable from the negative terminal.
CAUTION:
To prevent damage to the parts, disconnect the battery cable from the negative terminal first.
2. Remove air duct (inlet). See: Air Cleaner Fresh Air Duct/Hose > Removal and Replacement > Exploded View.
3. Remove reservoir tank. See: Radiator > Removal and Replacement > Exploded View.
4. Disconnect alternator harness connector.
5. Remove "B" terminal harness nut, and then disconnect "B" terminal harness.
6. Remove alternator mounting bolt (upper).
7. Remove engine under cover. See: Interior Moulding / Trim > Removal and Replacement > Exploded View.
8. Remove front wheel RH.
9. Remove splash guard RH. See: Front Fender Liner > Removal and Replacement > Removal And Installation.
10. Remove drive belt. See: Drive Belt Tensioner > Removal and Replacement > Removal And Installation.
11. Remove idler pulley. See: Drive Belt Tensioner > Removal and Replacement > Removal And Installation.
12. Remove compressor mounting bolts, and then move compressor to secure work space. See: Compressor HVAC > Removal and Replacement > Exploded View, "Exploded View".
CAUTION:
Never disconnect low-pressure flexible hose and high-pressure flexible hose from compressor.
13. Remove water pipe mounting bolts, and then move water pipe to secure work space. See: Oil Cooler, Engine > Removal and Replacement > Exploded View.
CAUTION:
Never disconnect water hose from water pipe.
14. Remove return tube fixing clamps, and then move return tube to secure work space. See: Power Steering Line/Hose > Removal and Replacement > Exploded View.
CAUTION:
Never disconnect return tube from return hose assembly.
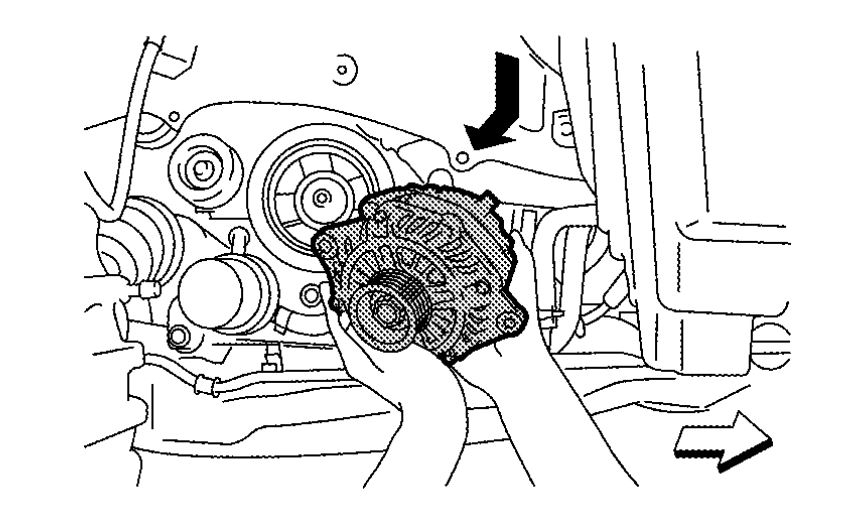
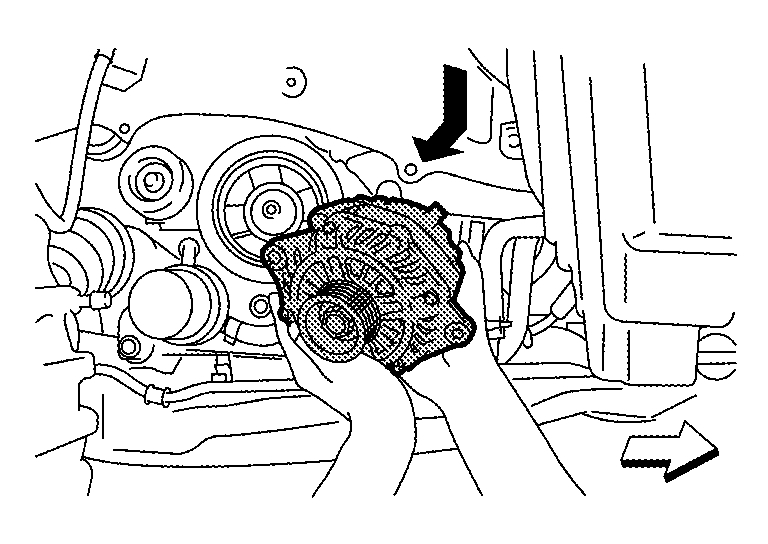
15. Remove alternator mounting bolt (lower) and alternator mounting nut (lower).
ImageOpen In New TabZoom/Print
White Arrow Indicates Vehicle front
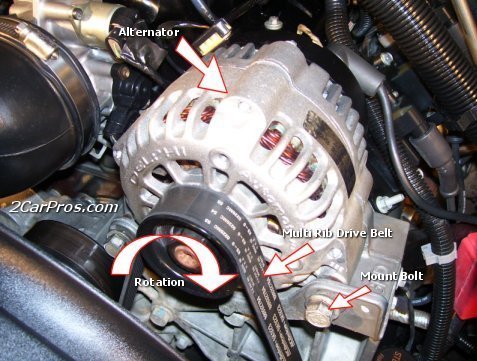
16. Remove alternator from the right side of the vehicle.
CAUTION:
Be careful not to contact with and damage surrounding parts when removing alternator from the vehicle.
INSTALLATION
Note the following items, and then install in the reverse order of removal.
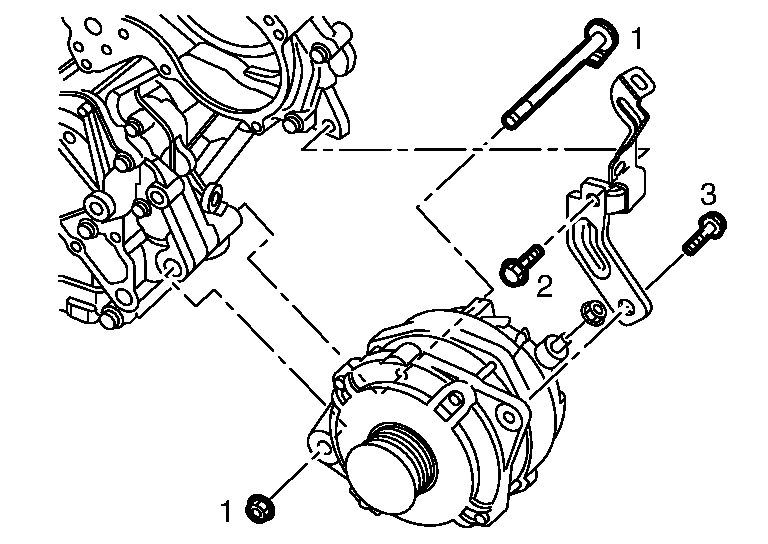
CAUTION:
imageOpen In New TabZoom/Print
Temporarily tighten all of alternator bolts and nut. And then tighten them in numerical order shown in the figure.
Install alternator, and check tension of belt. See: Drive Belt > Procedures > Checking Drive Belt.
Be careful to tighten "B" terminal nut carefully.
For this model, the power generation voltage variable control system that controls the power generation voltage of the alternator has been adopted. Therefore, the power generation voltage variable control system operation inspection should be performed after replacing the alternator, and then make sure that the system operates normally. See: Charging System > Initial Inspection and Diagnostic Overview > Inspection Procedure.
Images (Click to make bigger)
SPONSORED LINKS
Thursday, May 13th, 2021 AT 12:26 PM