Yes, the water pump is inside the timing belt cover so you have yo remove the extrnal components to get at it.
Removal and installation:
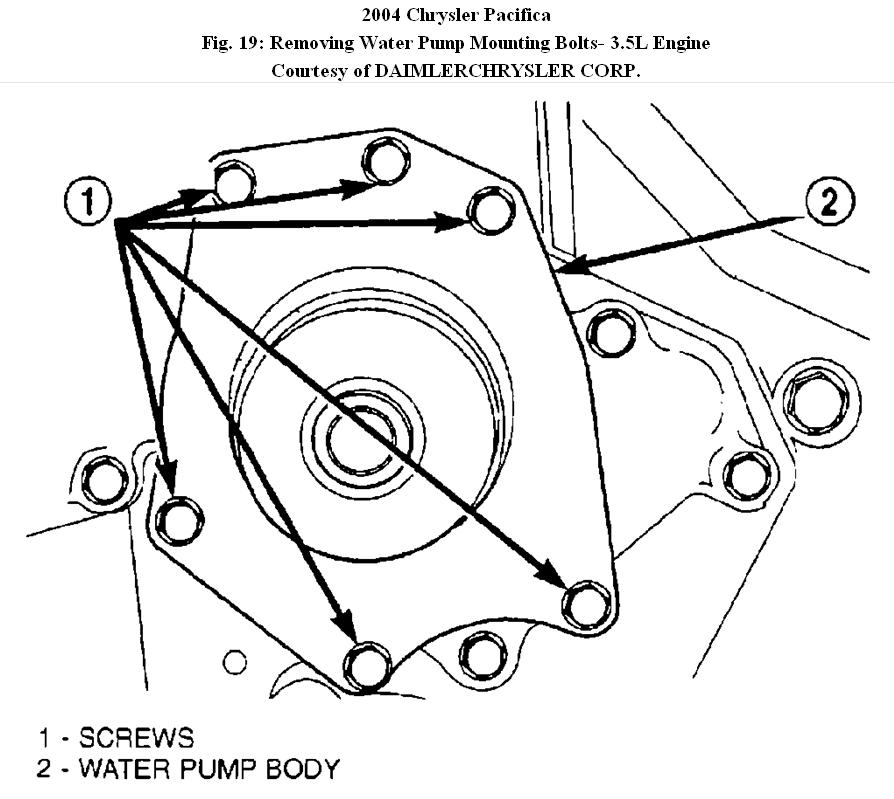
Caution:This application is an interference engine. Do not rotate camshaft or crankshaft when timing belt is removed, or engine damage may occur.
Timing belt:
Caution:The 3.5L is not a freewheeling engine. Therefore, loosen the valve train rocker assemblies before servicing the timing device.
Removal
1. Relieve fuel system pressure and disconnect negative battery cable.
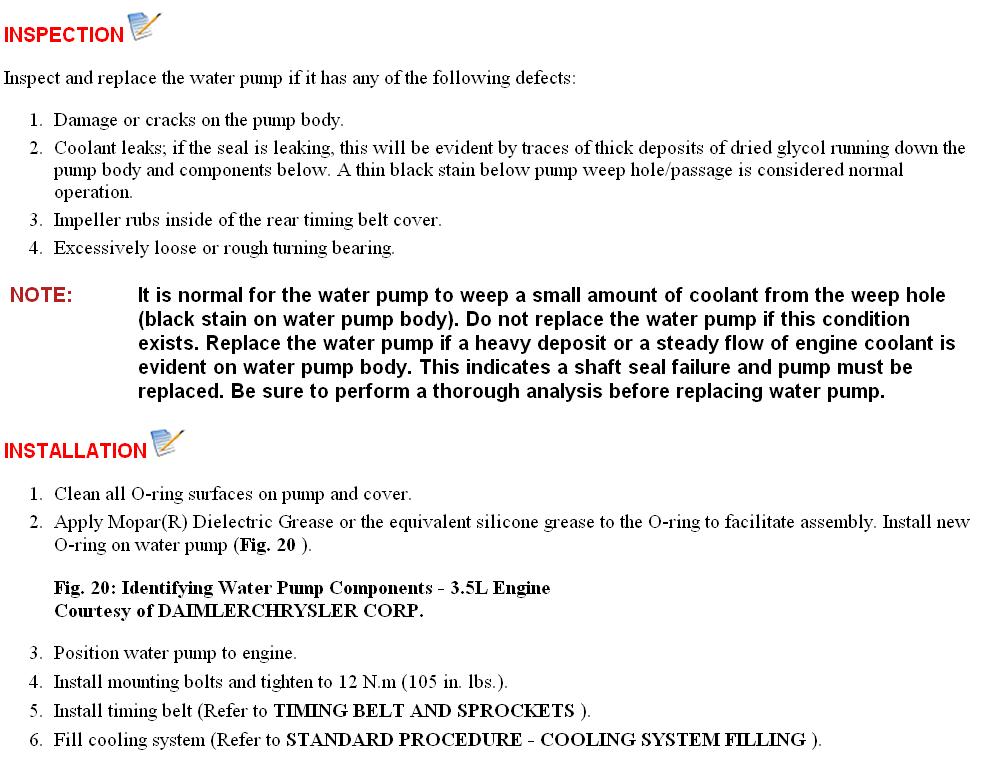
2. Remove both cylinder head covers and loosen the rocker arm assemblies.
3. Raise vehicle on hoist.
4. Remove accessory drive belt and tension-er.
5. Remove bolts for power steering pump and move pump aside.
6. Remove right front wheel and accessory drive belt splash shield.
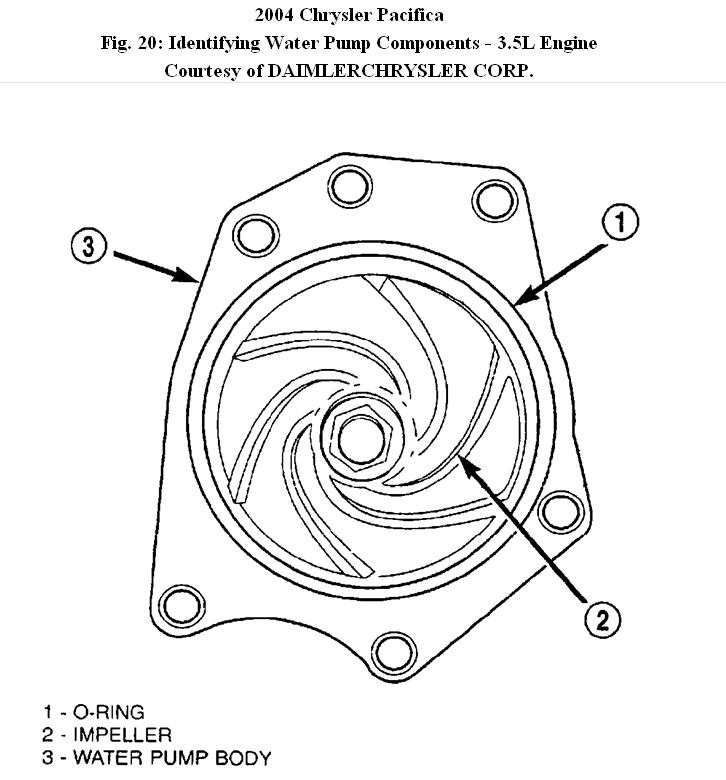
7. Remove crankshaft damper bolt. Using Puller (1023) and Insert (9020-R), remove crankshaft damper. See figure 1.
8. Remove the lower front timing belt cover fasteners.
9. Lower vehicle.
10. Perform the following:
� Support engine with a floor jack.
� Remove the air cleaner housing.
� Remove the front engine mount.
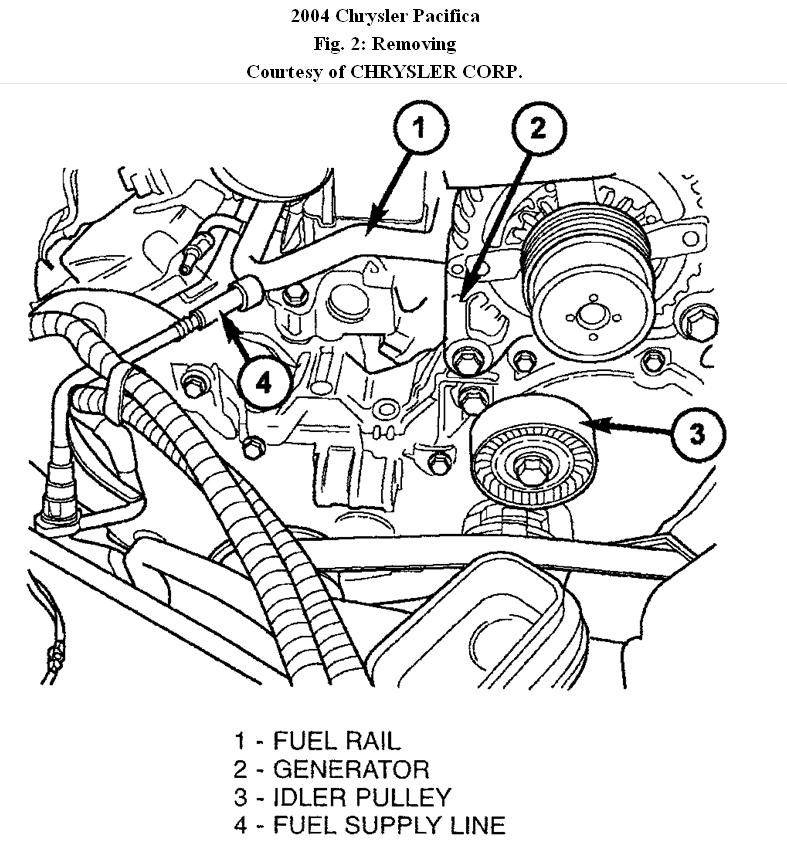
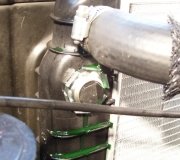
� Disconnect the fuel supply line at the fuel rail. See figure 2.
11. Remove the upper timing belt cover bolts and remove front timing belt cover.
12. If timing belt is to be reused, mark belt running direction.
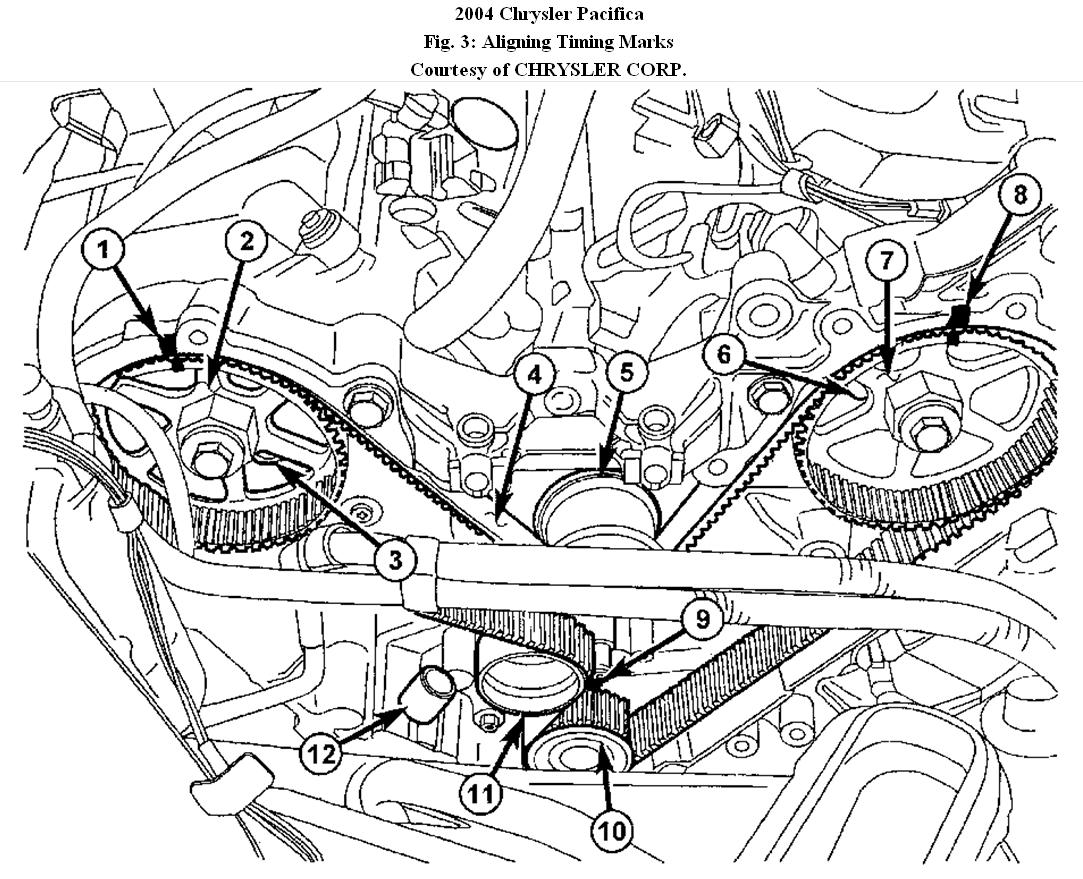
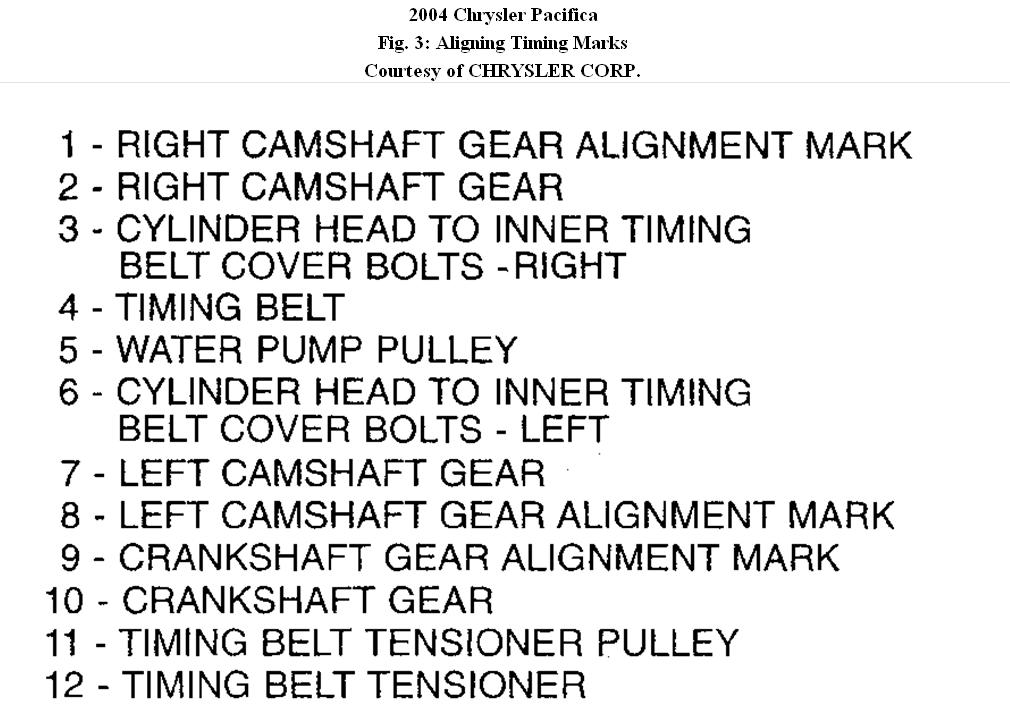
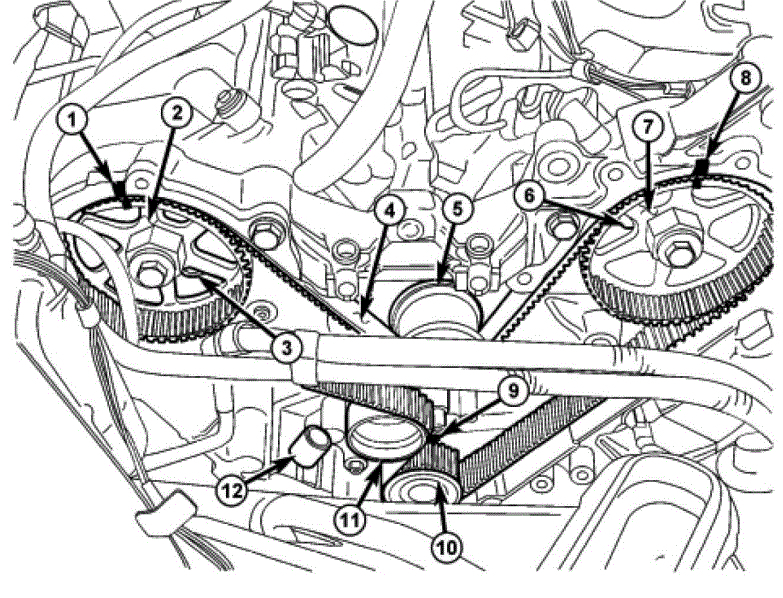
13. Rotate engine clockwise until crankshaft mark aligns with the TDC mark on the oil pump housing, and the camshaft sprocket marks are aligned with the marks on the rear cover. See figure 3.
14. Remove the timing belt tensioner, and remove timing belt.
� � � �
Installation:
Caution: If camshafts have moved from the timing marks, always rotate camshaft toward the direction nearest the timing marks. Do not turn camshafts a full revolution, or damage to valves and/or pistons could result.
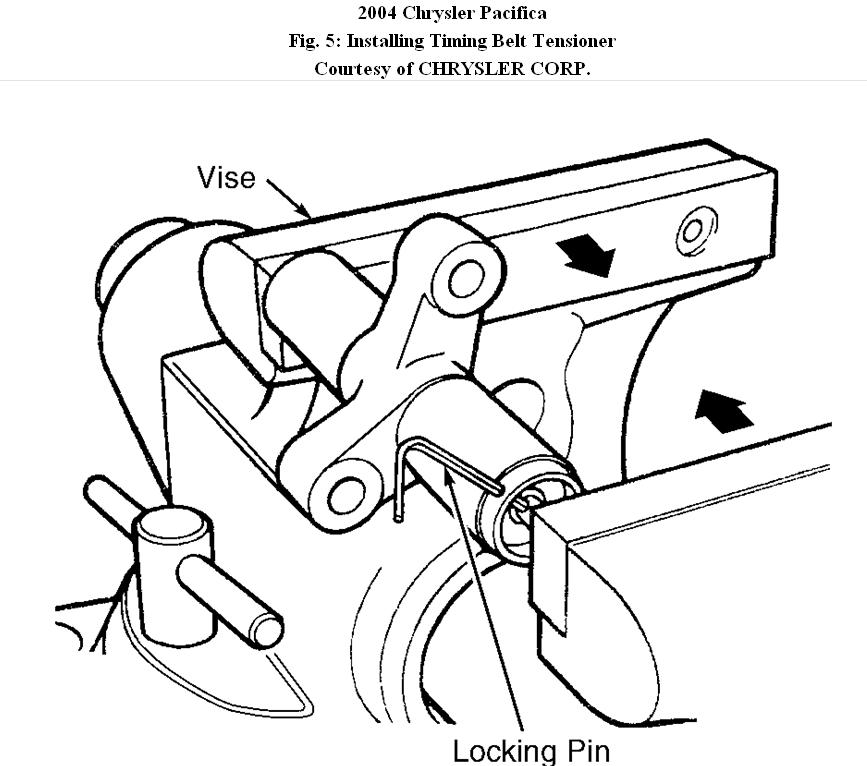
Caution: Index tension-er in the vise the same way it is installed on the engine. This ensures proper pin orientation when tension-er is installed on the engine.
1. Place tension-er into a vise and slowly compress the plunger. See
Fig. 5. Total bleed down of tension-er should take about five minutes.
2. When plunger is compressed into the tension-er body, install a pin through the body and plunger to retain plunger in place until tension-er is installed.
3. Align the crankshaft sprocket with the TDC mark on oil pump cover. See figure 3.
4. Align the camshaft sprockets timing reference mark with the mark on the rear cover. See figure 3.
5. Install the timing belt starting at the crankshaft sprocket going in a counterclockwise direction. Install the belt around the last sprocket. Maintain tension on the belt as it is positioned around the tension-er pulley.
6. Holding the tension-er pulley against the belt, install the tension-er into the housing and tighten bolts. Each camshaft mark should remain aligned at the rear cover marks.
Note:
If the camshaft gears have been removed, it is only necessary to have camshaft gear retaining bolts installed to a snug torque at this time.
7. When tension-er is in place, pull retaining pin to allow the tension-er to extend to the pulley bracket.
8. Rotate camshaft sprocket two revolutions and check the timing marks on the camshafts and crankshaft. The marks should line up within their respective locations. See figure 3. If marks do not line up, repeat procedure.
NOTE:
If camshaft gears have been removed and timing is correct, counter-hold and tighten the camshaft gears to final torque specification.
9. Install front timing cover.
10. Perform the following:
� Install the upper engine mount.
� Connect fuel supply line at fuel rail. See figure 2.
� Install air cleaner housing.
11. Use floor jack to raise vehicle.
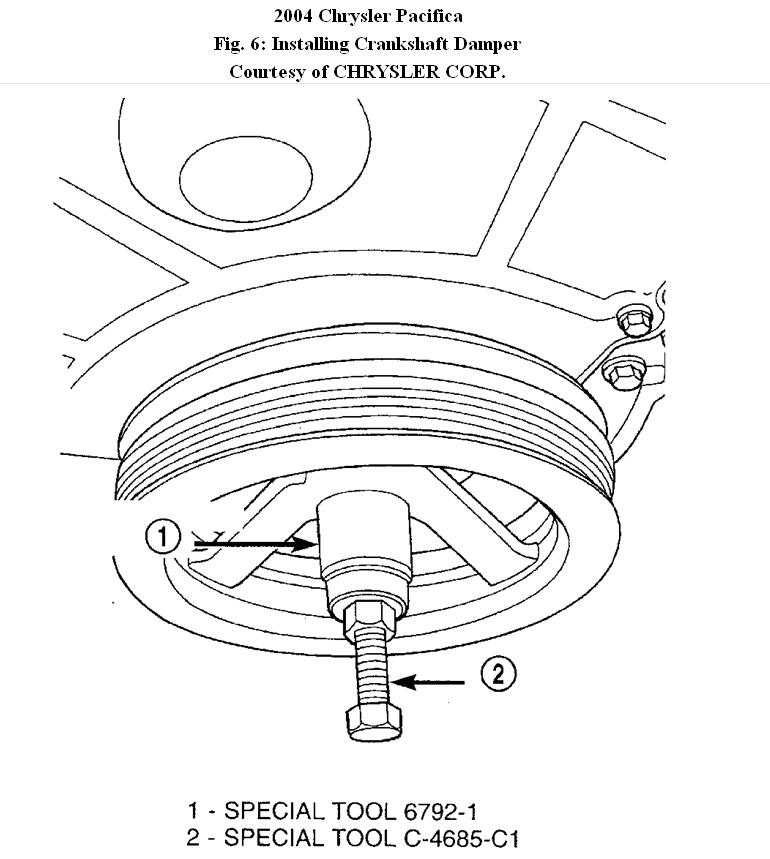
12. Install crankshaft damper using 5.9" Bolt With Nut (C-4685-C1) and Thrust Bearing (6792), and Installer (6792-1). See Fig. 6.
13. Install power steering pump fasteners.
14. Install crankshaft damper bolt.
15. Install accessory drive belt tensio-ner.
16. Install accessory drive belt.
17. Install the accessory drive belt splash shield and right front wheel.
18. Lower vehicle.
19. Tighten the rocker arm assemblies and install cylinder head covers.
20. Connect negative battery cable.
Merry Christmas and a Happy New Year.
Images (Click to make bigger)
Saturday, December 25th, 2010 AT 2:02 AM