1. Disconnect negative battery cable. . .
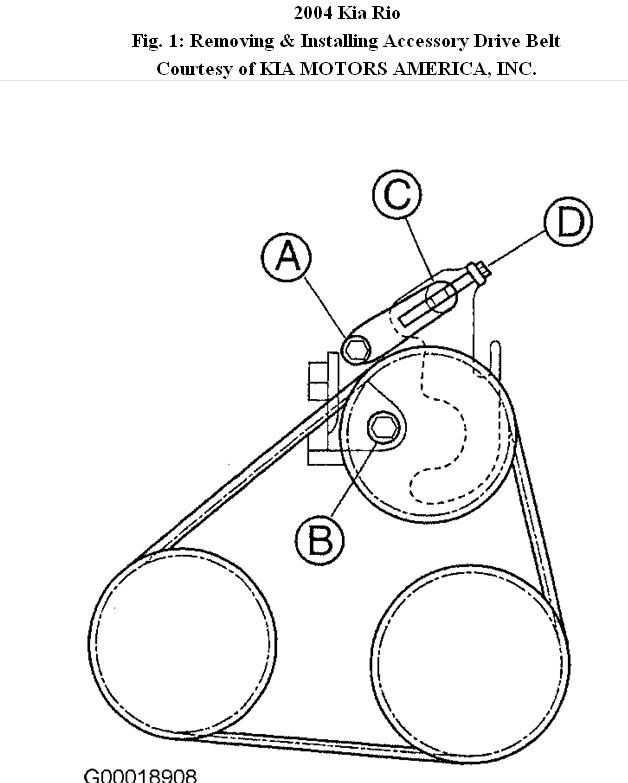
2. Loosen power steering lock bolts and nuts& accordingly and remove tension from power steering (P/S) and/or air conditioning (A/C) compressor drive belt. . . 3. Remove P/S and/or A/C drive belt. . .
4. Loosen generator mounting bolts and adjusting bolt. . .
5. Remove generator bolts. . .
6. Remove water pump pulley . . .
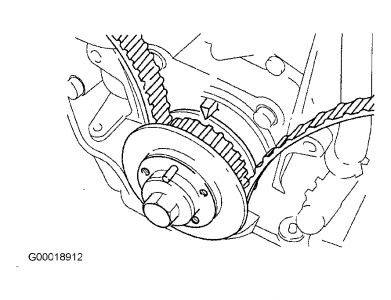
7. Remove crankshaft pulley. . .
8. Remove upper and lower timing belt covers. . .
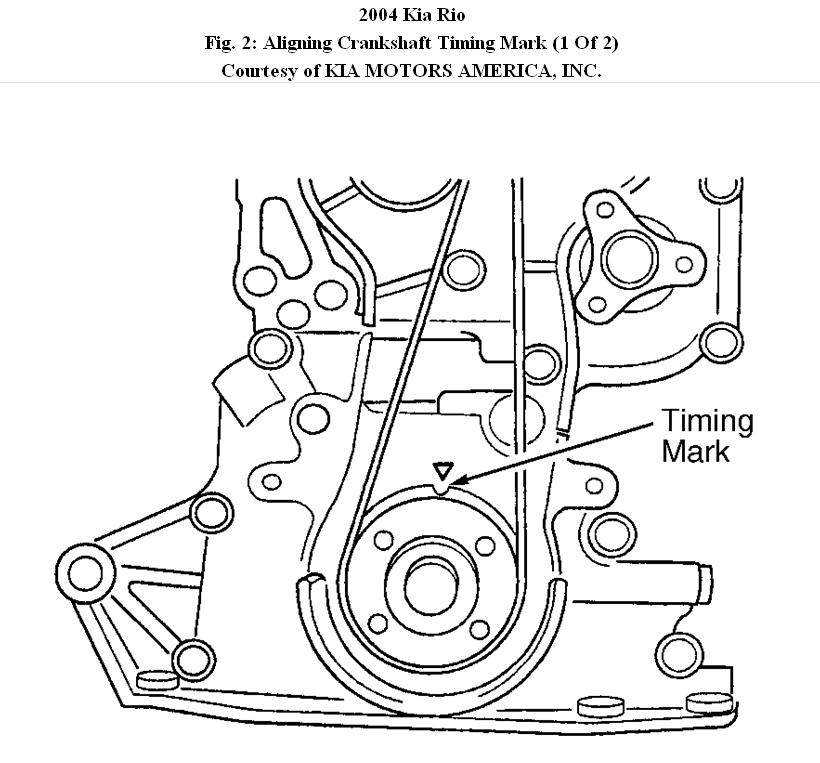
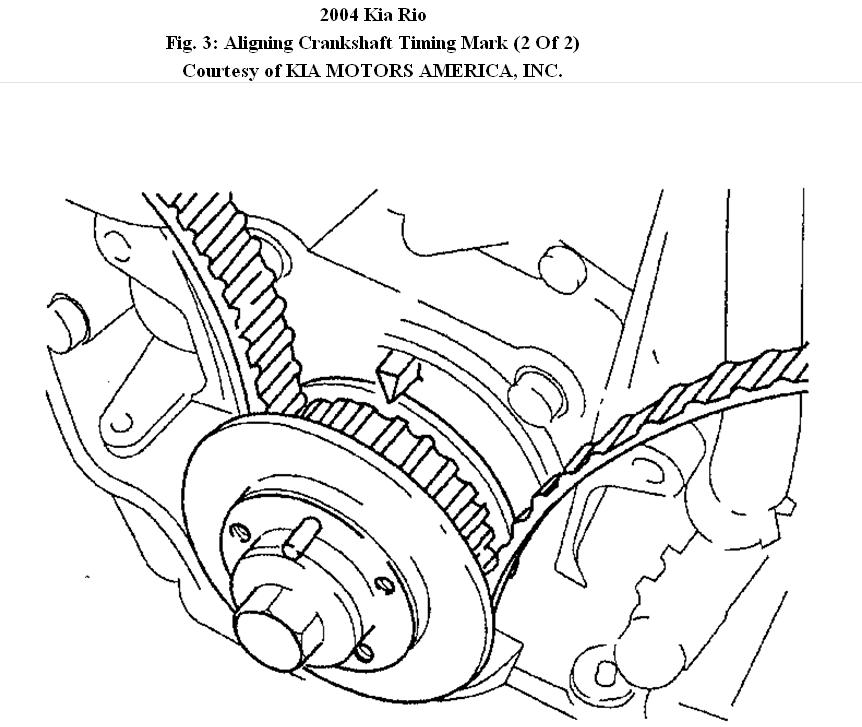
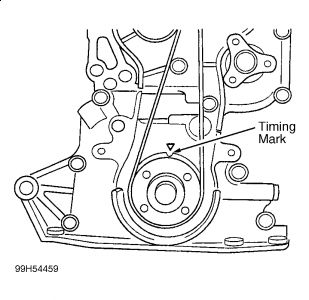
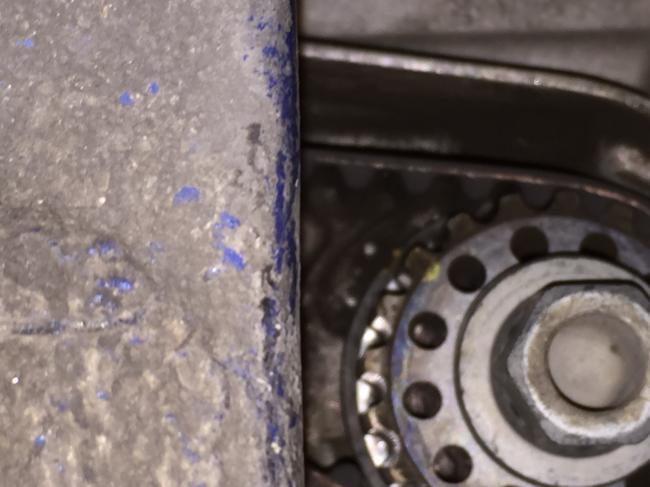
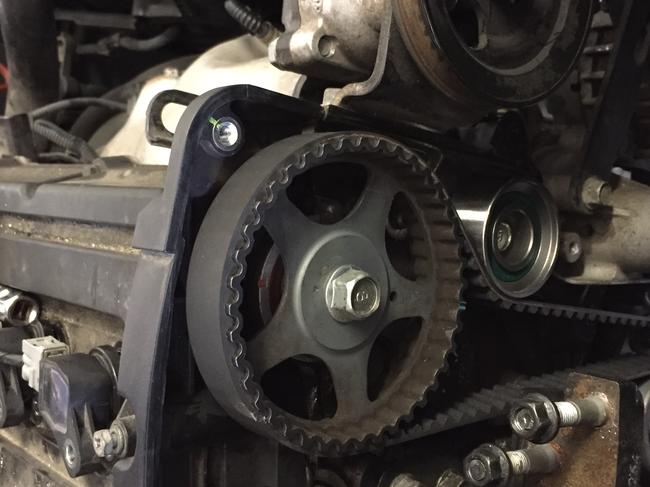
9. Turn crankshaft so that timing mark on timing belt pulley is aligned with timing mark on engine. . .
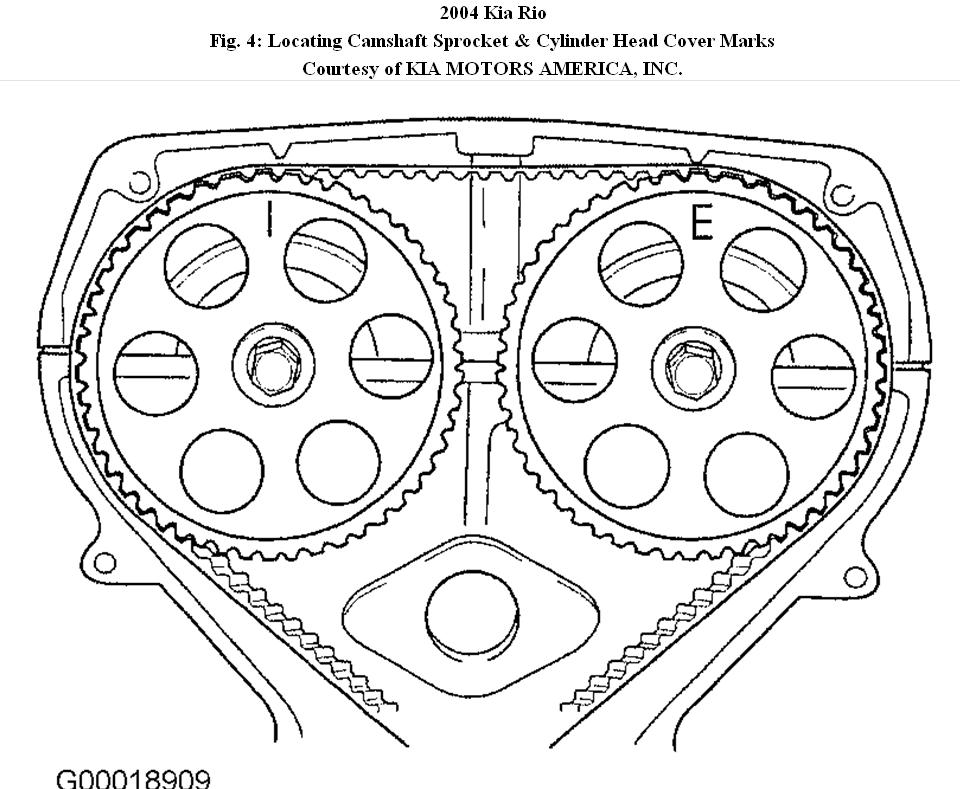
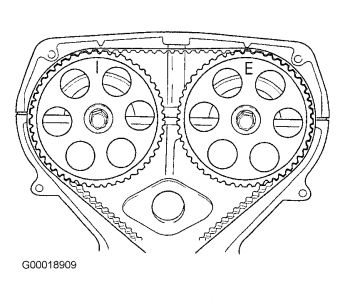
10. Check that "I" mark on intake camshaft pulley is aligned with mark on seal plate and "E" mark on exhaust camshaft pulley is aligned with mark on seal plate. . .
NOTE: Do not move camshaft or crankshaft once timing marks have been correctly positioned. . .
11. Loosen tensioner pulley lock bolt. . .
12. Protect timing belt with a rag. . .
13. Remove tensioner pulley. . .
14. Remove timing belt. . .
NOTE: Mark the direction of timing belt rotation (on the timing belt) for proper reinstallation. . .
INSTALLATION
1. Install tensioner pulley. . .
NOTE: Replace tensioner spring whenever timing belt is replaced. . .
2. Pull tensioner pulley to its furthest point and tighten lock bolt. . .
3. ck that timing mark on timing belt pulley is aligned with timing mark on engine. . .
4. Check that "I" mark on intake camshaft pulley is aligned with mark on seal plate and "E" mark on exhaust camshaft pulley is aligned with mark on seal plate. . .
NOTE: If existing timing belt is being reused, install belt in proper rotation direction marked prior to removal.
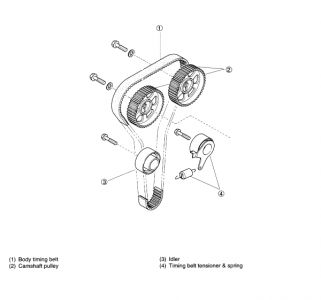
5. Install timing belt onto timing belt pulley first, then idler pulley, exhaust camshaft pulley, intake camshaft pulley, and tensioner pulley in that order. . .
6. Check that there is no looseness in belt between idler pulley and exhaust camshaft pulley or between intake and exhaust camshaft pulleys. . .
7. Loosen tensioner pulley lock bolt and allow tensioner spring to apply tension to timing belt. . .
NOTE: Do not add additional tension.
8. Tighten tensioner pulley lock bolt to specified torque. Tightening torque: 28 - 38 ft. lbs. (38 - 51 Nm, 3.9 - 5.2 kgf-cm). . .
9. Rotate crankshaft two full revolutions (clockwise only) and align timing mark on timing belt pulley with timing mark on engine block. . .
10. Check that "I" mark on intake camshaft pulley and "E" mark on exhaust camshaft pulley are aligned with marks on seal plate. . .
11. If they are not aligned, remove timing belt and start process from tensioner installation. . .
12. Measure timing belt deflection by applying moderate pressure midway between camshaft pulleys. If deflection is not correct, repeat from tensioner installation. Deflection pressure: 22 lbs. (98 N, 10 kg) . . .
Deflection: 0.39 - 0.50 inch (11 - 13 mm) . . .
13. Install lower and upper timing belt covers in that order. Tightening torque: 5.8 - 8.0 ft. lbs. (7.9 - 10.7 Nm, 0.8 - 1.1 kgf-cm) . . .
14. Install timing belt guide plate and crankshaft pulley. Tightening torque: 9.0 - 12.6 ft. lbs. (12.3 - 17.2 Nm, 1.3 - 1.8 kgf-cm)
Install water pump pulley. Tightening torque: 9.0 - 12.6 ft. lbs. (12.3 - 17.2 Nm, 1.3 - 1.8 kgf-cm) . . .
16. Install generator belt and adjust the tension. . .
17. Install P/S and/or A/C drive belt and adjust the tension. . .
18. Connect negative battery cable.
Images (Click to enlarge)
Mar 30, 2019 at 8:01 AM
(Merged)