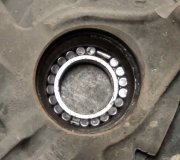
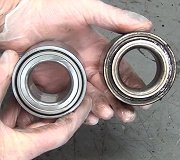
From the info I have the piston is just squeezed not screwed into the caliper. It look's like you have rear parking brake shoe's behind the rotor so the caliper wouldn't have to screw in or out. Here is direction's on replacing the pad's.
INSTALLATION - REAR DISC BRAKE SHOES
1. Completely retract the caliper piston back into the piston bore of the caliper. This is required for caliper installation when new brake pad assemblies are installed on caliper.
2. Lubricate both adapter abutments with a liberal amount of Mopers Multipurpose Lubricant, or equivalent.
3. Install rear rotor on hub making sure it is squarely seated on face of hub (Fig. 13).
4. Remove protective paper from noise suppression gasket on both inner and outer brake pad assemblies (if equipped).
5. Install new inboard brake pad into caliper piston by firmly pressing it into bore of piston using thumbs (Fig. 14). Be sure inboard brake shoe is positioned squarely against face of piston.
6. Slide new outboard brake pad onto the caliper (Fig. 14). Be sure retaining clip is squarely seated in the depressed areas on the caliper.
CAUTION: Use care when installing caliper assembly onto adapter, so the guide pin bushings and sleeves do not get damaged by the mounting bosses on adapter.
7. Carefully lower caliper and brake shoes over rotor reversing the required removal procedure (Fig. 11). Make sure that caliper guide pin bolts, bushings and sleeves are clear of the adapter bosses.
CAUTION: Extreme caution should be taken not to cross thread the caliper guide pin bolts when they are installed.
8. Install caliper guide pin bolts into adapter. (Fig. 10). Tighten the guide pin bolts to a torque of 22 Nm (192 inch lbs.).
9. Install the wheels and tires.
10. Tighten the wheel mounting stud nuts in proper sequence until all nuts are torqued to half specification. Then repeat the tightening sequence to the full specified torque of 135 Nm (100 ft. Lbs.).
11. Lower vehicle.
12. Check brake fluid level.
NOTE: Before vehicle is moved after any brake service work, pump the brake pedal several times to insure the vehicle has a firm brake pedal.
13. Road test the vehicle and make several stops to wear off any foreign material on the brakes and to seat the brake pads.
SPONSORED LINKS
Friday, April 2nd, 2021 AT 9:49 AM


