You have a big job ahaead of you. Here are directions:
Before servicing the vehicle, refer to the precautions section.
Disable the SIR system by performing the following procedure:
Point the wheel in the straight-ahead position.
Turn the ignition switch to the LOCK position.
Remove the AIR BAG fuse from the fuse block.
At the base of the steering column, remove the left sound insulator.
At the base of the steering column, disconnect the Connector Position Assurance (CPA), the yellow 2-way electrical connectors and the passenger-s side module electrical connector.
Disconnect the negative battery cable.
Drain the cooling system into a clean container for reuse.
Disconnect the heater hoses from the heater core.
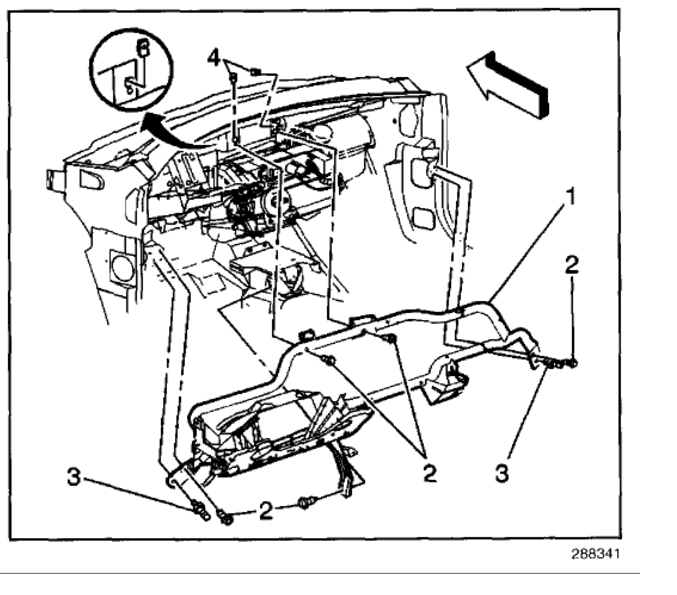
Fig. Air distribution duct mounting-2002 Cavalier shown
Fig. Location of the air distribution duct mounting-2002 Sunfire shown
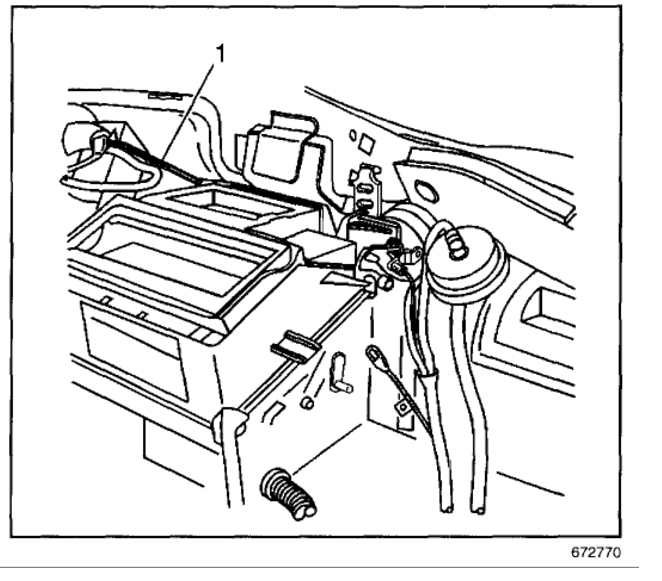
Fig. Detach the instrument panel lamp connector-2002 Cavalier and Sunfire
Fig. Instrument panel-to-tie bar attachments-2002 Cavalier
Fig. Instrument panel-to-tie bar mounting-2002 Sunfire
If equipped, remove the Diagnostic Energy Reserve Module (DERM) with attaching brackets.
Remove the steering wheel by removing or disconnecting the following:
CAUTION
Place the SIR module in a safe place with the front facing upward.
SIR module-to-steering wheel screws SIR module and disconnect the electrical connector
Steering wheel-to-steering column nut Steering wheel from the steering column
Remove the instrument panel by removing or disconnecting the following:
NOTE
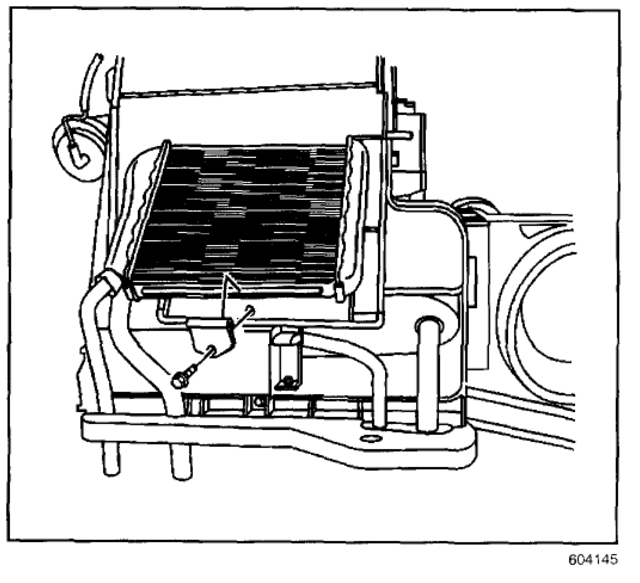
The heater core mounting screw is located in the recess in the center of the heater core cover.
Defroster grille Instrument panel end caps from both sides Instrument panel trim pad, (Cavalier models only) Accessory trim plate, (Sunfire models only) Instrument panel trim plate Heater/air conditioning control assembly Radio Air ventilation ducts from the heater housing Instrument panel light electrical connector Tie bar screws Instrument panel from the tie bar Heater core outlet screws and the outlet Heater core cover-to-heater case screws and the cover.
Heater core clamp from the heater assembly Heater core from the heater assembly
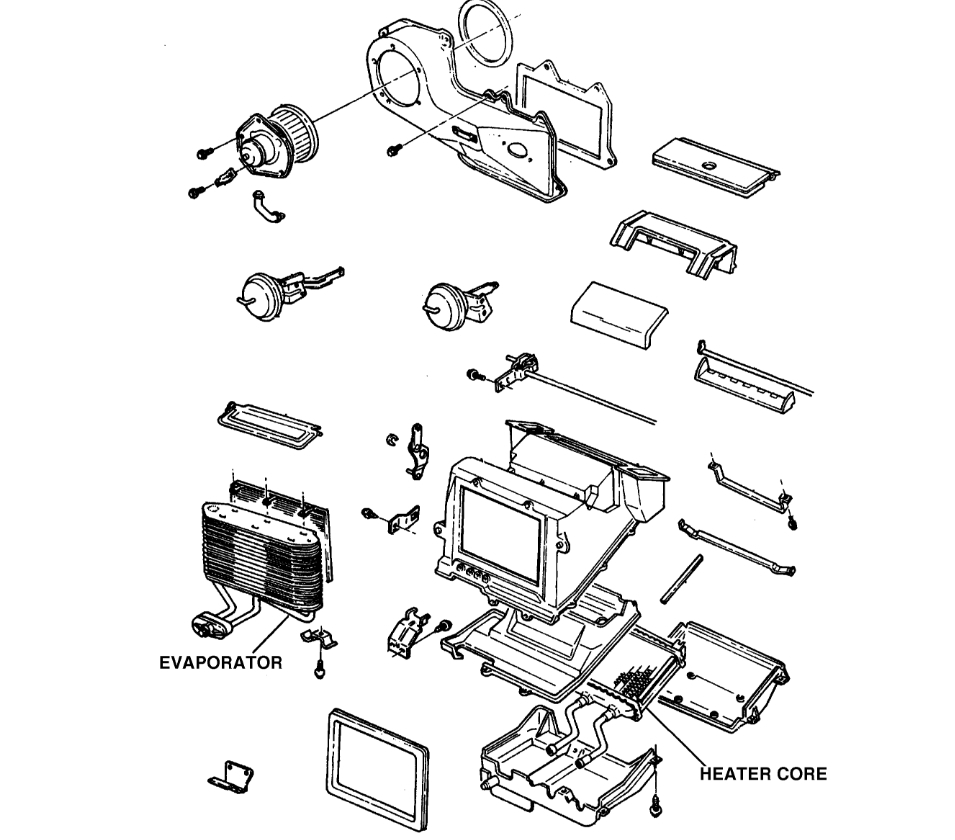
Fig. Exploded view of the heater/evaporator housing assembly-2002 Cavalier and Sunfire
To install:
Install or connect the following:
Heater core to the heater assembly Heater core clamp to the heater assembly and torque the clamp screws to 9 inch lbs. (1 Nm) Heater core cover and the cover-to-heater case screw and torque the screws to 9 inch lbs. (1 Nm) Heater core outlet and torque the screws to 9 inch lbs. (1 Nm) Diagnostic Energy Reserve Module (DERM) with attaching bracket, if equipped
Install the instrument panel by installing or connecting the following:
Instrument panel to the tie bar Tie bar screws Instrument panel light electrical connector Air ventilation ducts to the heater housing Radio Heater/air conditioning control assembly Instrument panel trim plate Instrument panel trim pad, (Cavalier models only) Accessory trim plate, (Sunfire models only) Instrument panel end caps on both sides Defroster grill Heater hoses to the heater core
Install the steering wheel by installing or connecting the following:
Steering wheel to the steering column Steering wheel-to-steering column nut and torque the nut to 30 ft. lbs. (41 Nm) Electrical connector and install the SIR module SIR module-to-steering wheel screws and torque the screws to 89 inch lbs. (10 Nm)
Refill the cooling system.
Connect the negative battery cable.
Enable the SIR system by performing the following procedure:
Turn the ignition switch to the LOCK position.
At the base of the steering column, connect the Connector Position Assurance (CPA), the yellow 2-way electrical connectors and the passenger-s side module electrical connector.
At the base of the steering column, install the left sound insulator.
Install the AIR BAG fuse to the fuse block.
Turn the ignition switch to the RUN position; the INFL REST warning light should flash 7-9 times then turn OFF.
Operate the engine to normal operating temperatures; then, check the climate control operation and check for leaks.
Drain the cooling system.
Recover the refrigerant.
Remove the bolt connecting the evaporator lines to the evaporator.
Remove the evaporator lines from the evaporator.
Use hose clamp pliers to reposition the hose clamps.
Disconnect the heater hoses from the heater core.
Remove the evaporator case drain tube.
Turn the steering wheel so that the vehicle wheels are pointing straight ahead.
Turn the ignition switch to the OFF position.
Remove the key from the ignition switch.
Remove the defroster grille screw.
With a flat-bladed tool disengage the defroster grille from the I/P trim pad.
With a flat-bladed tool disengage the outer trim covers from the I/P carrier. Pull the cover rearward to disengage the locating tabs from I/P carrier.
Open the I/P compartment.
Remove the I/P trim pad screws.
Remove the I/P trim pad from the I/P carrier.
Remove the AIR BAG fuse from the left hand I/P wiring harness junction block.
NOTE
With the AIR BAG fuse removed and the ignition switch in the RUN position, the AIR BAG warning lamp illuminates. This is a normal operation and does not indicate an SIR system malfunction.
Remove the Connector Position Assurance (CPA) from the inflatable restraint steering wheel module coil connector, located under the instrument panel, left of the steering column.
Disconnect the steering wheel module coil connector from the vehicle harness connector.
Remove the screws from the top of the I/P cluster.
Remove the I/P cluster pulling rearward.
Disconnect the electrical connector from the I/P cluster.
Remove the I/P cluster.
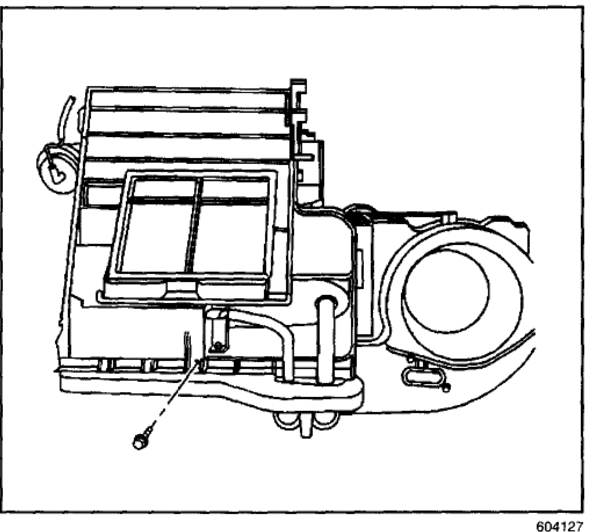
Remove the air distribution duct screws.
Remove the air distribution duct.
Remove the right side air distribution duct.
Remove the CPA from the inflatable restraint I/P module yellow 2-way pigtail connector.
Disconnect the yellow 2-way pigtail connector from the inflatable restraint I/P module.
Remove the mounting bolts from the inflatable restraint I/P module.
Remove the inflatable restraint module from the I/P
Remove the screw from the HVAC temperature control cable.
Remove the control cable end from the door lever.
Remove the HVAC control assembly from the I/P carrier. Leave the harness connected to the HVAC control and position aside.
Remove the radio from the I/P carrier
Remove the steering wheel.
Remove the tilt lever.
Remove the washer switch.
Remove the screws from the I/P carrier.
Remove the nuts from the I/P carrier.
Remove the I/P carrier from the lower tie bar.
Remove the I/P carrier from the vehicle.
Disconnect the wiring harness from the cross vehicle beam.
Remove the attaching bolts from the right and left side of the HVAC module.
Remove the bolts from the cross vehicle beam.
NOTE
Place the steering column in the straight tilt position using the tilt lever.
Remove the cross vehicle beam from the front of the vehicle.
Remove the floor air outlet.
Disconnect the wiring harness from the HVAC module assembly.
Disconnect the electrical connections at the blower motor and blower resistor.
Remove the HVAC module attaching bolts near the heater hoses and the A/C evaporator lines.
Remove the HVAC module assembly screw from the mounting bracket.
NOTE
Do not tilt the HVAC module assembly, or coolant may leak out.
Remove the HVAC module from the vehicle.
Remove the heat stakes and the screws from the heater cover case.
Remove the heater cover case.
Remove the heater core from the HVAC module assembly.
To install:
Install the heater core to the HVAC module assembly.
Install the heater core cover case.
NOTE
Use the correct fastener in the correct location. Replacement fasteners must be the correct part number for that application. Fasteners requiring replacement or fasteners requiring the use of thread locking compound or sealant are identified in the service procedure. Do not use paints, lubricants, or corrosion inhibitors on fasteners or fastener joint surfaces unless specified. These coatings affect fastener torque and joint clamping force and may damage the fastener. Use the correct tightening sequence and specifications when installing fasteners in order to avoid damage to parts and systems.
Install the heater core cover case screws. Tighten to 9 inch lbs. (1 Nm).
Install the HVAC module assembly. Align the mounting bracket to the front of dash slot and mounting bolt hole. Install the bolt to the mounting bracket.
Install the HVAC module attaching bolts near the heater hoses and the A/C evaporator lines.
Connect the electrical connections at the blower motor and resistor.
Connect the wiring harness to the HVAC module assembly.
Install the floor air outlet.
Install the cross vehicle beam to the front of the dash.
Install the bolts and the studs to the cross vehicle beam. Tighten to 89 inch lbs. (10 Nm).
Install the support bolts on the right and left side of the HVAC module.
Connect the wiring harness to the cross vehicle beam.
Place the I/P carrier into the vehicle.
Install the I/P carrier to the lower tie bar.
Install the screws to the I/P carrier. Tighten the screws to 20 inch lbs. (2.3 Nm) and the nuts to 44 inch lbs. (5 Nm).
Install the washer switch.
Install the tilt lever.
Install the steering wheel.
Install the air distribution duct.
Install the radio.
Install the HVAC control assembly to the I/P carrier.
Install the end of the HVAC temperature control cable to the door lever.
Install the control cable screw and tighten to 18 inch lbs. (2 Nm).
Install the inflatable restraint module to the I/P
Install the mounting bolts to the inflatable restraint module and tighten to 44 inch lbs. (5 Nm).
Connect the yellow 2-way pigtail connector to the inflatable restraint module.
Install the CPA to the yellow 2-way pigtail connector on the inflatable restraint module.
Install the air distributor duct.
Connect the electrical connector to the I/P cluster.
Position the I/P cluster retainer tabs into the I/P.
Install the instrument panel cluster to the I/P.
Install the I/P cluster screws.
Install the I/P trim pad to the I/P carrier.
Install the I/P trim pad screws.
Close the I/P compartment door.
Align the outer trim covers locating tabs into the I/P carrier. Press the cover into the I/P carrier until fully engaged.
Install the defroster grille to the I/P trim pad.
Remove the key from the ignition switch.
Connect the steering wheel module coil connector to the vehicle harness connector.
Install the CPA to the steering wheel module coil connector.
Install the AIR BAG fuse to the left hand I/P wiring harness junction block.
Install the left hand I/P outer trim cover.
Use caution while reaching in and turn the ignition switch to the ON position. The AIR BAG indicator will flash then turn OFF.
Connect the negative battery cable
Install the evaporator case drain tube.
Connect the heater hoses to the heater core.
Reposition the hose clamps.
Connect the evaporator tube to the evaporator. Tighten the fittings to 18 ft. lbs. (24 Nm).
Evacuate and recharge the A/C system.
Leak test the fittings of the component.
Fill the cooling system.
https://www.2carpros.com/articles/mitchell1eautorepair-car-repair-manuals
May 1, 2019 at 7:18 PM
(Merged)