I attached the procedure for the clock spring for you.
https://www.2carpros.com/articles/steering-wheel-clock-spring-removal
Roy
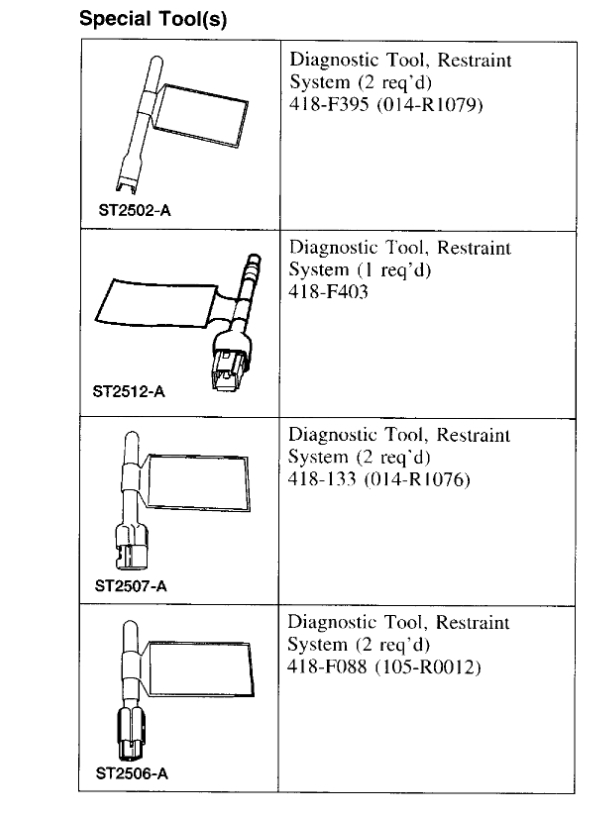
SPECIAL TOOL(S)
REMOVAL
WARNING:
- Always wear safety glasses when repairing an air bag supplemental restraint system (SRS) vehicle and when handling an air bag module. This will reduce the risk of injury in the event of an accidental deployment.
- Carry a live air bag module with the air bag and trim cover pointed away from your body. This will reduce the risk of injury in the event of an accidental deployment.
- Do not set a live air bag module down with the trim cover face down. This will reduce the risk of injury in the event of an accidental deployment.
- After deployment, the air bag surface can contain deposits of sodium hydroxide, a product of the gas generant combustion that is irritating to the skin. Wash your hands with soap and water afterwards.
- Never probe the connectors on the air bag module. Doing so can result in air bag deployment, which can result in personal injury.
- Air bag modules with discolored or damaged trim covers must be replaced, not repainted.
NOTE: Repair is made by installing a new part only. If the new part does not correct the condition, install the original part and perform the diagnostic procedure again.
1. WARNING: To avoid accidental deployment and possible personal injury, the backup power supply must be depleted before repairing or replacing any front or side air bag supplemental restraint system (SRS) components and before servicing, replacing, adjusting or striking components near the front or side air bag sensors, such as doors, instrument panel, console, door latches, strikers, seats and hood latches.
The front impact severity sensor is located at the bottom of the hood latch support bracket.
The first row side impact sensors (if equipped) are located in the first row doors, behind the door trim panel.
The second row side impact sensors (if equipped) are located at or near the base of the C-pillars.
To deplete the backup power supply energy, disconnect the battery ground cable and wait at least one minute. Be sure to disconnect auxiliary batteries and power supplies (if equipped).
Disconnect the battery ground cable and wait at least one minute.
2. WARNING: To reduce the risk of serious personal injury, read and follow all warning, cautions, note, and instructions in the supplemental restraint system (SRS) deactivation/reactivation procedure.
Deactivate the supplemental restraint system (SRS).
3. Make sure the road wheels are in the straight-ahead position.
4. WARNING: To reduce the risk of serious personal injury, read and follow all warning, cautions, note, and instructions in the steering wheel removal and installation procedure.
Remove the steering wheel.
imageOpen In New TabZoom/Print
5. Apply two strips of masking tape across the clockspring to prevent accidental rotation when the clockspring is removed.
imageOpen In New TabZoom/Print
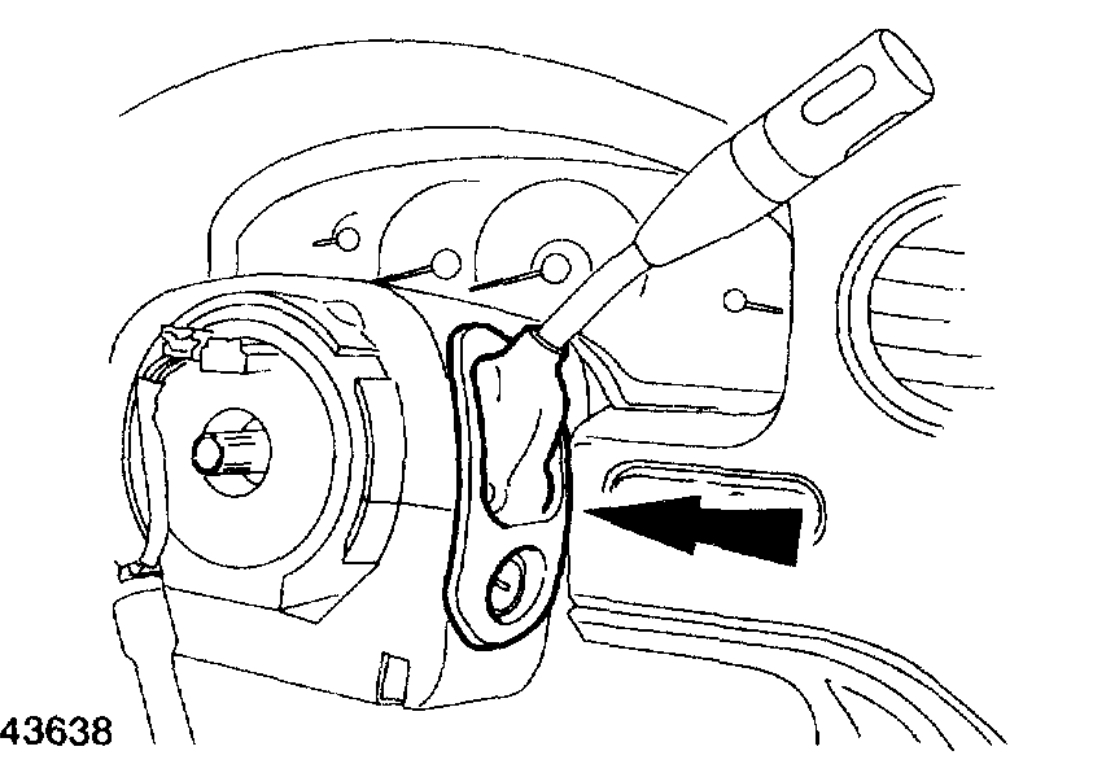
6. Release the tabs and slide the gear selector cover away from the steering column shrouds.
imageOpen In New TabZoom/Print
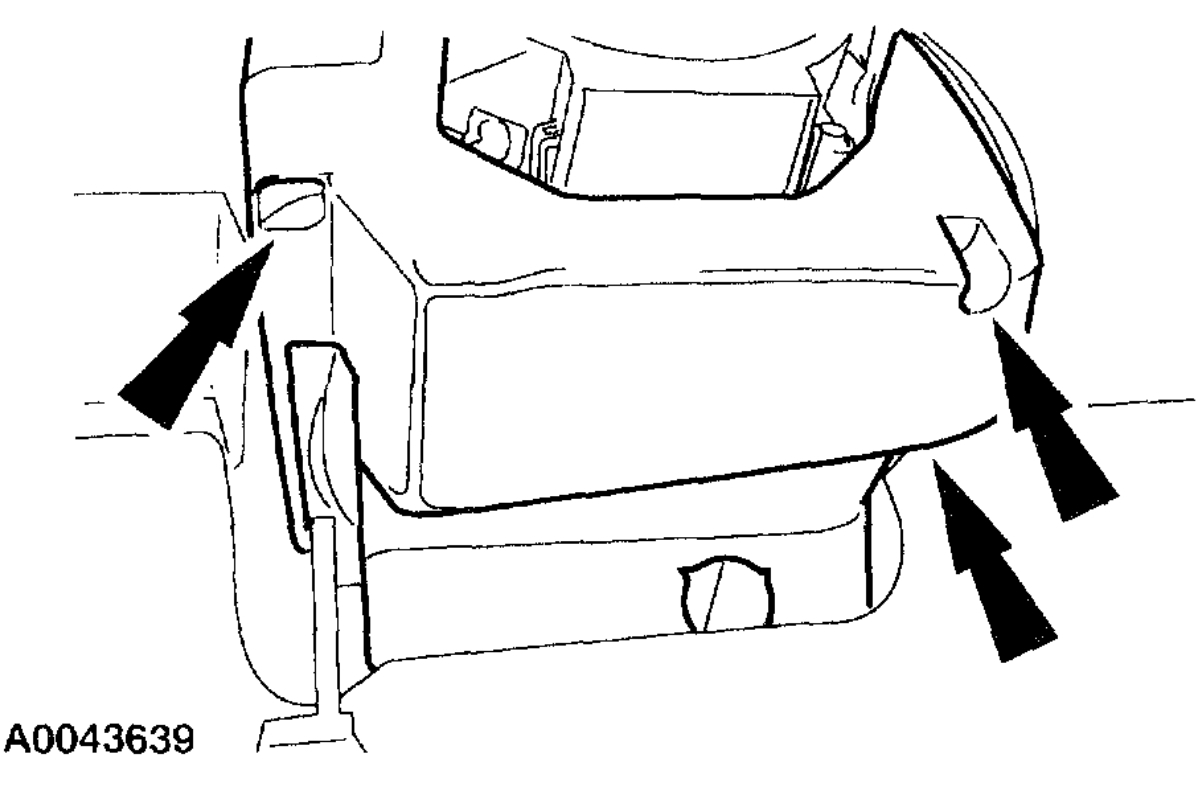
7. From under the steering column, remove the three screws and the lower steering column shroud.
imageOpen In New TabZoom/Print
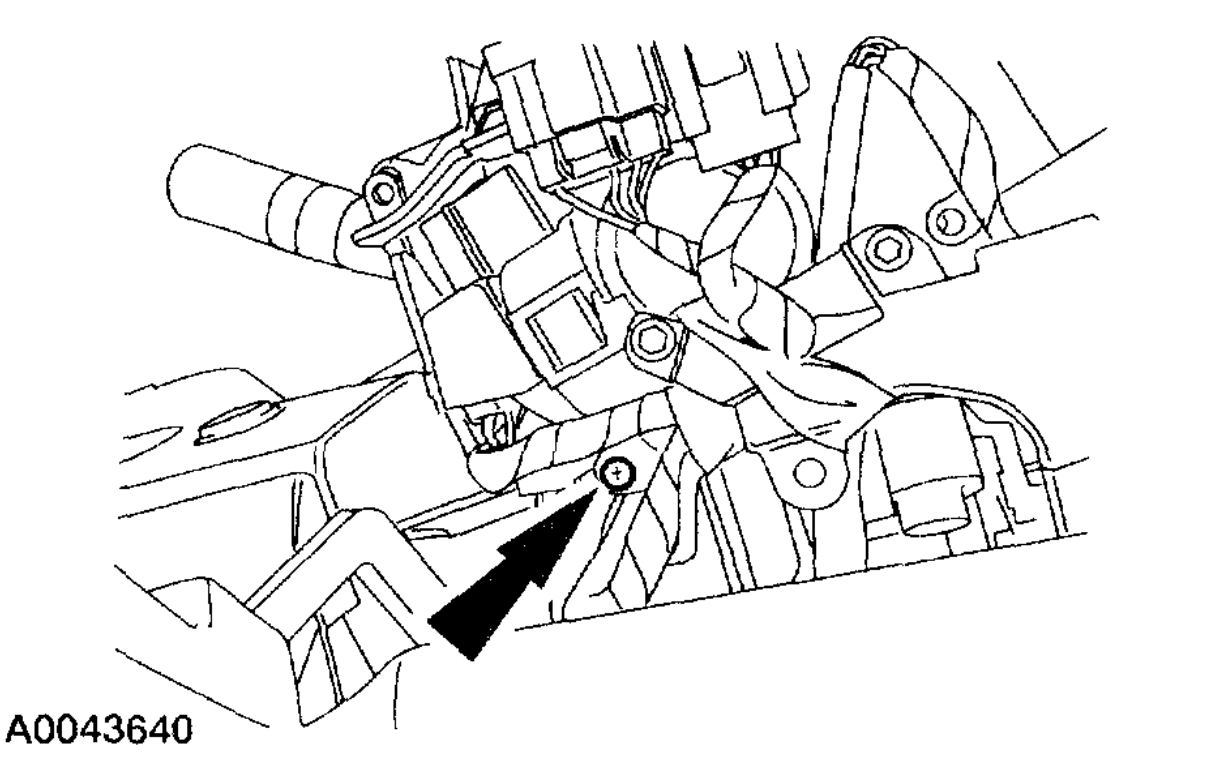
8. From under the steering column remove the screw and then remove the upper steering column shroud.
imageOpen In New TabZoom/Print
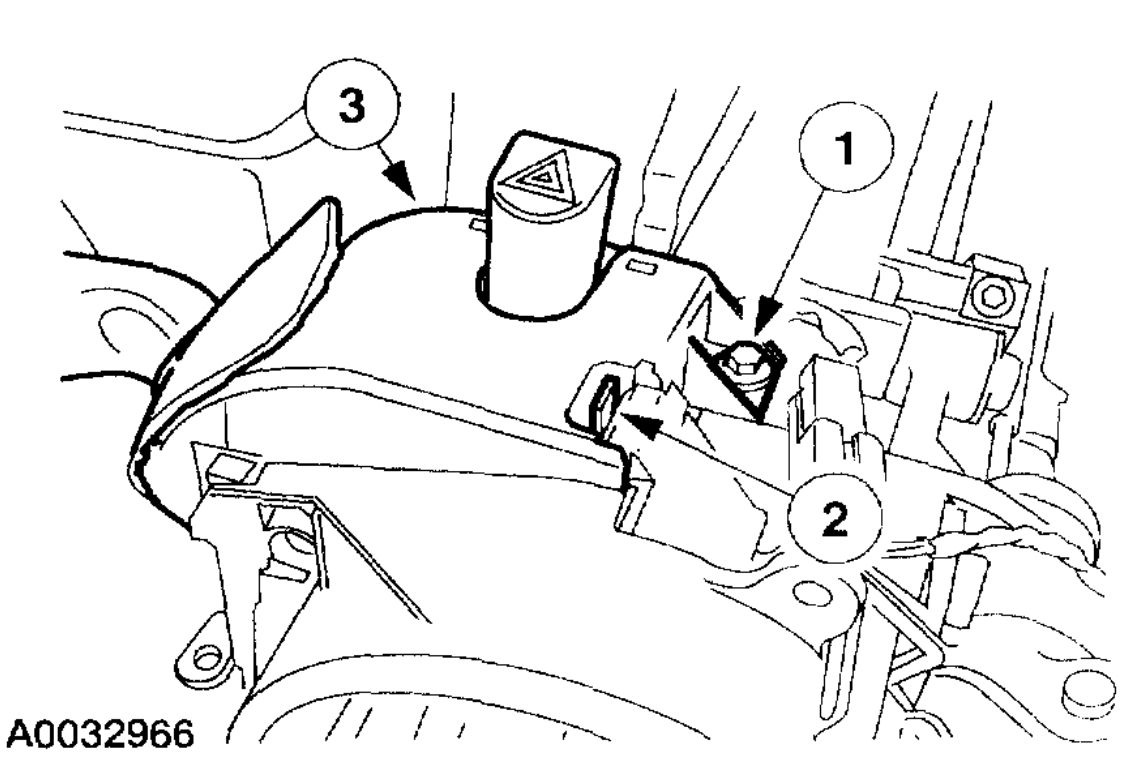
9. Separate the multi-function switch from the clockspring.
1 Remove the screw.
2 Release the tab.
3 While releasing the retaining tab, slide the multi-function switch up and out of the way.
imageOpen In New TabZoom/Print
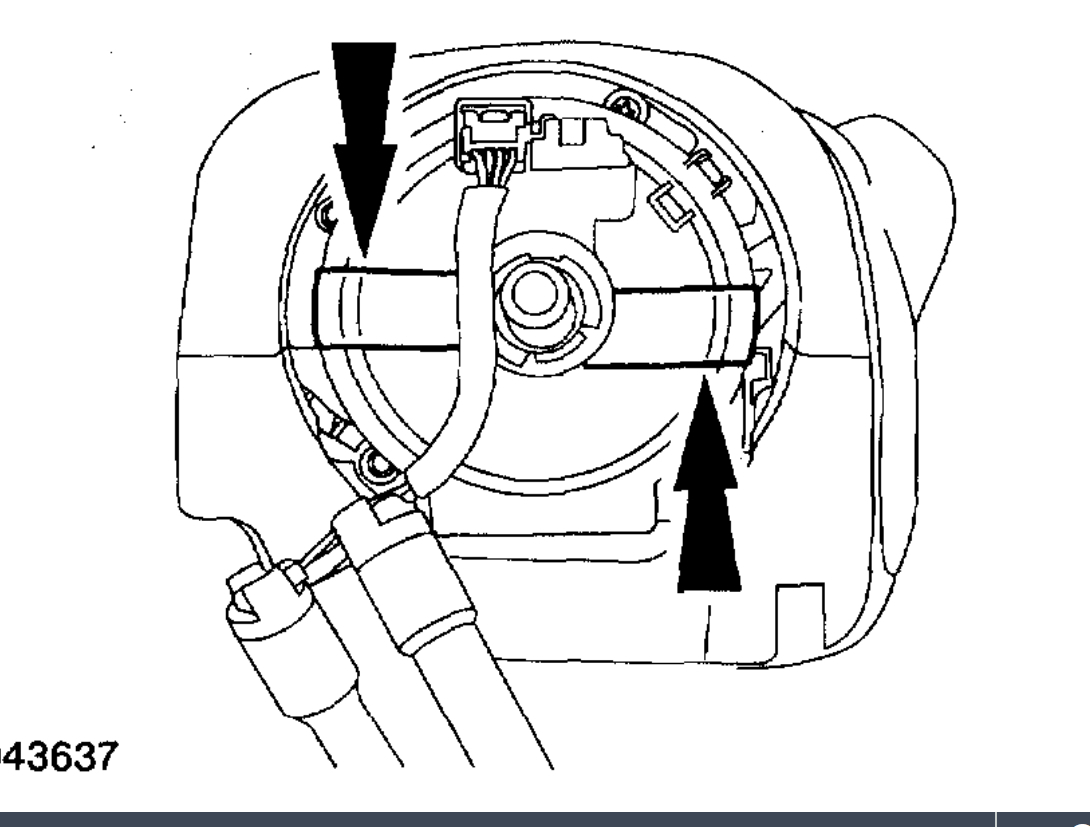
10. Separate the clockspring from the steering column.
1 Remove the screws.
2 Slide the clockspring off the steering column shaft.
imageOpen In New TabZoom/Print
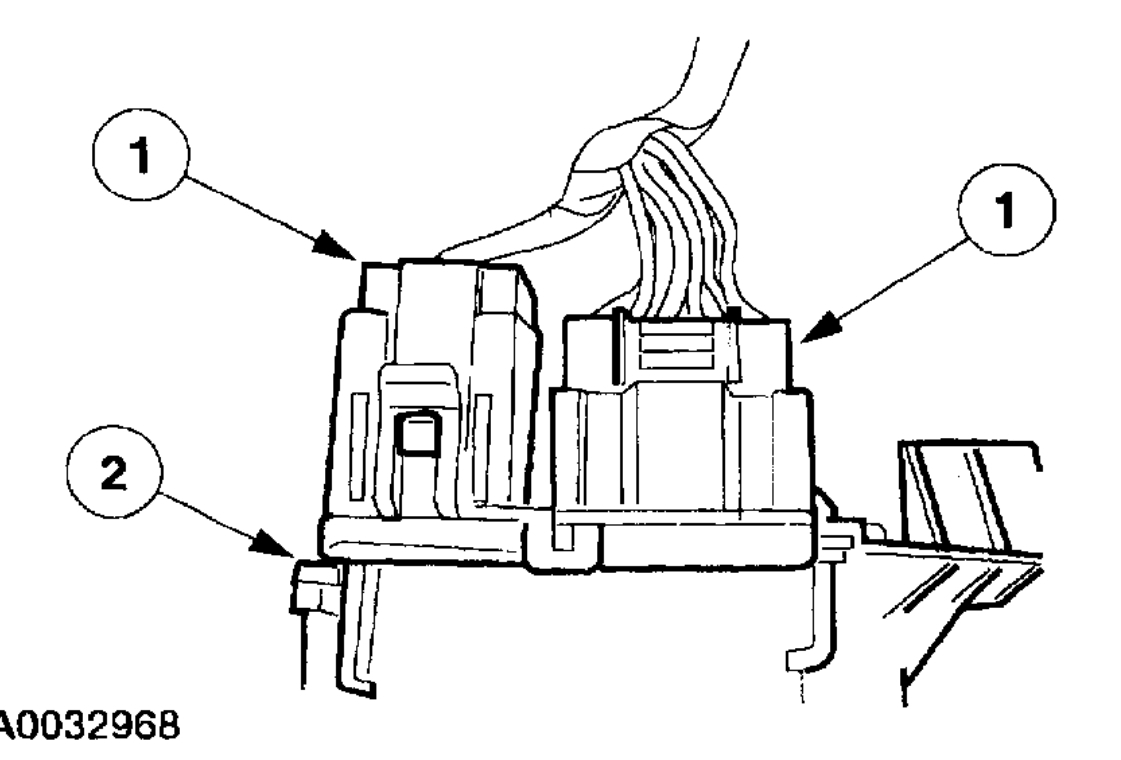
11. Remove the clockspring.
1 Disconnect the clockspring electrical connectors.
2 Remove the clockspring.
Steering wheel
Removal and Installation
1. Turn the steering wheel to the straight ahead position and turn the ignition switch to the OFF position.
2. Disconnect the battery ground cable and wait at least one minute to allow depletion of the restraint system backup power supply.
3. WARNING: To reduce the risk of serious personal injury, read and follow all warnings, cautions and notes in the deactivation procedure.
Deactivate the Supplemental Restraint System (SRS).
4. WARNING: To reduce the risk of serious personal injury, read and follow all warnings, notes and instructions in the driver air bag removal and installation procedure.
Remove the driver side air bag module.
imageOpen In New TabZoom/Print
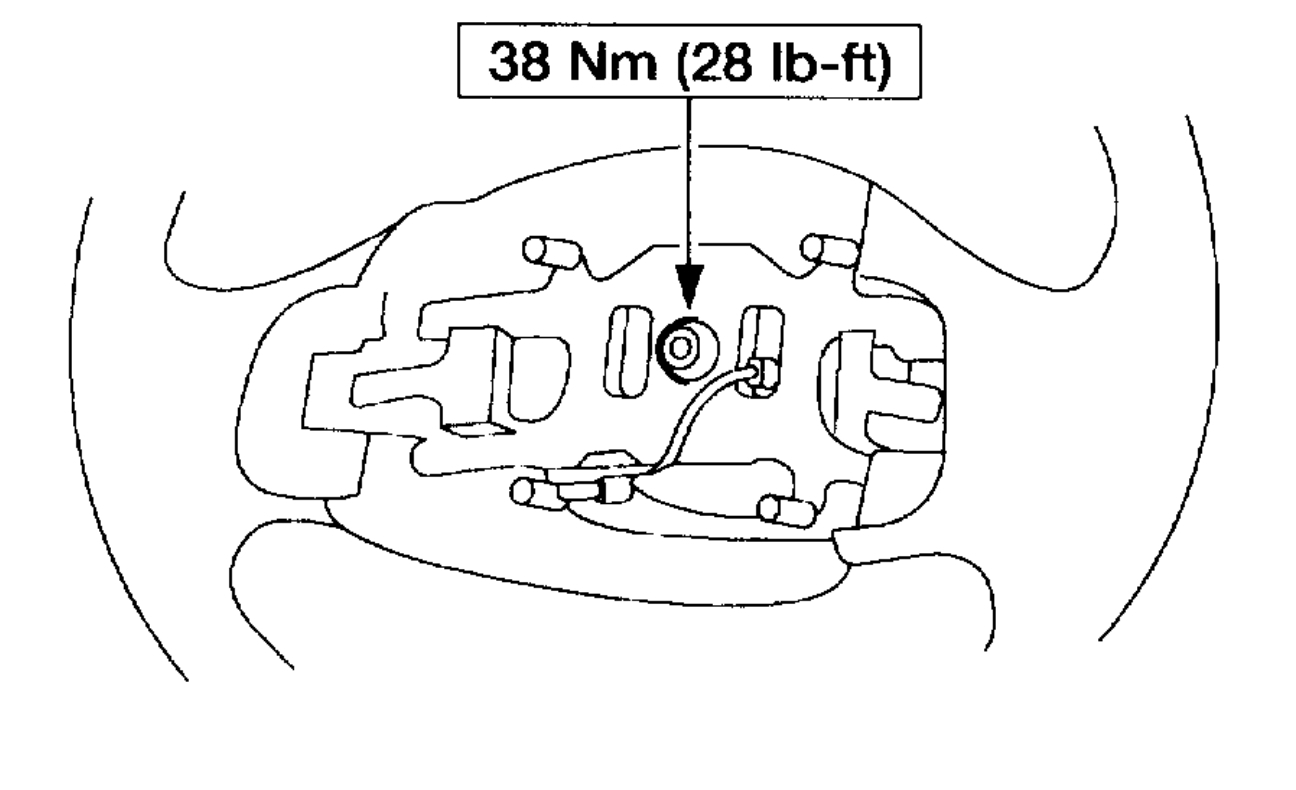
5. Remove the steering wheel bolt.
imageOpen In New TabZoom/Print
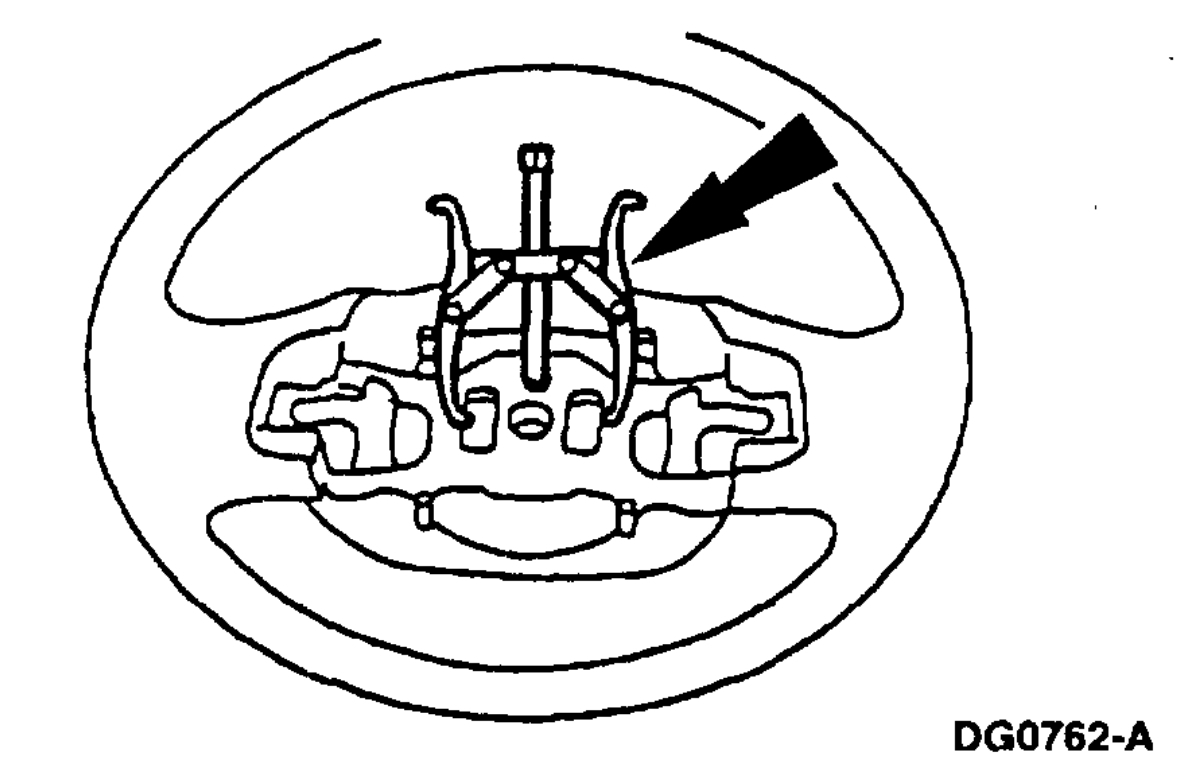
6. CAUTION: Removing the steering wheel without using a puller can damage the column bearings.
Use the Differential Side Bearing Puller to remove the steering wheel (3600).
7. To install, reverse the removal procedure.
8. WARNING: To reduce the risk of serious personal injury, read and follow all warnings, cautions and notes in the reactivation procedure.
Reactivate the Supplemental Restraint System (SRS).
Images (Click to make bigger)
SPONSORED LINKS
Monday, February 1st, 2021 AT 3:03 PM