Hi and thanks for using 2carpros. Com
I'm not sure what engine you have so I will provide the directions for both available engines for this vehicle with diagrams below. Here are the directions for the 2.0L The attached pictures correlate with these directions.
REMOVAL
Engine removal is not required for this procedure.
1. Remove the engine cover.
2. Remove the RH front wheel.
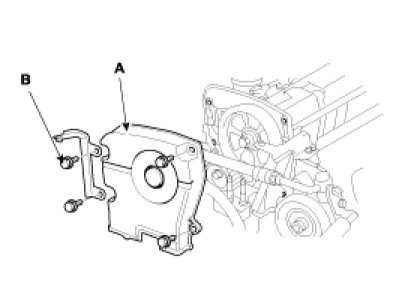
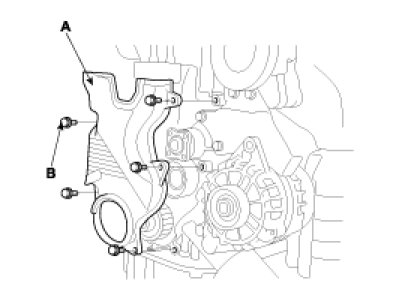
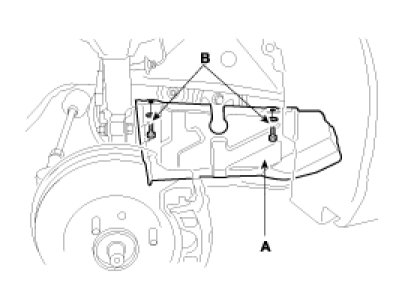
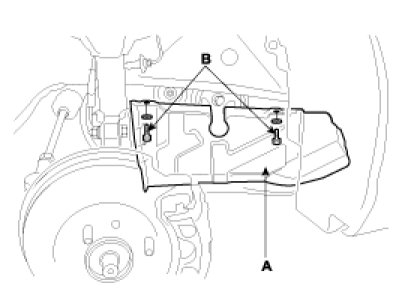
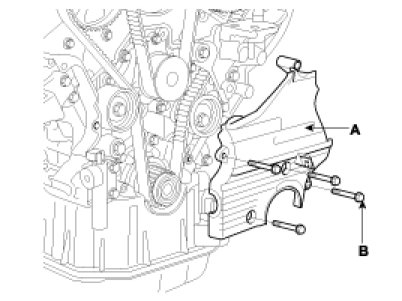
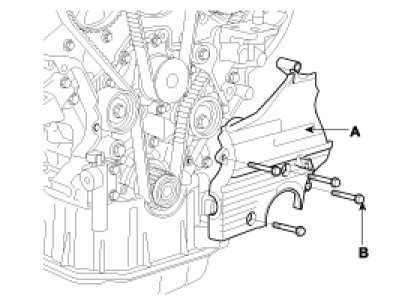
3. Remove the 2 bolts(B) and RH side cover(A).
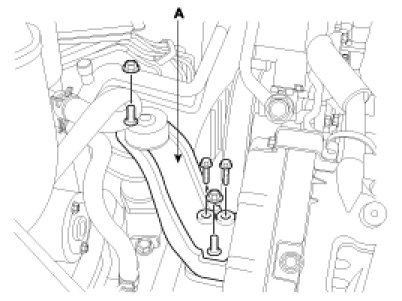
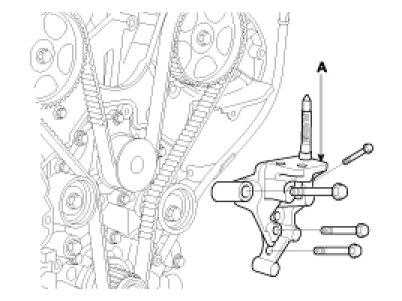
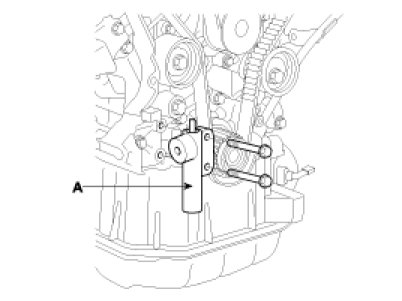
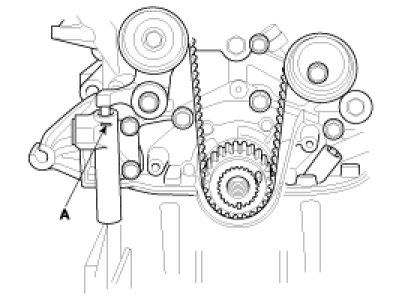
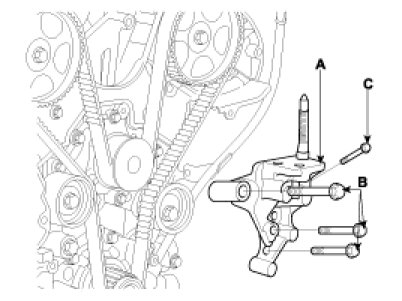
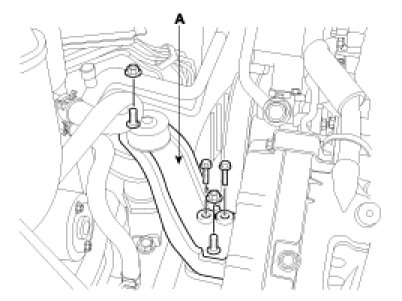
4. Remove the engine mounting support bracket.
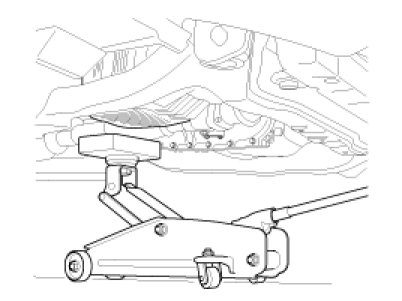
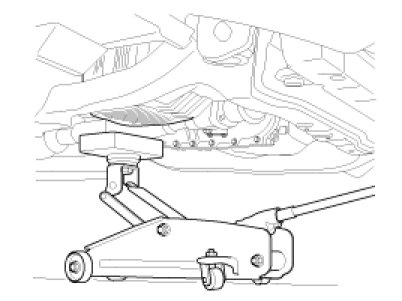
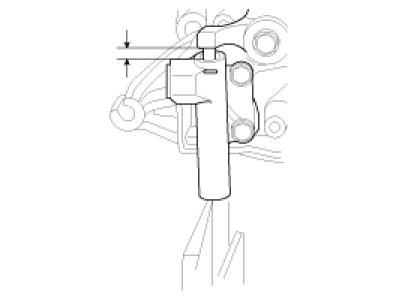
(1)Set the jack to the engine oil pan.
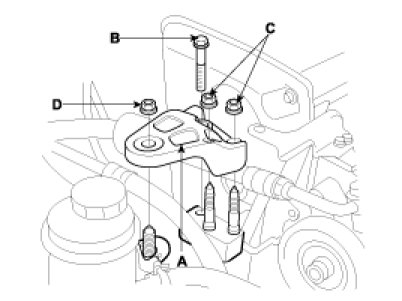
(2)Remove the bolt(B), nuts(C, D) and engine mounting support bracket(A).
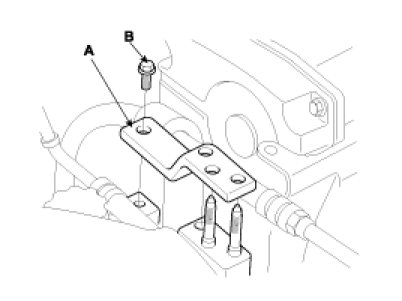
(3)Remove the bolt(B) and engine support bracket stay plate(A).
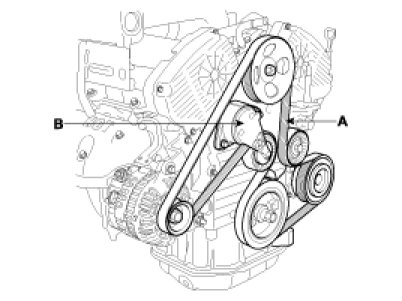
5. Temporarily loosen the water pump pulley bolts.
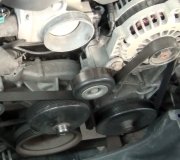
6. Remove the alternator drive belt.
7. Remove the air conditioner compressor drive belt.
8. Remove the power steering pump drive belt.
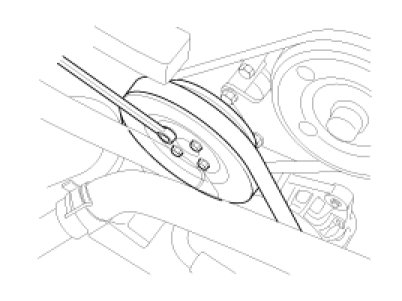
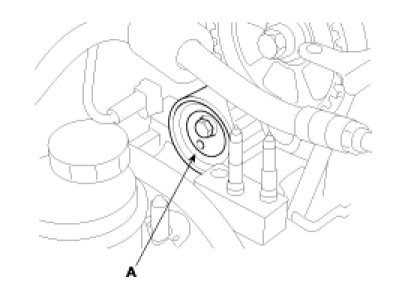
9. Remove the 4 bolts and water pump pulley.
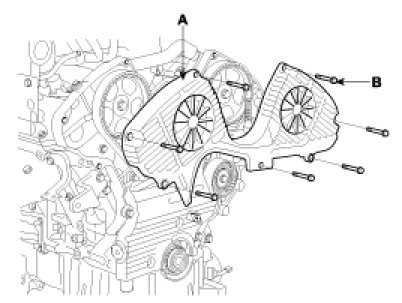
10. Remove the 4 bolts(B) and timing belt upper cover(A).
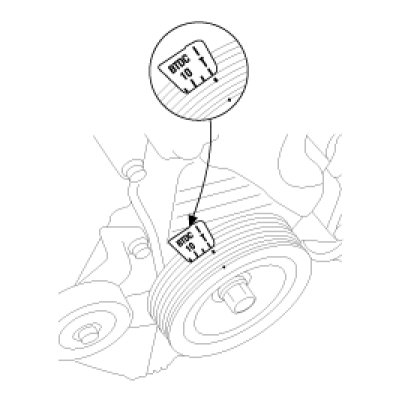
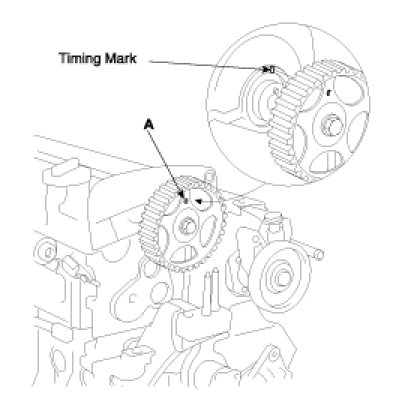
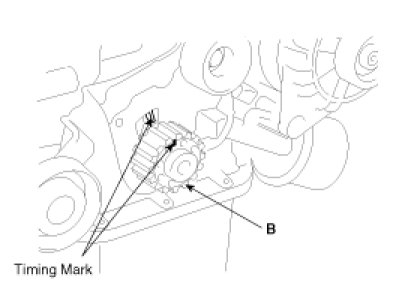
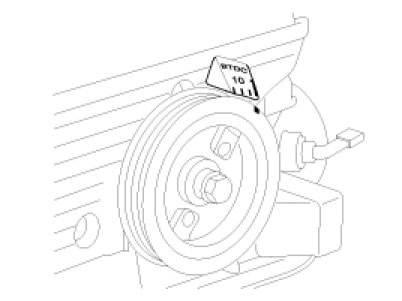
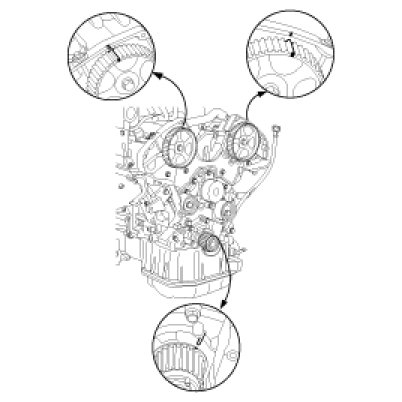
11. Turn the crankshaft pulley, and align its groove with timing mark "T" of the timing belt cover. Check that the timing mark of camshaft sprocket is aligned with the timing mark of cylinder head cover. (No.1 cylinder compression TDC position)
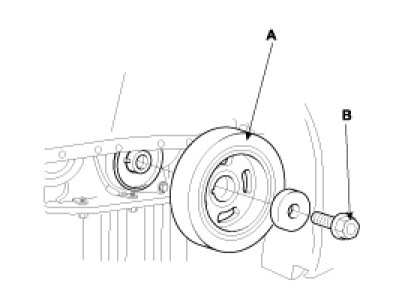
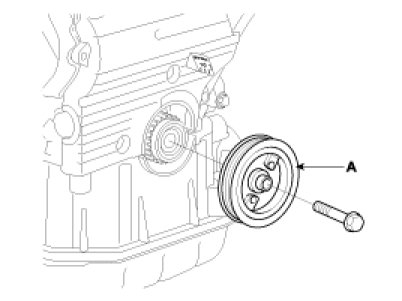
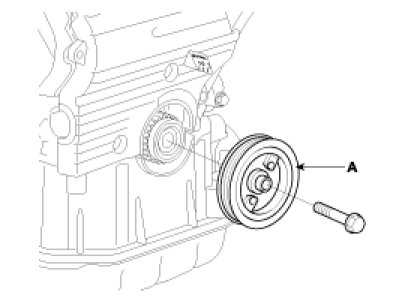
12. Remove the crankshaft pulley bolt(B) and crankshaft pulley(A).
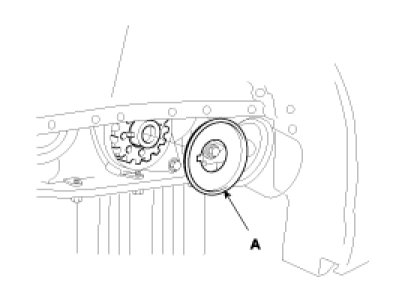
13. Remove the crankshaft flange(A).
14. Remove the 5 bolts(B) and timing belt lower cover(A)
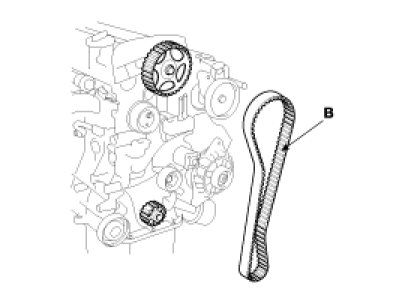
15. Remove the timing belt tensioner(A) and timing belt(B).
NOTE:
If the timing belt is going to be reused, make an arrow indicating the turning direction to make sure that the belt is reinstalled in the same direction as before.
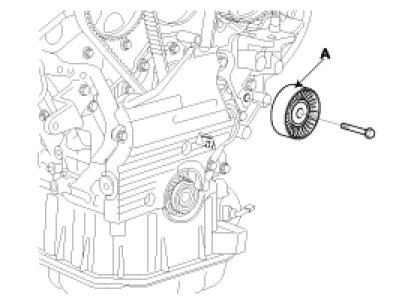
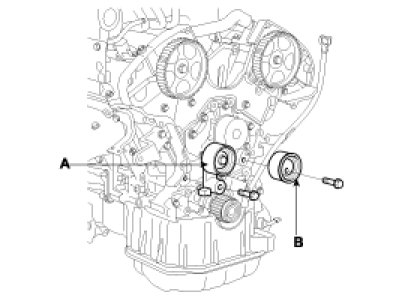
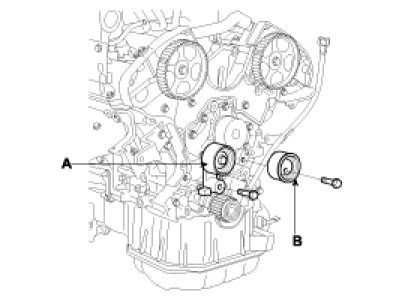
16. Remove the bolt(B) and timing belt idler(A).
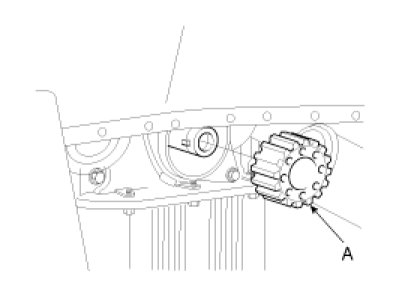
17. Remove the crankshaft sprocket(A).
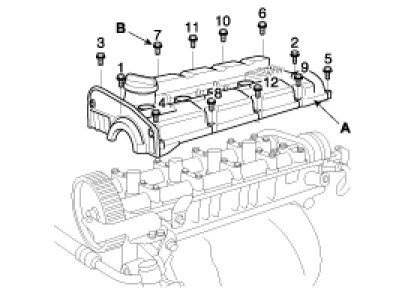
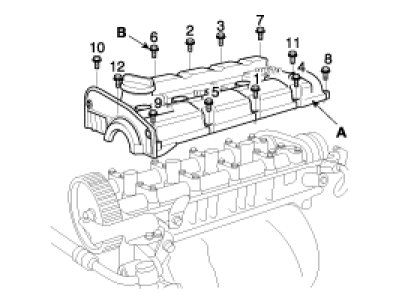
18. Remove the cylinder head cover.
(1)Disconnect the spark plug cables and do not pull on the cable by force.
NOTE:
Pulling on or bending the cables may damage the conductor inside.
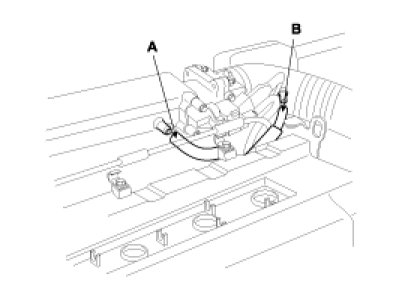
(2)Remove the PCV (Positive Crankcase Ventilation) hose(A) and the breather hose(B) from the cylinder head cover.
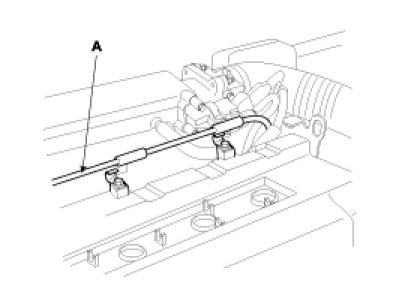
(3)Remove the accelerator cable(A) from the cylinder head cover.
(4)Loosen the cylinder head cover bolts(B) and then remove the cover(A) and gasket.
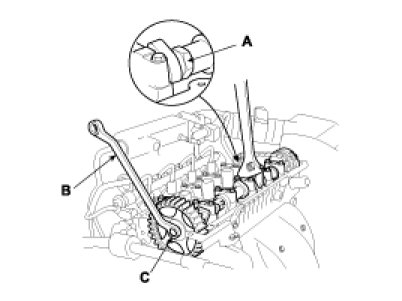
19. Remove the camshaft sprocket.
(1)Hold the portion(A) of the camshaft with a hexagonal wrench, and remove the bolt(C) with a wrench(B) and remove the camshaft sprocket.
CAUTION:
Be careful not to damage the cylinder head and valve lifter with the wrench.
INSTALLATION
1. Install the camshaft sprocket and tighten the bolt to the specified torque.
(1)Temporarily install the camshaft sprocket bolt(C).
(2)Hold the portion(A) of the camshaft with a hexagonal wrench, and tighten the bolt(C) with a wrench(B).
Tightening torque :
98.1 - 117.7N.M (10 - 12kgf.M, 72.3 - 86.8lbf. Ft)
2. Install the cylinder head cover.
(1)Install the cylinder head cover(A) and bolts(B).
Tightening torque :
7.8 - 9.8N.M (0.8 - 1.0kgf.M, 5.8 - 7.2lbf. Ft)
(2)Install the PCV(Positive Crankcase Ventilation) hose(A) and breather hose(B) to the cylinder head cover.
(3)Install the accelerator cable(A) to the cylinder head cover.
(4)Install the spark plug cables.
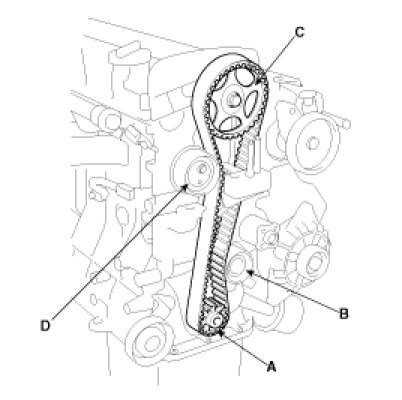
3. Install the crankshaft sprocket(A).
4. Align the timing marks of the camshaft sprocket(A) and crankshaft sprocket(B) with the No. 1 piston placed at top dead center and its compression stroke.
5. Install the idler pulley(A) and tighten the bolt(B) to the specified torque.
Tightening torque :
42.2 - 53.9N.M (4.3 - 5.5kgf.M, 31.1 - 39.8lbf. Ft)
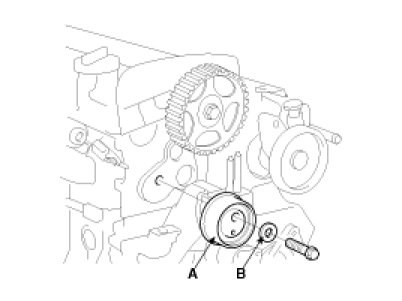
6. Temporarily install the timing belt tensioner(A) with plain washer(B).
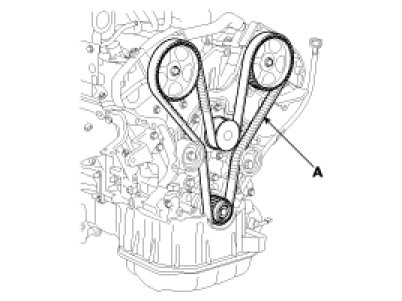
7. Install the belt so as not give slack at each center of shaft. Do as following procedures when installing timing belt.
Crankshaft sprocket(A) ->idler pulley(B) ->camshaft sprocket(C) ->timing belt tensioner(D).
8. Temporarily install tensioner pulley using center bolt to add tension force to the belt.
9. Adjust the timing belt tension.
(1)Rotate the crankshaft clockwise(view from front) through angle equivalent to two teeth(18°) of camshaft sprocket(A).
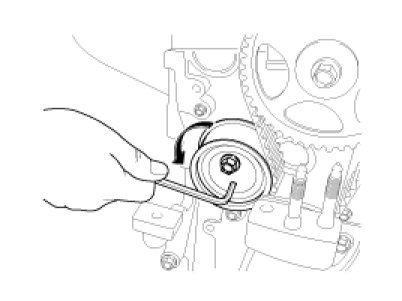
(2)Using a hex-wrench, apply tension to the timing belt in the clockwise direction so that there is no slack in the belt on the tension side.
(3)Tighten the tensioner bolt.
Tightening torque :
42.2 - 53.9N.M (4.3 - 5.5kgf.M, 31.1 - 39.8lbf. Ft)
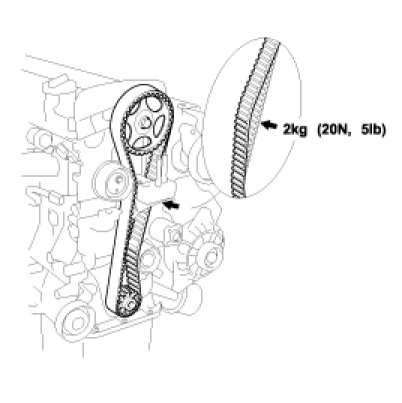
(4)Recheck the belt tension. When the tension side of timing belt is pushed horizontally with a moderate force [approx. 2kg (20N, 5lb)], the timing belt cog end sags in approx. 4 - 6mm (0.16 - 0.24in).
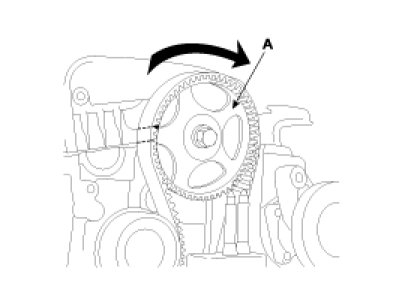
10. Turn the crankshaft two turns in the operating direction (clockwise) and realign crankshaft sprocket and camshaft sprocket timing mark.
11. Install the timing belt lower cover(A) with 5bolts(B).
Tightening torque :
7.8 - 9.8N.M (0.8 - 1.0kgf.M, 5.8 - 7.2lbf. Ft)
12. Install the flange and crankshaft pulley(A), and then tighten crankshaft pulley bolt(B).
Make sure that the crankshaft sprocket pin fits into the small hole in the pulley.
Tightening torque :
166.7 - 176.5N.M (17 - 18kgf.M, 123.0 - 130.2lbf. Ft)
13. Install the timing belt upper cover(A) with 4 bolts(B).
Tightening torque :
7.8 - 9.8N.M (0.8 - 1.0kgf.M, 5.8 - 7.2lbf. Ft)
14. Install the water pump pulley and 4 bolts.
15. Install the power steering pump drive belt.
16. Install the air conditioner compressor drive belt.
17. Install the alternator drive belt.
18. Tighten the bolts of water pump pulley.
19. Install the engine mounting support bracket.
(1)Install the engine mounting support bracket stay plate(A) with bolt(B).
Tightening torque :
42.2 - 53.9N.M (4.3 - 5.5kgf.M, 31.1 - 39.8lbf. Ft)
(2)Install the engine mounting support bracket(A) with nuts(C, D) and bolt(B).
Tightening torque :
Nut(D) : 58.8 - 78.5N.M (6.0 - 8.0kgf.M, 43.4 - 57.9lbf. Ft)
Nut(C) and bolt(B) : 49.0 - 63.7N.M
(5.0 - 6.5kgf.M, 36.2 - 47.0lbf. Ft)
20. Install the RH side cover(A) with 2 bolts(B).
21. Install the RH front wheel.
Tightening torque :
88.3 - 98.N.M (9.0 - 10.0kgf.M, 65.1 - 72.3lbf. Ft)
22. Install the engine cover with bolts.
Tightening torque :
3.9 - 5.9N.M (0.4 - 0.6kgf.M, 2.9 - 4.3lbf. Ft)
Check out the diagrams (Below). Please let us know if you need anything else to get the problem fixed.
Images (Click to make bigger)
SPONSORED LINKS
Friday, March 1st, 2019 AT 10:38 PM