Note: Ford does not provide camshaft gear timing marks, or information to perform timing belt service without the special tools shown in this procedure.
Special Service Tools:
Timing Tool, Camshaft Alignment T94P-6256-CH
Timing Peg, Crankshaft Position T97P-6000-A
Cam Sprocket Holding/Removing Tool T74P-6256-B
CAUTION: The maximum amount by which the engine management system will adjust the camshaft timing (VCT control unit) is limited to two degrees.
As a result of this an extremely high degree of accuracy is required for any work which affects the valve timing.
Note: The locations of engine mountings and engine support insulators are described looking from the transaxle to the engine.
Note: Operation steps which only apply to certain model variants and therefore do not apply to all vehicles are clearly marked with the statement (if necessary).
Removal:
Disconnect the battery ground cable.
Raise and support the vehicle.
Loosen the right-hand front wheel nuts.
Remove the right-hand front wheel.
Remove the right-hand front splash shield.
Note: Mark the accessory drive belt direction if the belt is to be reused.
Remove the accessory drive belt.
Loosen the water pump pulley bolts.
Working clockwise, loosen the belt and remove it.
(if necessary) Remove the water pump pulley.
(if necessary) Remove the belt idler pulley.
Note: Using the access hole in the bottom of transaxle case to stop rotation of engine.
Remove the crankshaft pulley/vibration damper.
Remove the lower part of the engine front cover.
Vehicles with manual transaxle:
Loosen the center bolt of the right - hand engine support insulator two turns.
Vehicles with automatic transaxle:
Loosen the center bolt of the right-hand engine support insulator two turns.
All Vehicles
Loosen the center bolt of the left-hand engine support insulator two turns.
Lower the vehicle.
Detach the coolant expansion tank and position it to one side.
(if necessary) Disconnect the speed control cable from the coolant expansion tank.
CAUTION: Use a block of wood between the oil pan and the floor jack.
Position the floor jack under the oil pan and raise slightly to release pressure on the front insulator.
Note: Mark the mounting position.
Remove the engine front mounting.
Detach the power steering pipe bracket from the engine lift eye.
Remove the bolts.
Remove the center part of the engine front cover/front engine mounting bracket.
(if necessary) Take off the upper and the center covers.
Unclip the throttle cable and the speed control cable from the cylinder head appearance cover.
Remove the appearance cover.
Disconnect the solenoid valve electrical connector.
Remove the appearance cover.
Note: Loosening sequence: From the outside inwards, working diagonally.
Remove the valve cover.
Disconnect the HT wires from the spark plugs.
Disconnect the crankcase ventilation hose.
Unscrew the 10 bolts.
Remove the spark plugs.
Note: Set the crankshaft approximate to TDC on cylinder No.1.
Loosen the timing belt.
Loosen the bolt and release the timing belt tensioner by turning it clockwise.
Unscrew the bolt four turns and unhook the timing belt tensioner.
Note: To loosen the camshaft pulleys, hold the camshafts by the hexagon.
Loosen the camshaft pulleys.
Unscrew the blanking plug from the exhaust camshaft pulley.
Loosen the exhaust camshaft pulley.
Loosen the intake camshaft pulley.
Note: Mark the belt direction, if the timing belt is to be reused.
Remove the timing belt.
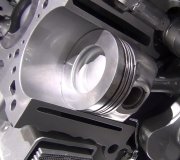
Attached an image as well
Roy
Image (Click to make bigger)
SPONSORED LINKS
Sunday, November 4th, 2012 AT 8:33 PM