GAUGE ASSEMBLY REPLACEMENT
1. Remove the instrument panel (see INSTRUMENT PANEL REMOVAL/INSTALLATION ).
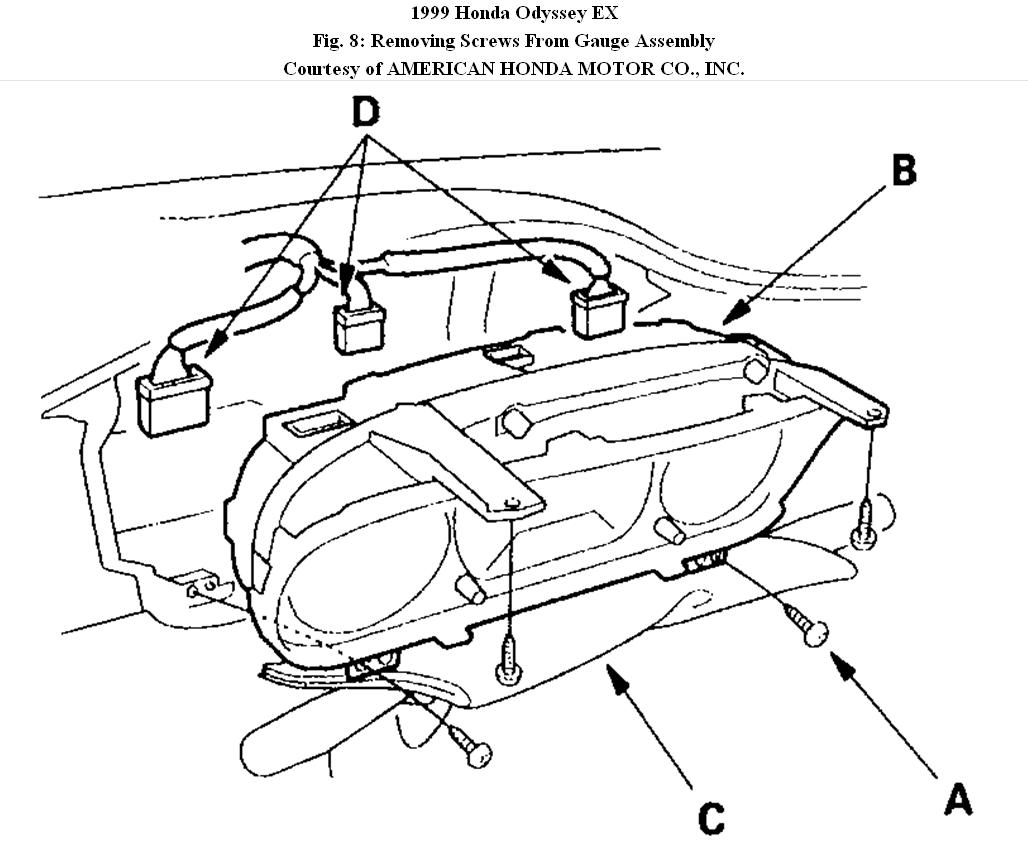
2. Remove the screws (A) from the gauge assembly (B), and spread a protective cloth (C) on the upper column cover.
Fig. 8: Removing Screws From Gauge Assembly
3. Disconnect the connectors (D), and remove the gauge assembly.
4. Install in the reverse order of removal.
INSTRUMENT PANEL REMOVAL/INSTALLATION
NOTE:
� When prying with a flat-tip screwdriver, wrap it with protective
tape, and apply protective tape around the related parts, to prevent damage.
� Take care not to scratch the dashboard and related parts.
1. Remove these items:
� Driver's switch panel (see Driver's Switch Panel Removal/Installation )
� Center panel (see Center Panel Removal/Installation )
2. Tilt the steering column down.
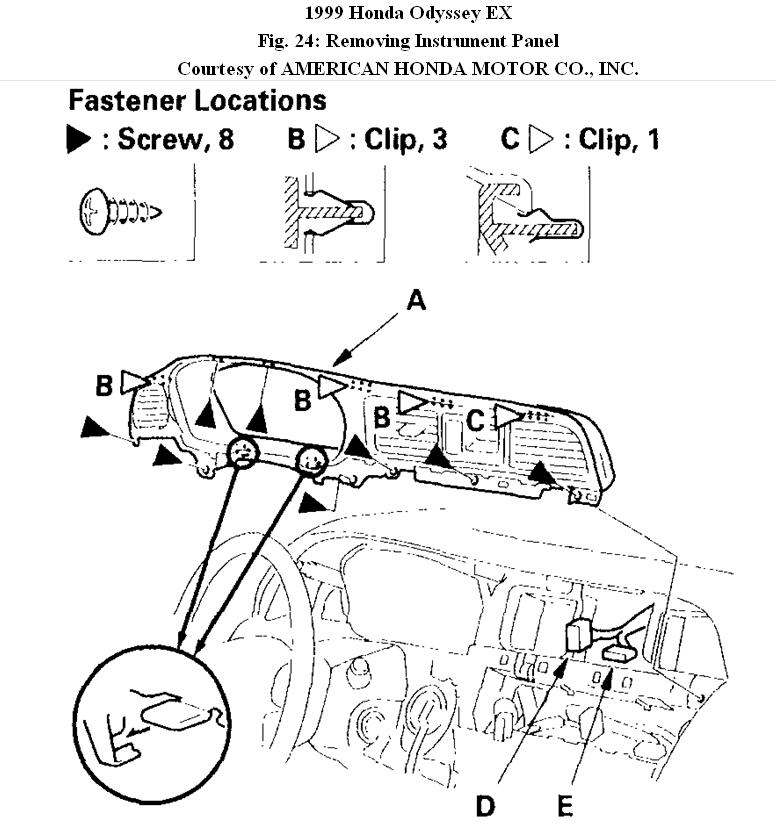
3. Remove the instrument panel (A).
? 1 Remove the screws.
? 2 Gently pull out along the top to release the clips (B, C).
? 3 Disconnect the hazard warning switch connector (D) and clock connector (E). With navigation system, disconnect the climate control unit connector.
Fig. 24: Removing Instrument Panel
4. Install the instrument panel in the reverse order of removal, and note these items:
� Make sure each connector is plugged in properly.
� Push the clips into place securely.
DRIVER'S SWITCH PANEL REMOVAL/INSTALLATION
NOTE:
� When prying with a flat-tip screwdriver, wrap it with protective
tape, and apply protective tape around the related parts, to prevent damage.
� Take care not to scratch the dashboard and related parts.
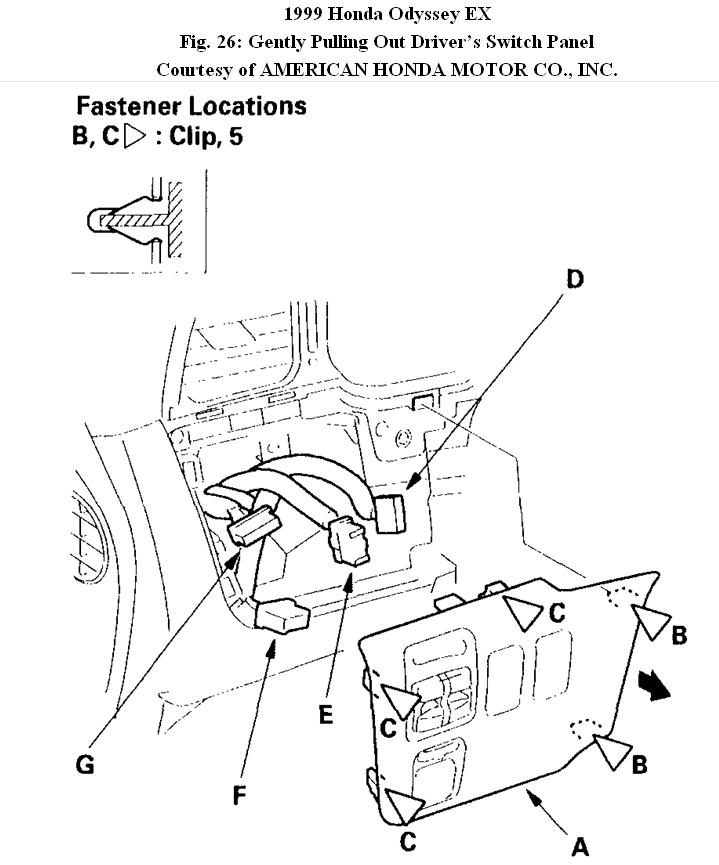
1. Gently pull out on the driver's switch panel (A) to release the right clips (B), then detach the remaining clips (C). If equipped, disconnect the cruise control main switch connector (D), TCS switch connector (E), power mirror switch connector (F) and power sliding door switch connector (G), then remove the panel.
Fig. 26: Gently Pulling Out Driver's Switch Panel
2. Install the panel in the reverse order of removal, and note these items:
� Make sure each connector is plugged in properly (if equipped).
� Push the clips into place securely.
CENTER PANEL REMOVAL/INSTALLATION
NOTE:
� When prying with a flat-tip screwdriver, wrap it with protective tape, and apply protective tape around the related parts, to prevent damage.
� Take care not to scratch the dashboard and related parts.
1. Remove the steering column covers (see step 4 on STEERING COLUMN REMOVAL AND INSTALLATION ).
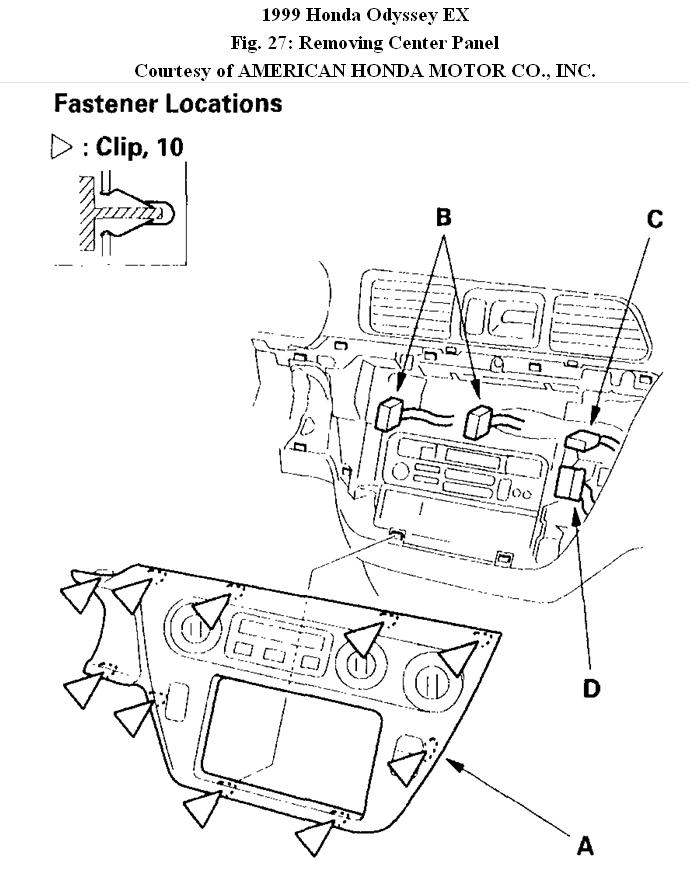
2. Carefully detach the clips, then remove the center panel (A). Disconnect the heater control panel connectors (B) or climate control unit connectors, rear A/C control dial (C) (for some models) and interior light switch connector (D). With navigation system, disconnect the hazard warning switch connector, rear A/C control dial, and interior light switch connector.
Fig. 27: Removing Center Panel
3. Install the panel in the reverse order of removal, and note these items:
� Make sure each connector is plugged in properly.
� Push the clips into place securely.
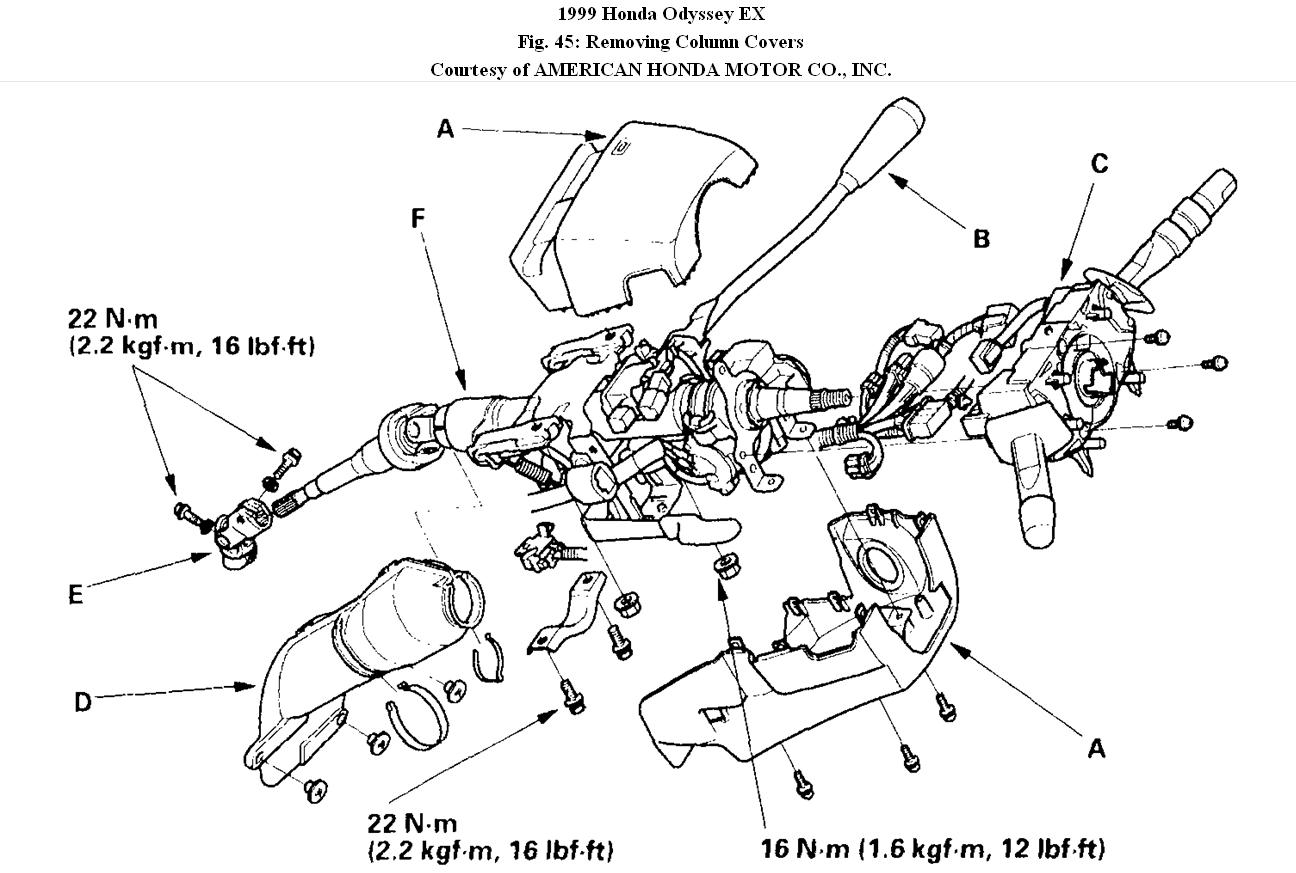
4. Remove the column covers (A).
Fig. 45: Removing Column Covers
Images (Click to make bigger)
SPONSORED LINKS
Friday, February 11th, 2011 AT 3:23 PM