1. Before servicing the vehicle, refer to the Precautions Section.
NOTE
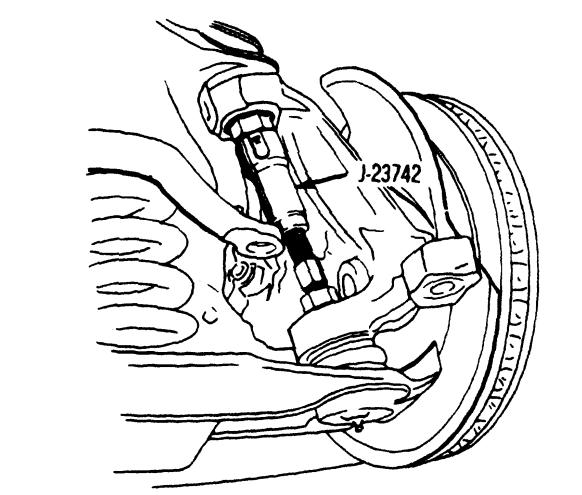
The following procedure requires the use of a ball joint remover/installer set (the particular set may vary upon application but must include a clamping-type tool with the appropriately sized adapters) and a ball joint separator tool, such as J-23742.
2. Remove the wheel.
3. Position a jack under the spring seat of the lower control arm, then raise the jack to support the arm.
CAUTION
The jack MUST remain under the lower control arm, during the removal and installation procedures, to retain the arm and spring positions. Make sure the jack is securely positioned and will not slip or release during the procedure or personal injury may result.
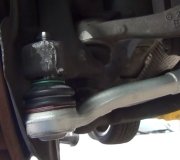
4. Remove brake caliper and support it aside using a hanger or wire. Make sure the brake line is not stressed or damaged.
5. Remove lower ball joint cotter pin and discard.
6. Remove ball joint stud nut.
7. Remove lower ball joint from the steering knuckle using tool J-23742.
8. Carefully guide the lower control arm out of the opening in the splash shield using a putty knife. Position a block of wood between the frame and upper control arm to keep the knuckle out of the way.
9. Remove grease fitting.
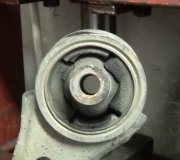
10. Remove ball joint from the control arm using the ball joint remover set along with the appropriate adapters.
To install:
1. Clean the tapered hole in the steering knuckle of any dirt or foreign matter, then check the hole to see if it is out of round, deformed or otherwise damaged. If a problem is found, then knuckle must be replaced.
2. Press the new ball joint (with grease fitting pointing inward) until it bottoms in the control arm using a suitable installation set. Make sure the grease seal is facing inboard.
3. Install ball joint stud into the steering knuckle.
4. Install ball joint retaining nut and tighten to 90 ft. Lbs. (125 Nm).
NOTE
When installing the cotter pin, never loosen the castle nut to expose the cotter pin hole.
5. Install grease fitting into the ball joint, if not already installed.
6. Use a grease gun to lubricate the joint until grease appears at the seal.
7. Install brake caliper.
8. Install tire and wheel assembly.
9. Check and adjust the front end alignment, as necessary.
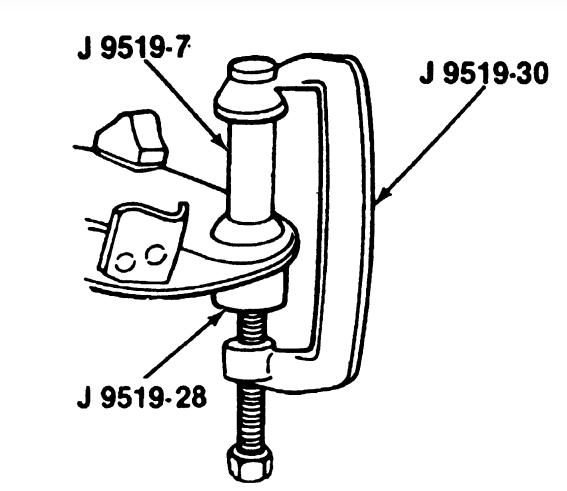
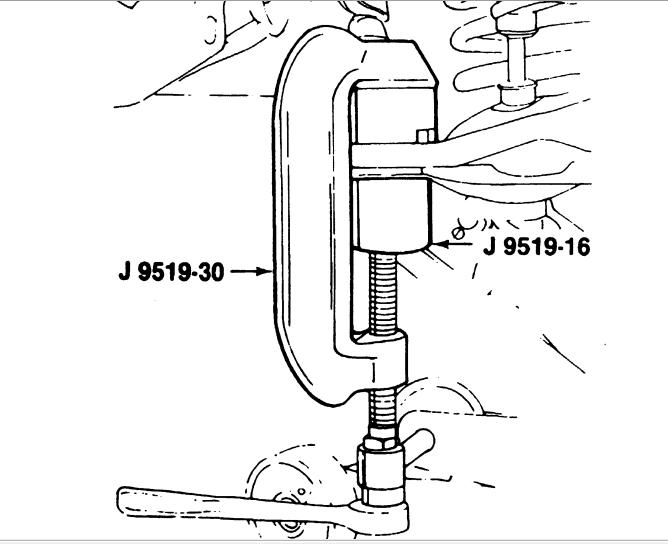
The attachments below are for an "On the vehicle" ball joint installer. If using a stationary press you will need to completely remove the arm from the vehicle. You will still need to use spacers to press the new one in, you only want to put pressure on the outer most ring of the ball joint
Images (Click to make bigger)
SPONSORED LINKS
Friday, February 18th, 2011 AT 5:12 PM