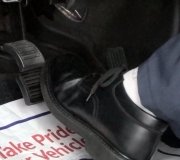
You're pretty close. The first issue is with the brake pedal going to the floor. Pushing it that far likely damaged the master cylinder. Crud and corrosion build up in the lower halves of the bores where the pistons don't normally travel. Pushing the brake pedal to the floor runs the lip seals over that crud and rips them. That results in a slowly-sinking brake pedal or the inability to get a good hard pedal.
The next issue is the "brake line". Actually, look at the front rubber flex hoses and you'll see a metal bracket crimped around the middle of it. Rust builds up inside that crimp and constricts the fluid flow. THAT is why that brake was smoking. You can force pressurized brake fluid through that restriction by pushing on the brake pedal, but the fluid can't release and flow back to the reservoir. You need a large Channel Lock pliers to open up that crimp a little. No need to replace the entire hose if it's still in good condition.
For future reference, never push a brake pedal more than halfway to the floor unless the master cylinder is less than about a year old. When bleeding the hydraulic system, gravity-bleeding is the only method I use or have ever needed. Fill the reservoir, leave the cap on but loose so no vacuum builds up that would impede fluid flow. Open the bleeder screws, then wait a couple of minutes until fluid shows up. Close that bleeder, then wait for the next one to start flowing. Once all the bleeder screws are closed, "irritate" the brake pedal a little by hand to wash any sticking air bubbles into the calipers and / or wheel cylinders. Open each bleeder for a few seconds to expel those last few bubbles.
If you let the reservoir run empty but catch it before the steel lines get air in them, there's no need to bleed at the wheels. Fill the reservoir, push the brake pedal halfway to the floor very slowly, then let it pop back up very quickly. Fluid will get pushed down into the lines and the air will float back up. When you release the pedal quickly, the fluid rushing back will wash the air bubbles back up into the reservoir with it.
When you're replacing the master cylinder, here's another trick to avoid having to bleed at the wheels. Loosen the soft metal line nuts at the master cylinder. Unbolt the master cylinder from the booster, pull it forward, then use it as a handle to bend the steel lines up a little. That will prevent the brake fluid from running out of the lines. Remove the lines, then remove the master cylinder.
The new one must be bench-bled first. Install the lines, bend them back down, then bolt the master cylinder to the booster. Loosen one or both line nuts just a little, then have a helper push the brake pedal slowly halfway to the floor. It should take about 15 seconds. As that is done, you'll see air bubbles spitting out by the line nut. Snug the loose nut(s), THEN tell the helper to release the pedal. Loosen a nut, then do that once more. As before, if any tiny air bubbles remain in the lines, you'll never notice it in the pedal, and they'll wash back into the reservoir pretty quickly.
SPONSORED LINKS
Thursday, March 11th, 2021 AT 2:01 PM