Trailing Arm front mount
TRAILING ARM FRONT RUBBER MOUNT
Removal
1. Remove trailing arm. See TRAILING ARM .
2. Unscrew bolt and remove console. See Fig. 32 .
3. On rubber mount with collar, measure gap (A) with a feeler gauge and note value. See Fig. 33 .
On rubber mount with collar, pull out rubber mount using special tool (00 8 550, 33 3 324 and
33 3 340). See Fig. 34 .
4.
On rubber mount with slot, pull out rubber mount with special tool 33 3 144/145/222/227/228/
and 12 mm nut (1). Position special tool (33 3 228) so that arrow on special tool points in
withdrawal direction. See Fig. 35 .
5.
6. On rubber mount with slot, mark trailing arm eye with dot of paint (K). See Fig. 36 .
Fig. 32: Locating Console Bolt
Courtesy of BMW OF NORTH AMERICA, INC.
Fig. 33: Measuring Gap On Rubber Mount
Courtesy of BMW OF NORTH AMERICA, INC.
Fig. 34: Pulling Out Rubber Mount With Collar
Courtesy of BMW OF NORTH AMERICA, INC.
Fig. 35: Pulling Out Rubber Mount With Slot
Courtesy of BMW OF NORTH AMERICA, INC.
Fig. 36: Marking Trailing Arm Eye
Courtesy of BMW OF NORTH AMERICA, INC.
Installation
CAUTION: If a rubber mount with collar is replaced by a rubber mount with slot,
the replacement must be made in pairs.
On rubber mount with collar, rubber mount and trailing arm eye must be free of grease. Ensure
installed position of rubber mount. See Fig. 37 .
1.
On rubber mount with collar, draw in new rubber mount with special tool (33 3 222/223/314
and 12 mm nut (1) to previously determined gap (A). See Fig. 38 .
2.
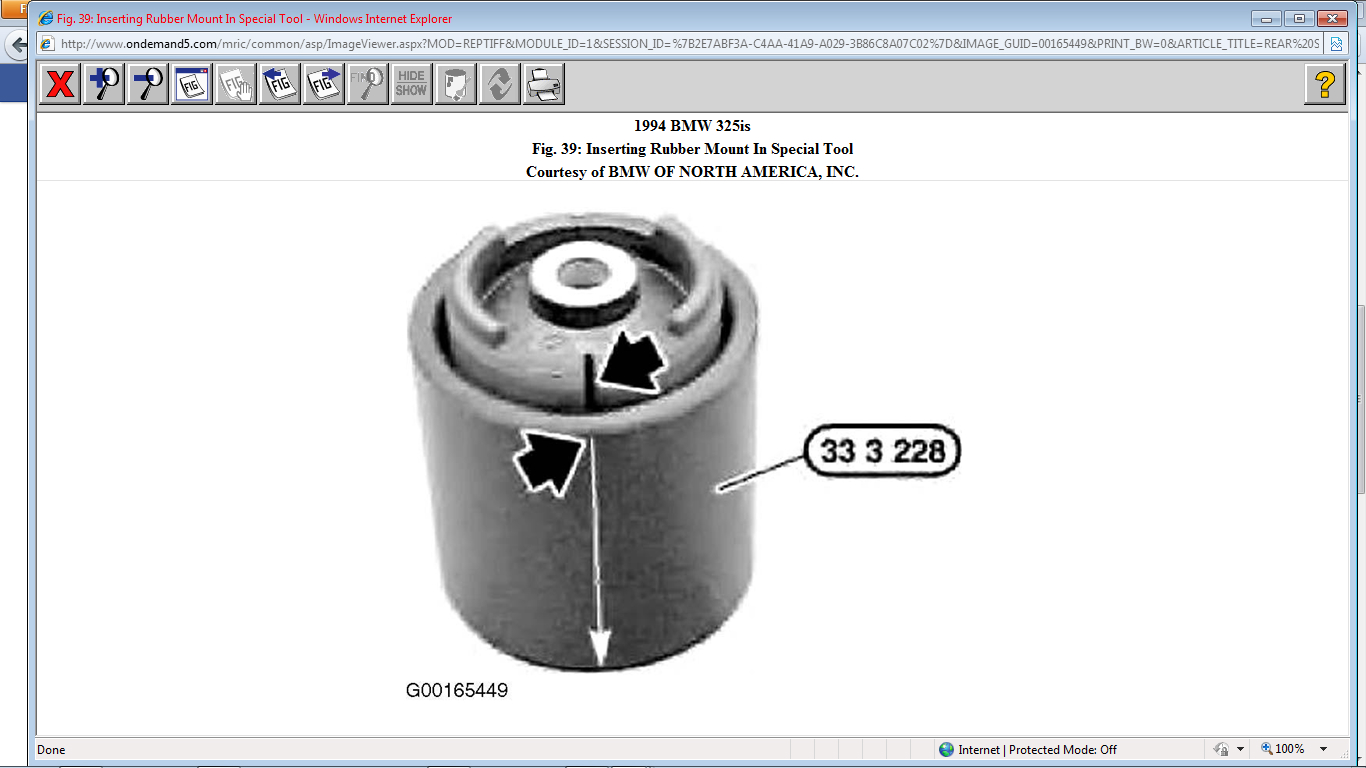
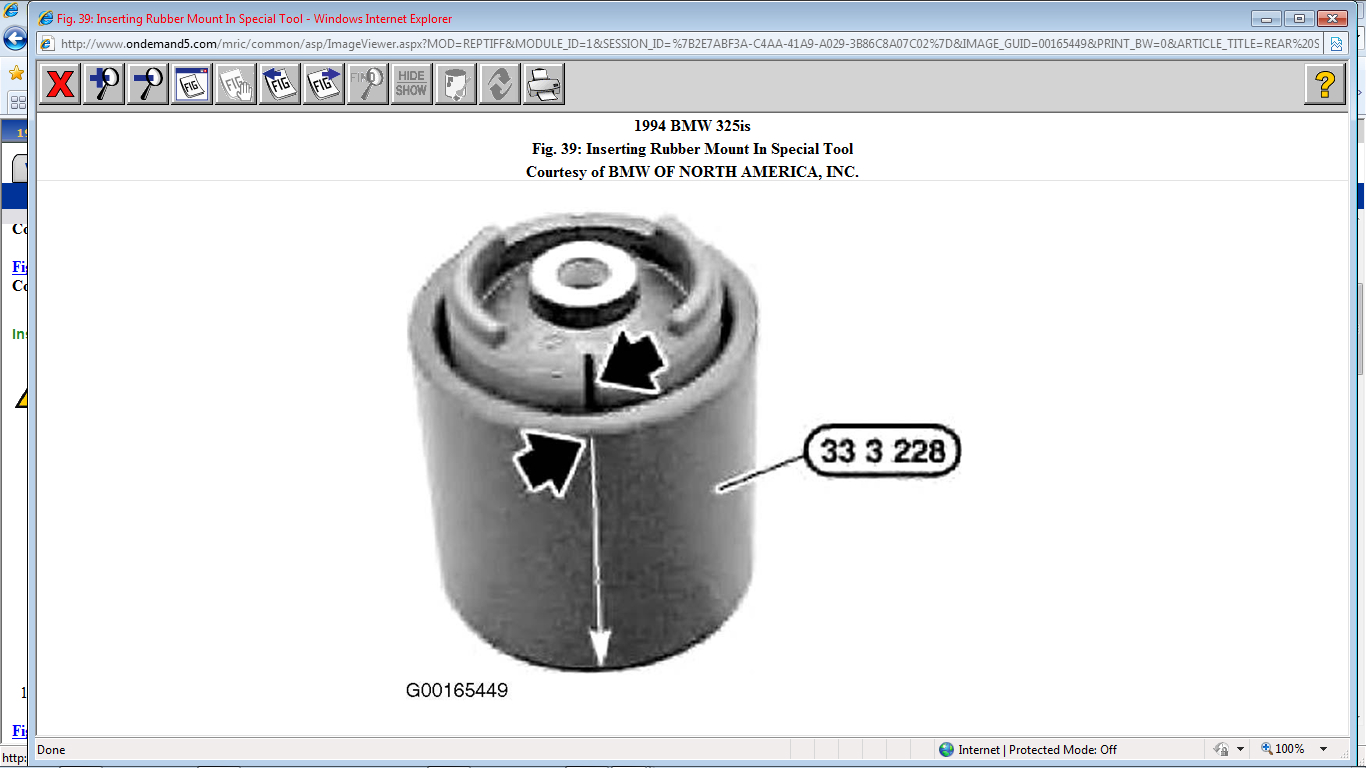
On rubber mount with slot, ensure rubber mount and trailing arm eye are free of grease. One
slot in the rubber mount must line up with the end of the arrow on special tool. Insert rubber
mount in special tool (33 3 228). See Fig. 39 .
3.
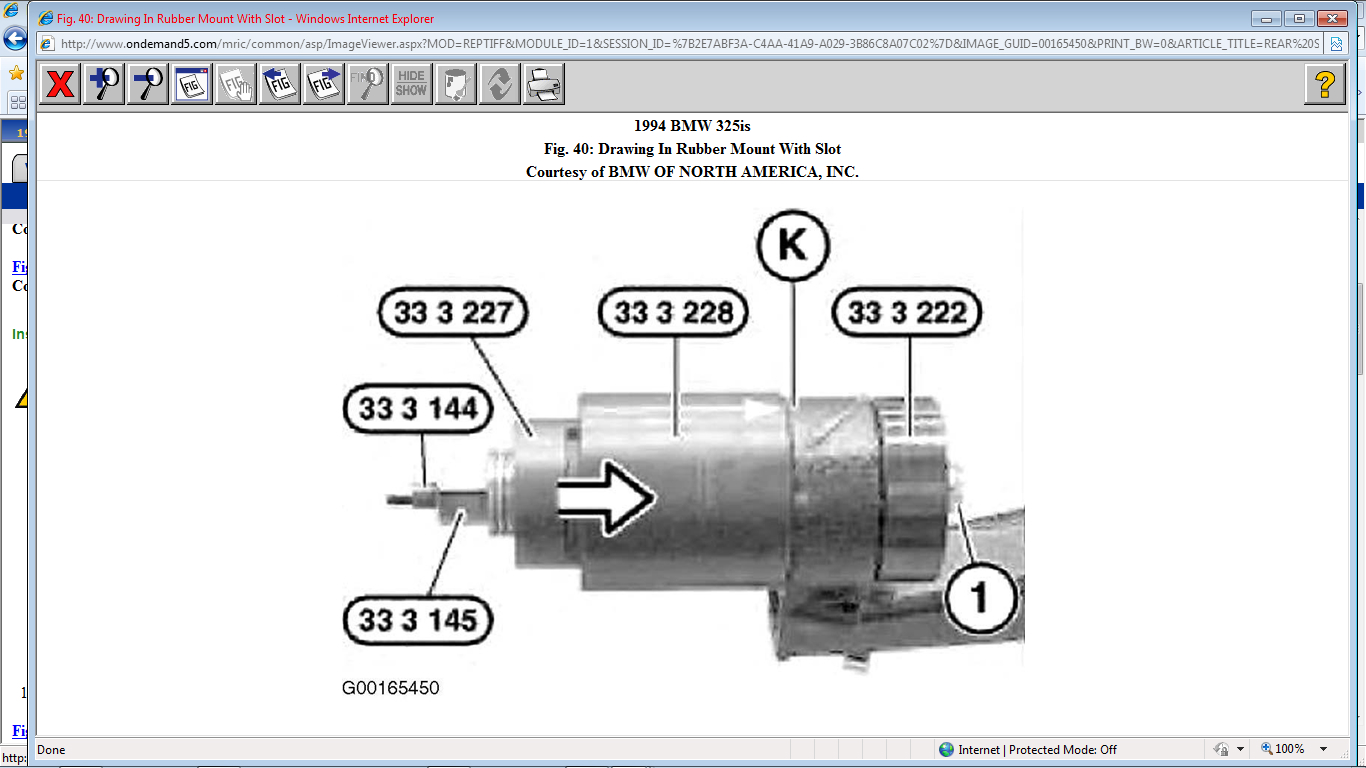
On rubber mount with slot, arrow on special tool must point to colored spot (K). Draw in rubber
mount with special tool (33 3 144/145, 33 3 222/227/228 and 12 mm nut (1) until special tool
(33 3 228) is slack. See Fig. 40 .
4.
On rubber mount with slot, remove special tool. Draw in rubber mount so distance between
arrows is 2.5 mm. See Fig. 41 .
5.
REAR SUSPENSION - REPAIR -1994 BMW 325is Page 1 of 2
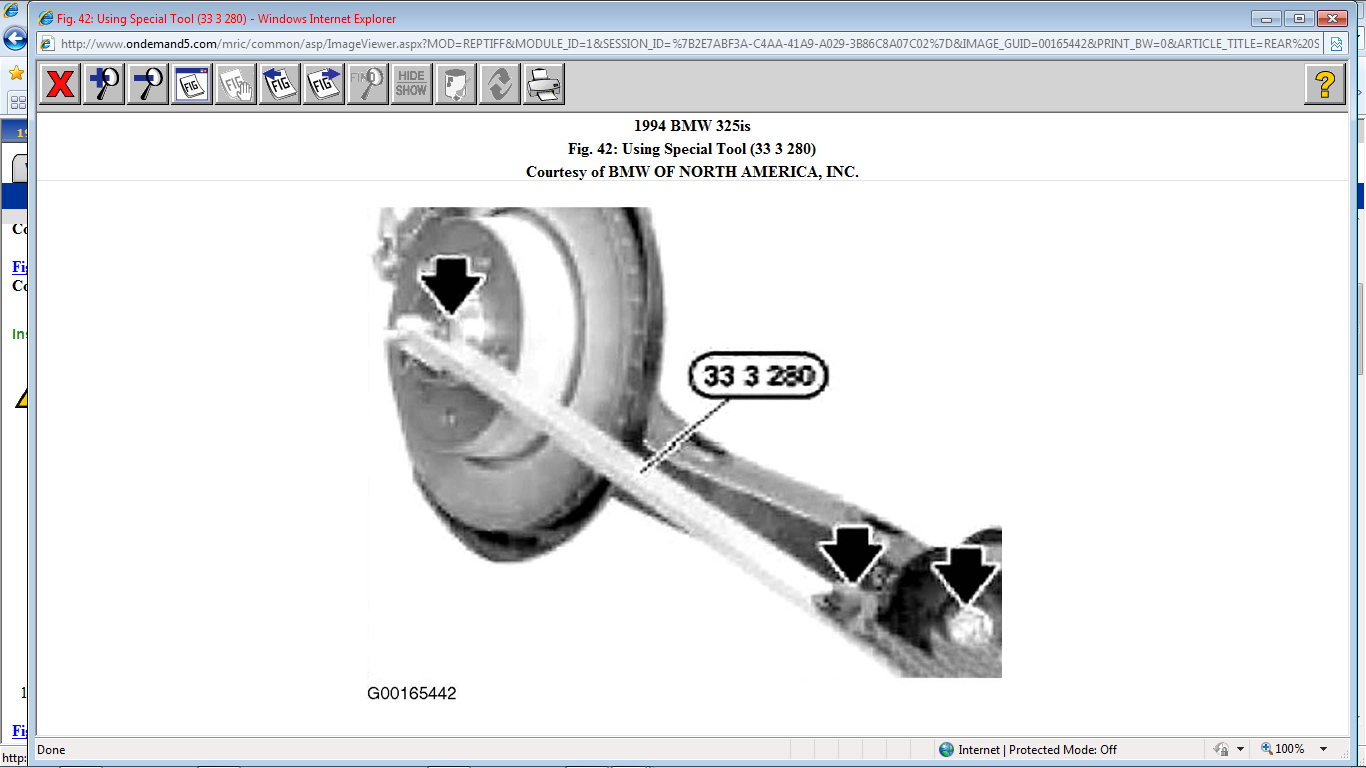
On all rubber mounts, secure special tool (33 3 280) to bearing pedestal with a screw and align
to wheel center. See Fig. 42 .
6.
To install without special tool, align bearing block on center point of wheel with an 8 mm
diameter rod. See Fig. 43 .
7.
Screw bearing pedestal down in this position. Tighten to specification. See TORQUE
SPECIFICATIONS .
8.
9. Install console.
10. Install trailing arm. See TRAILING ARM .
Fig. 37: Identifying Installed Position Of Rubber Mount
Courtesy of BMW OF NORTH AMERICA, INC.
Fig. 38: Drawing In New Rubber Mount
Courtesy of BMW OF NORTH AMERICA, INC.
Fig. 39: Inserting Rubber Mount In Special Tool
Courtesy of BMW OF NORTH AMERICA, INC.
Fig. 40: Drawing In Rubber Mount With Slot
Courtesy of BMW OF NORTH AMERICA, INC.
Fig. 41: Locating Rubber Mount Distance
Courtesy of BMW OF NORTH AMERICA, INC.
Fig. 42: Using Special Tool (33 3 280)
Courtesy of BMW OF NORTH AMERICA, INC.
Fig. 43: Aligning Bearing Block
Courtesy of BMW OF NORTH AMERICA, INC.
© 2008 Mitchell Repair Information Co., LLC.
REAR SUSPENSION - REPAIR -1994 BMW 325is Page 2 of 2
Images (Click to enlarge)
Dec 18, 2011 at 4:53 AM