Ignition problem, no spark to the distributor cap?

Tiny
CJ MEDEVAC
  • MECHANIC
  • 11,004 POSTS
I THOUGHT I THREW THE FUSIBLE LINK THING AT YOU BEFORE

I WAS READING YOUR POST AGAIN--SAW YOU MENTIONED IT AGAIN

READ THE NUMBERED PORTION TOWARDS THE BOTTOM OF "FEB 13" ANSWER AND SEE ITS PICS

https://www.2carpros.com/questions/1984-jeep-cherokee-cj7

LOOK AROUND ON YOUR FIREWALL/ FENDERS, SEE IF YOU HAVE ONE OF THESE (ON AN '83 IT'S SORTA UNDER AND LEFT OF THE MASTER CYLINDER)--TAKE PICS

http://www.autozone.com/autozone/parts/Duralast-Ignition-Control-Module/1982-Jeep-CJ7/_/N-ikzsqZ9n80t?counter=0&filterByKeyWord=ignition+module&fromString=search&itemIdentifier=118422_300759_0_2425

YOUR TURN

THE MEDIC
Was this
answer
helpful?
Yes
No
Thursday, December 8th, 2011 AT 3:48 AM
Tiny
GRIZZLY93
  • MEMBER
  • 68 POSTS
Haven't been able to mess with it the past few day, its been raining here. By the way it looks, I also had thought something with the computer. It is not the ignition control module, I had already replaced that. That's what one of those pictures was of that I posted on here. When you mention about the 79 carter w/o the stepper motor and eliminating the computer, that's what that "nutter bypass" is supposed to do. I had mentioned that close to the beginning. Hopefully weather will clear up for the weekend and ill be able to do a little work on it than. Will keep you posted as time will allow me to work on it.

The first picture is what had been ghetto rigged by the previous owner for the distributor pickup. Tough to tell by the picture, but all 3 of the wires that plug into the pickup had been rewired and were all done in the same color(gray) so I had to trace it back to where I could fine the original colors and plug them into the pickup side plug individually
Was this
answer
helpful?
Yes
No
Thursday, December 8th, 2011 AT 3:39 PM
Tiny
CJ MEDEVAC
  • MECHANIC
  • 11,004 POSTS
A 70s OR 80s FORD VEHICLE IN A AUTO SALVAGE YARD WILL YIELD YOU THE CORRECT HARNESS TO CONNECT THEM TOGETHER

YOU NEED TO INSURE YOU TIE IT WELL IF YOU LEAVE IT THAT WAY

OPT FOR "BETTERMENT", FROM A YARD!

THE MEDIC
Was this
answer
helpful?
Yes
No
Thursday, December 8th, 2011 AT 5:59 PM
Tiny
CJ MEDEVAC
  • MECHANIC
  • 11,004 POSTS
AND YOU ARE WAITING FOR WHAT?

SITTIN' HERE WITH NO ONE TO TALK CJ TO

THE MEDIC
Was this
answer
helpful?
Yes
No
Friday, December 23rd, 2011 AT 3:11 PM
Tiny
GRIZZLY93
  • MEMBER
  • 68 POSTS
Okay so I got it running, I had smacked the carburetor with a hammer a few times hoping to set the floats loose, than ran the fuel lines to a gas jug, cranked it, pumped the gas a few times and VOILA! She fired up, was running on its own. The carburetor isnt perfect, but good enough for now just so I know it runs. I was able to semi-test the transmission, I know 1st and reverse works from up and down the driveway. The second picture will show you why I didnt feel comfortable going around the block. Thats my current "gas tank"

i made a trip to a junkyard which is known for having a jeep inventory but they didnt have a single one. They told me theyve been crushing anything older than 1990 lately. So I got screwed for that. I have to order the gas tank and all relating components and still try to find a junkyard where I can find that harness connector.

The third picture, is something ive been trying to figure out since I got it. I originally thought that was the ignition control module, but thats on the other side. This picture is passenger side, directly next to the starter solenoid.
Was this
answer
helpful?
Yes
No
Tuesday, December 27th, 2011 AT 6:43 PM
Tiny
CJ MEDEVAC
  • MECHANIC
  • 11,004 POSTS
OK

I SORTA ALREADY HAVE HALF-HEARTEDLY BEEN LOOKING FOR THAT TOO--NEVER SEEN IT BEFORE---YOU DID SAY THAT THERE IS A SEPARATE IGNITION MODULE FROM THIS THING---IT IS WIRED LIKE MY PIC FROM DECEMBER 8?

JUST TO SEE IF YOU ARE ON YOUR TOES---DID I GIVE YOU A LINK TO A THE FACTORY SERVICE MANUAL?

DO YOU WANT IT?

I HAVE THE 1979 AMC JEEP PAPER MANUAL---IT IS THE MOST INFORMATIVE BOOK I HAVEIT IS IDENTICAL TO THE '79 AT THE SITETHEY HAVE SEVERAL OTHER SURROUNDING YEARS AT THE SITE

I WISH THIS HAD BEEN OBTAINABLE TO ME YEARS AGO!

LET ME KNOW

THE MEDIC
Was this
answer
helpful?
Yes
No
Tuesday, December 27th, 2011 AT 7:21 PM
Tiny
CJ MEDEVAC
  • MECHANIC
  • 11,004 POSTS
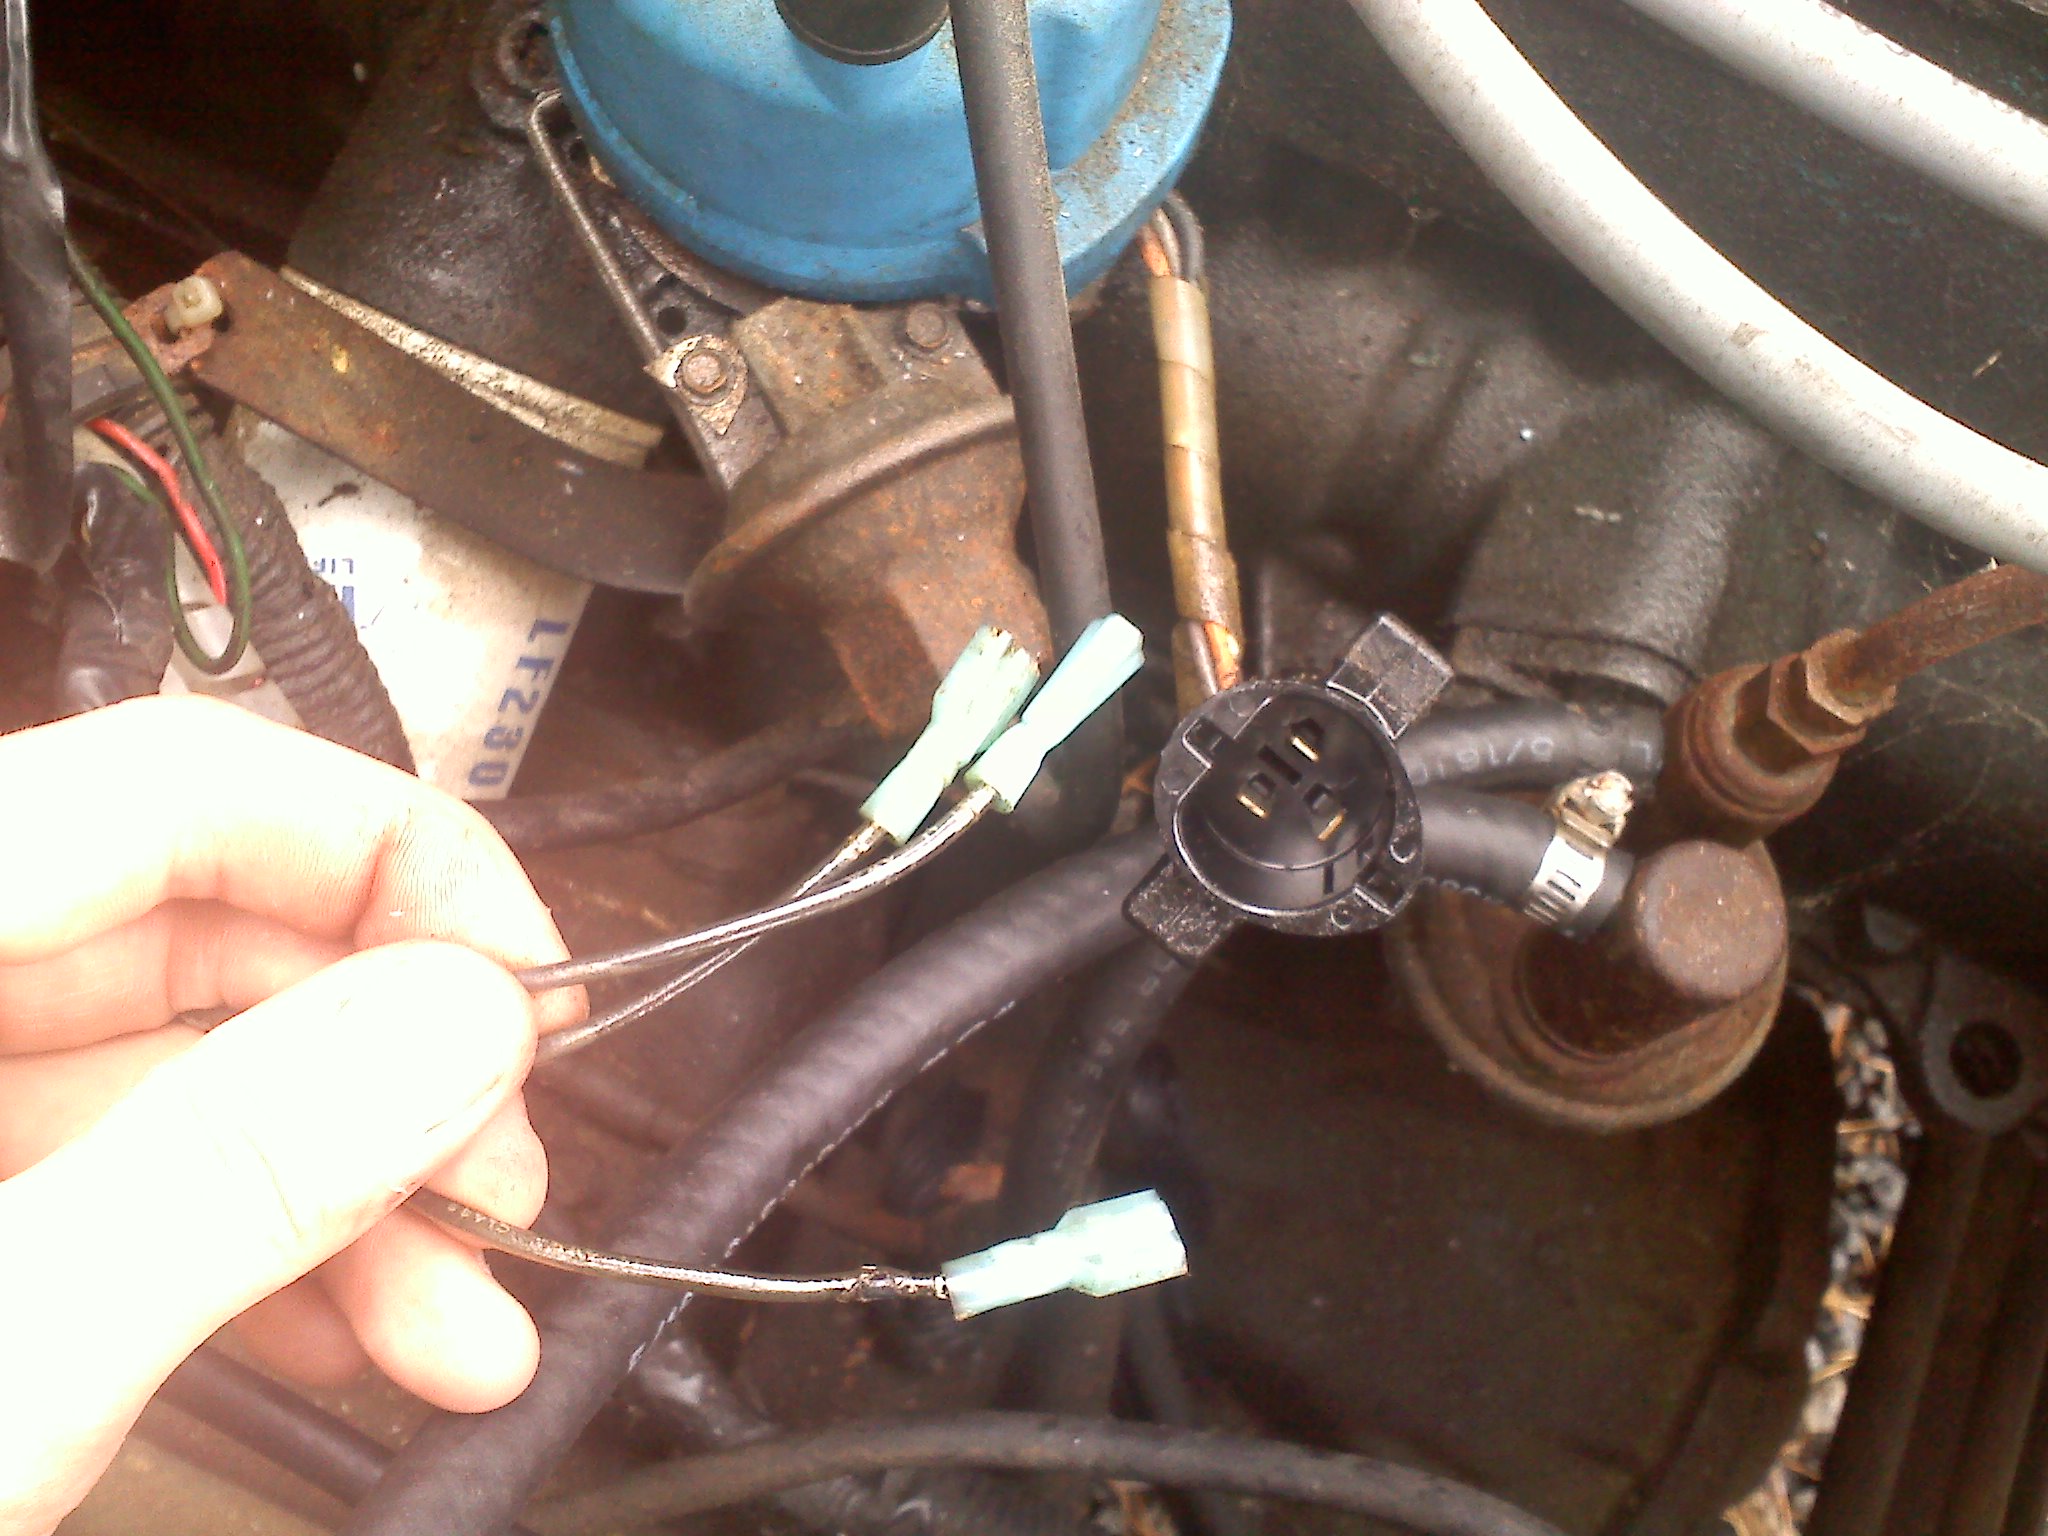
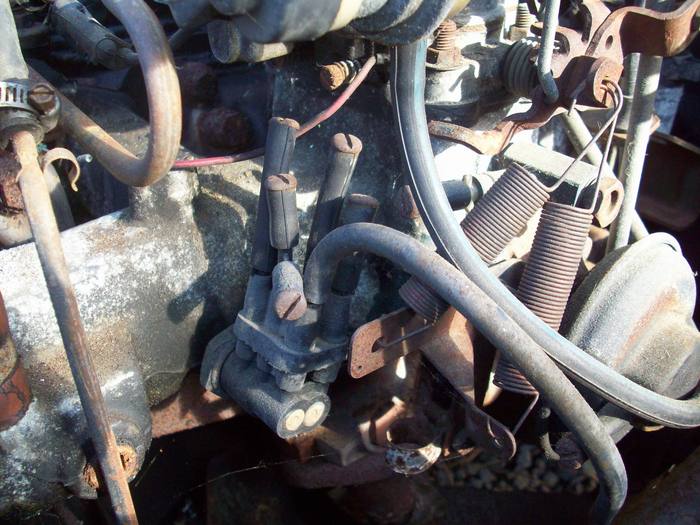
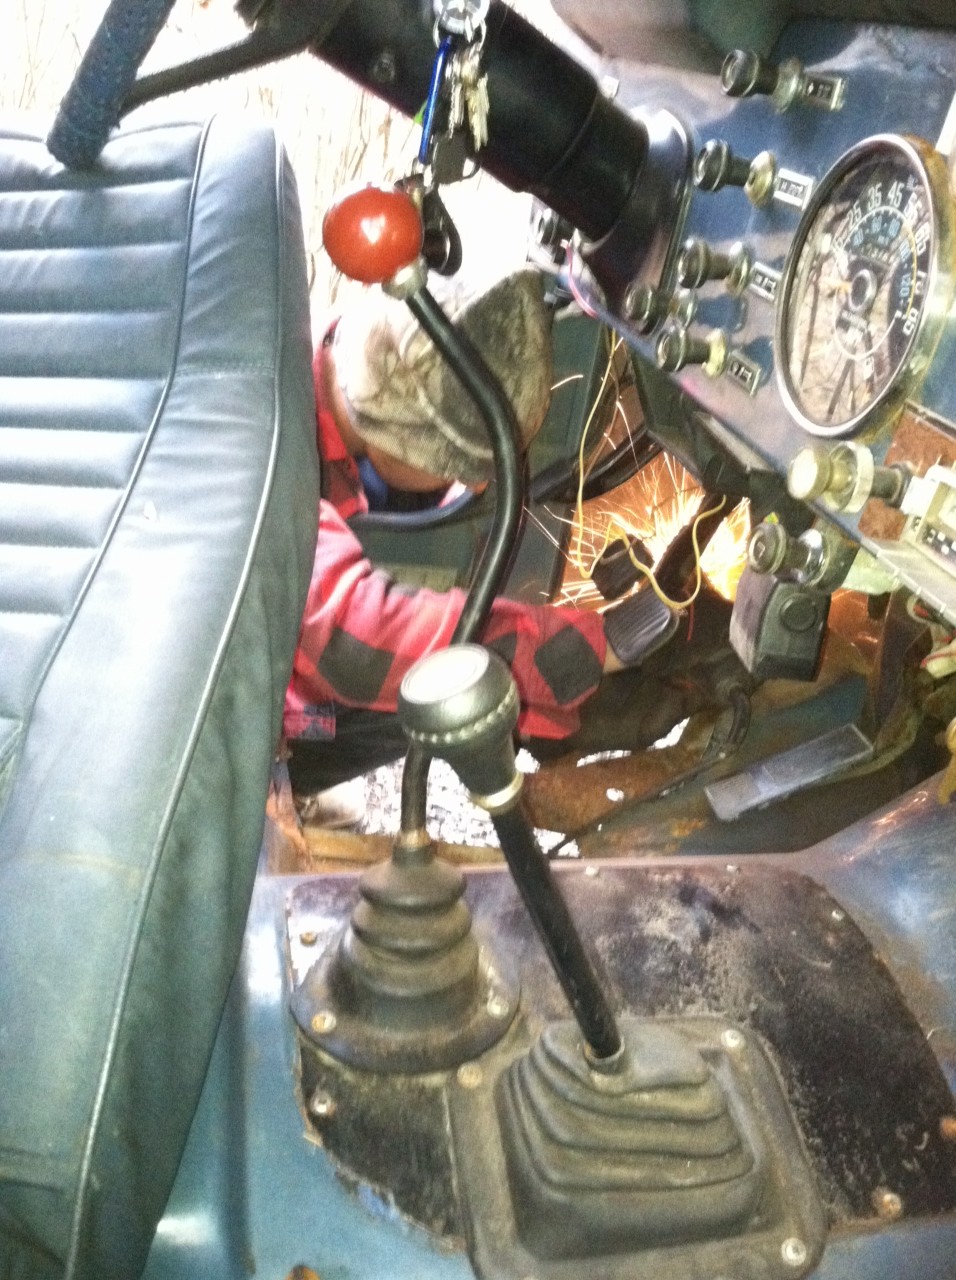
AFTER PULLING MY HAIR OUT, LOOKING MANY PLACES FOR THE MYSTERY BOX SINCE THE WIRING LOOKS TO BE FACTORY GOING INTO THE WIRE LOOMS---YA RECKON THAT'S A EARLY "ECM" OR CALIFORNIA STANDARDS?

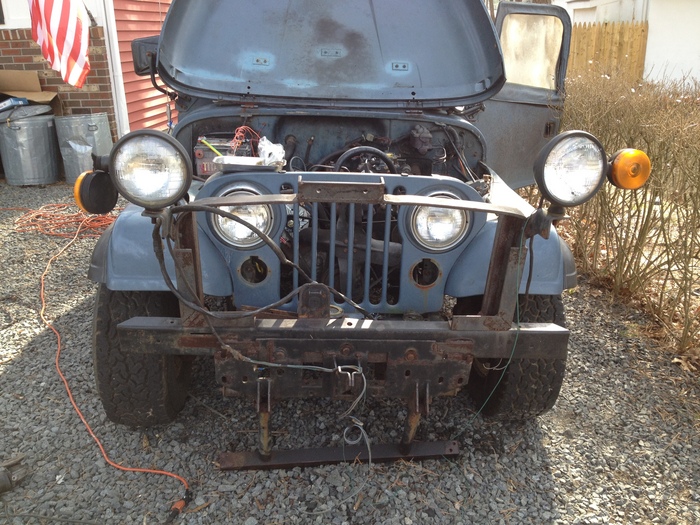
TO MAYBE RULE IT OUT---NORMALLY ON A LATER CJ, THE ECM IS UP UNDER THE PASSENGER SIDE DASH UP IN AROUND THE HEATER BOX---DO YOU SEE A MASS OF WIRES AND AN ALUMINUM BOX UP UNDER THERE?

IF YOU ARE EMISSIONS TESTED IN YOUR AREA--I CANNOT SEE THIS PASSING W/ ALL OF THE OVER THE YEARS MODIFYING AND ELIMINATIONS THAT IT COULD PASS.

IF YOU ARE NOT TESTED, MY BELIEF IS IF YOU CAN MAKE IT RUN AS EFFICIENTLY AS POSSIBLE, YOU ARE AT LEAST TRYING TO BE "GREEN"

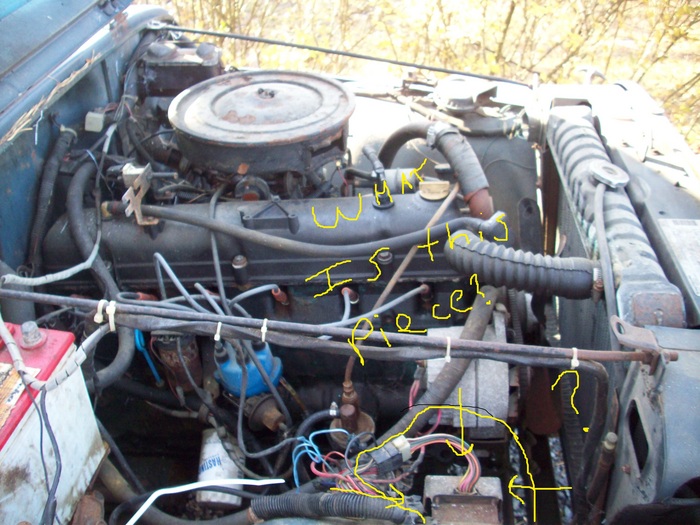
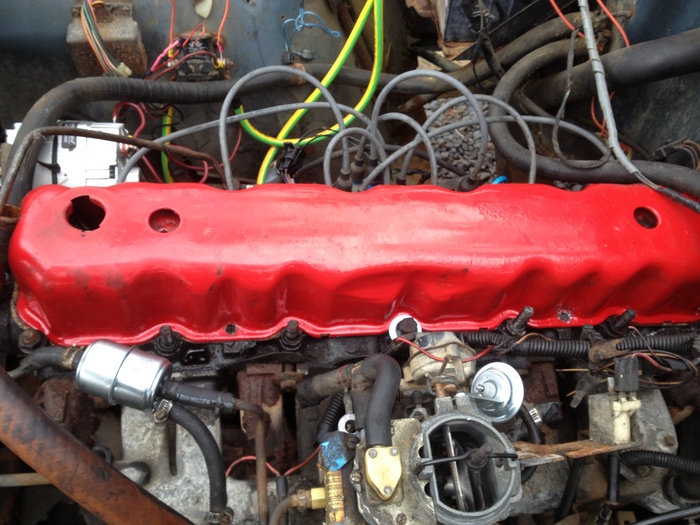
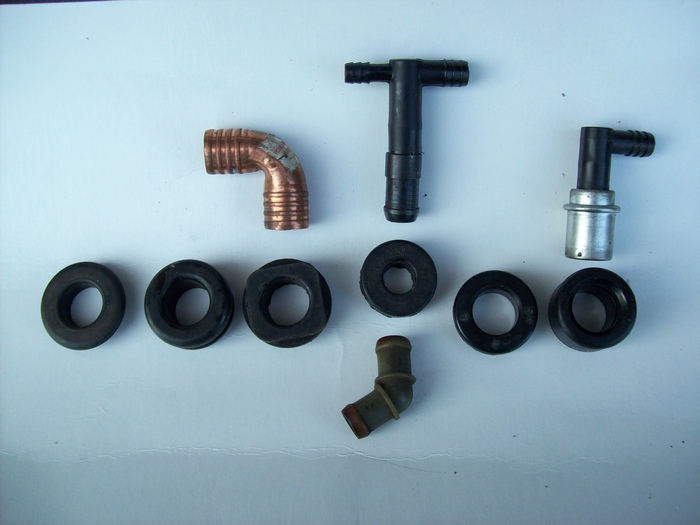
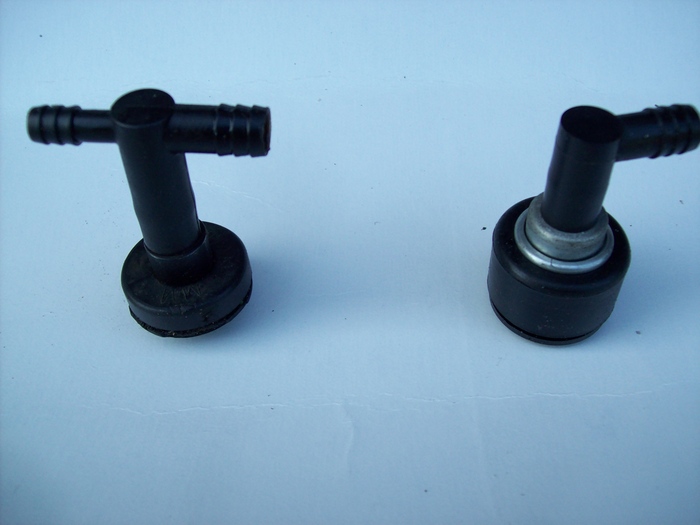
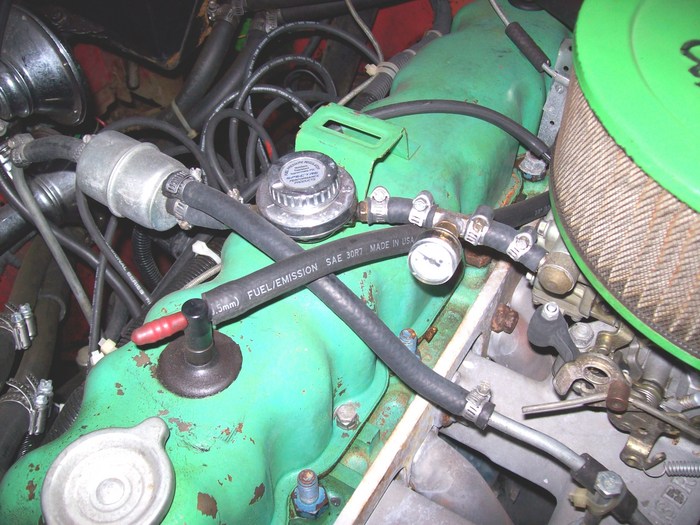
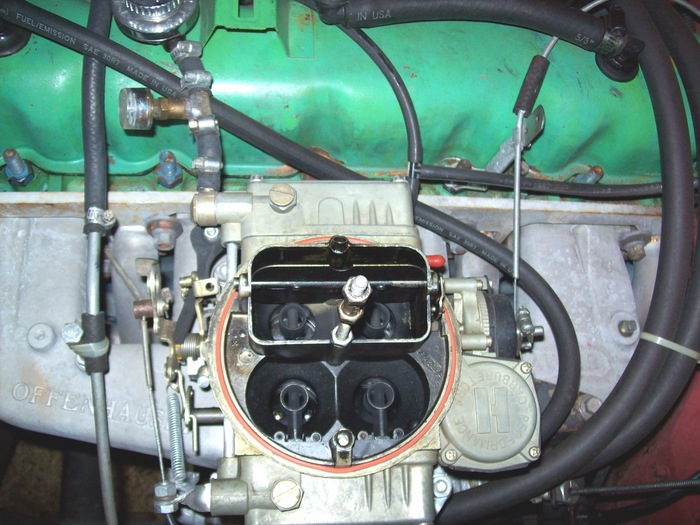
YOU ONLY NEED 2 VACUUM LINES TO MAKE IT RUN WELL--3 IF YOU KEEP THE EGR HOOKED (IT IS NOT NECESSARY, AS HEADERS WOULD COMPLETELY ELIMINATE IT) ---EVERYTHING ELSE CAN BE CAPPED OR PLUGGED

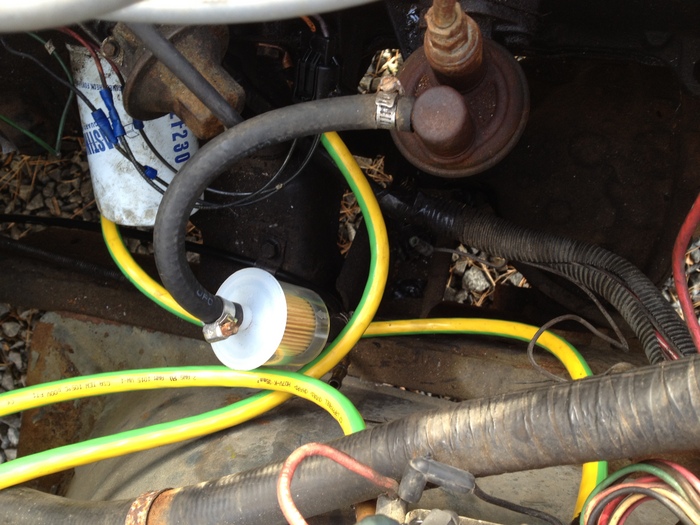
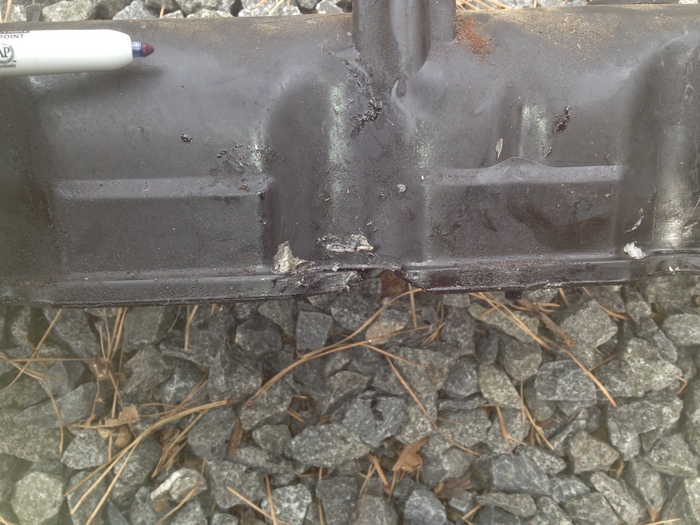
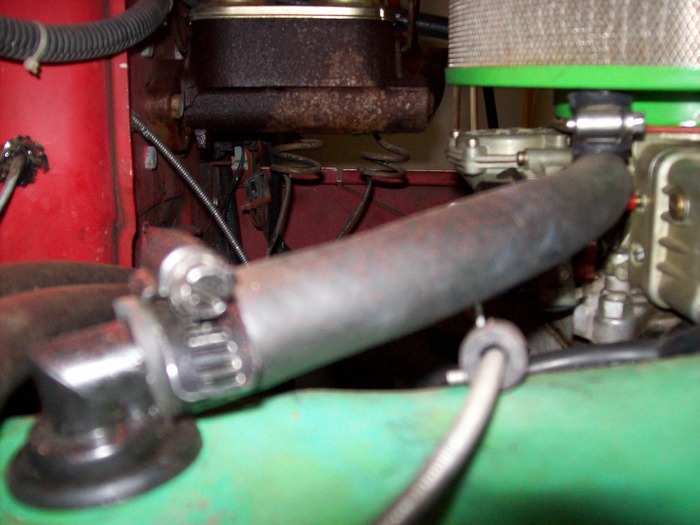
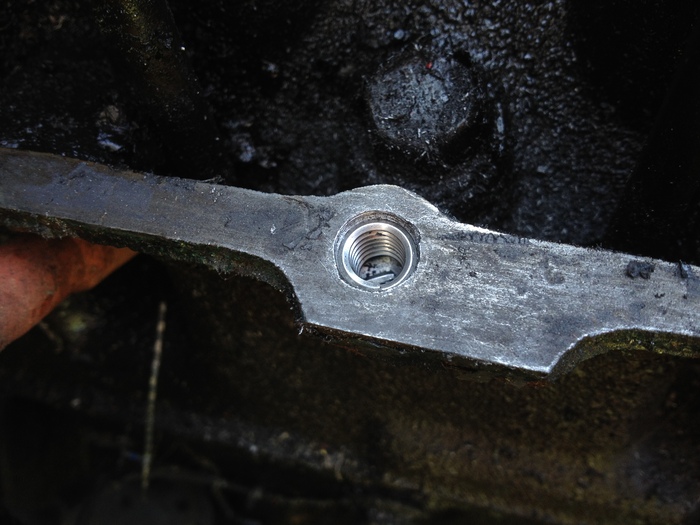
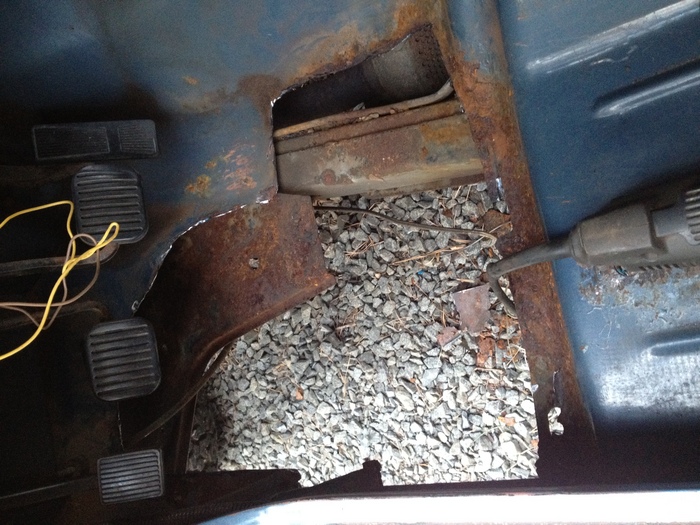
THAT LITTLE FOREST OF VACUUM LINES YOU GOT PLUGGED W/ SCREWS COULD BE COMPLETELY SCREWED OUT OF THE INTAKE AND A BRASS OR STEEL PLUG INSTALLED IN THE HOLE. WITHOUT A FURTHER BACK PIC, LOOKS LIKE THE REMAINING LINE IS TO THE EGR

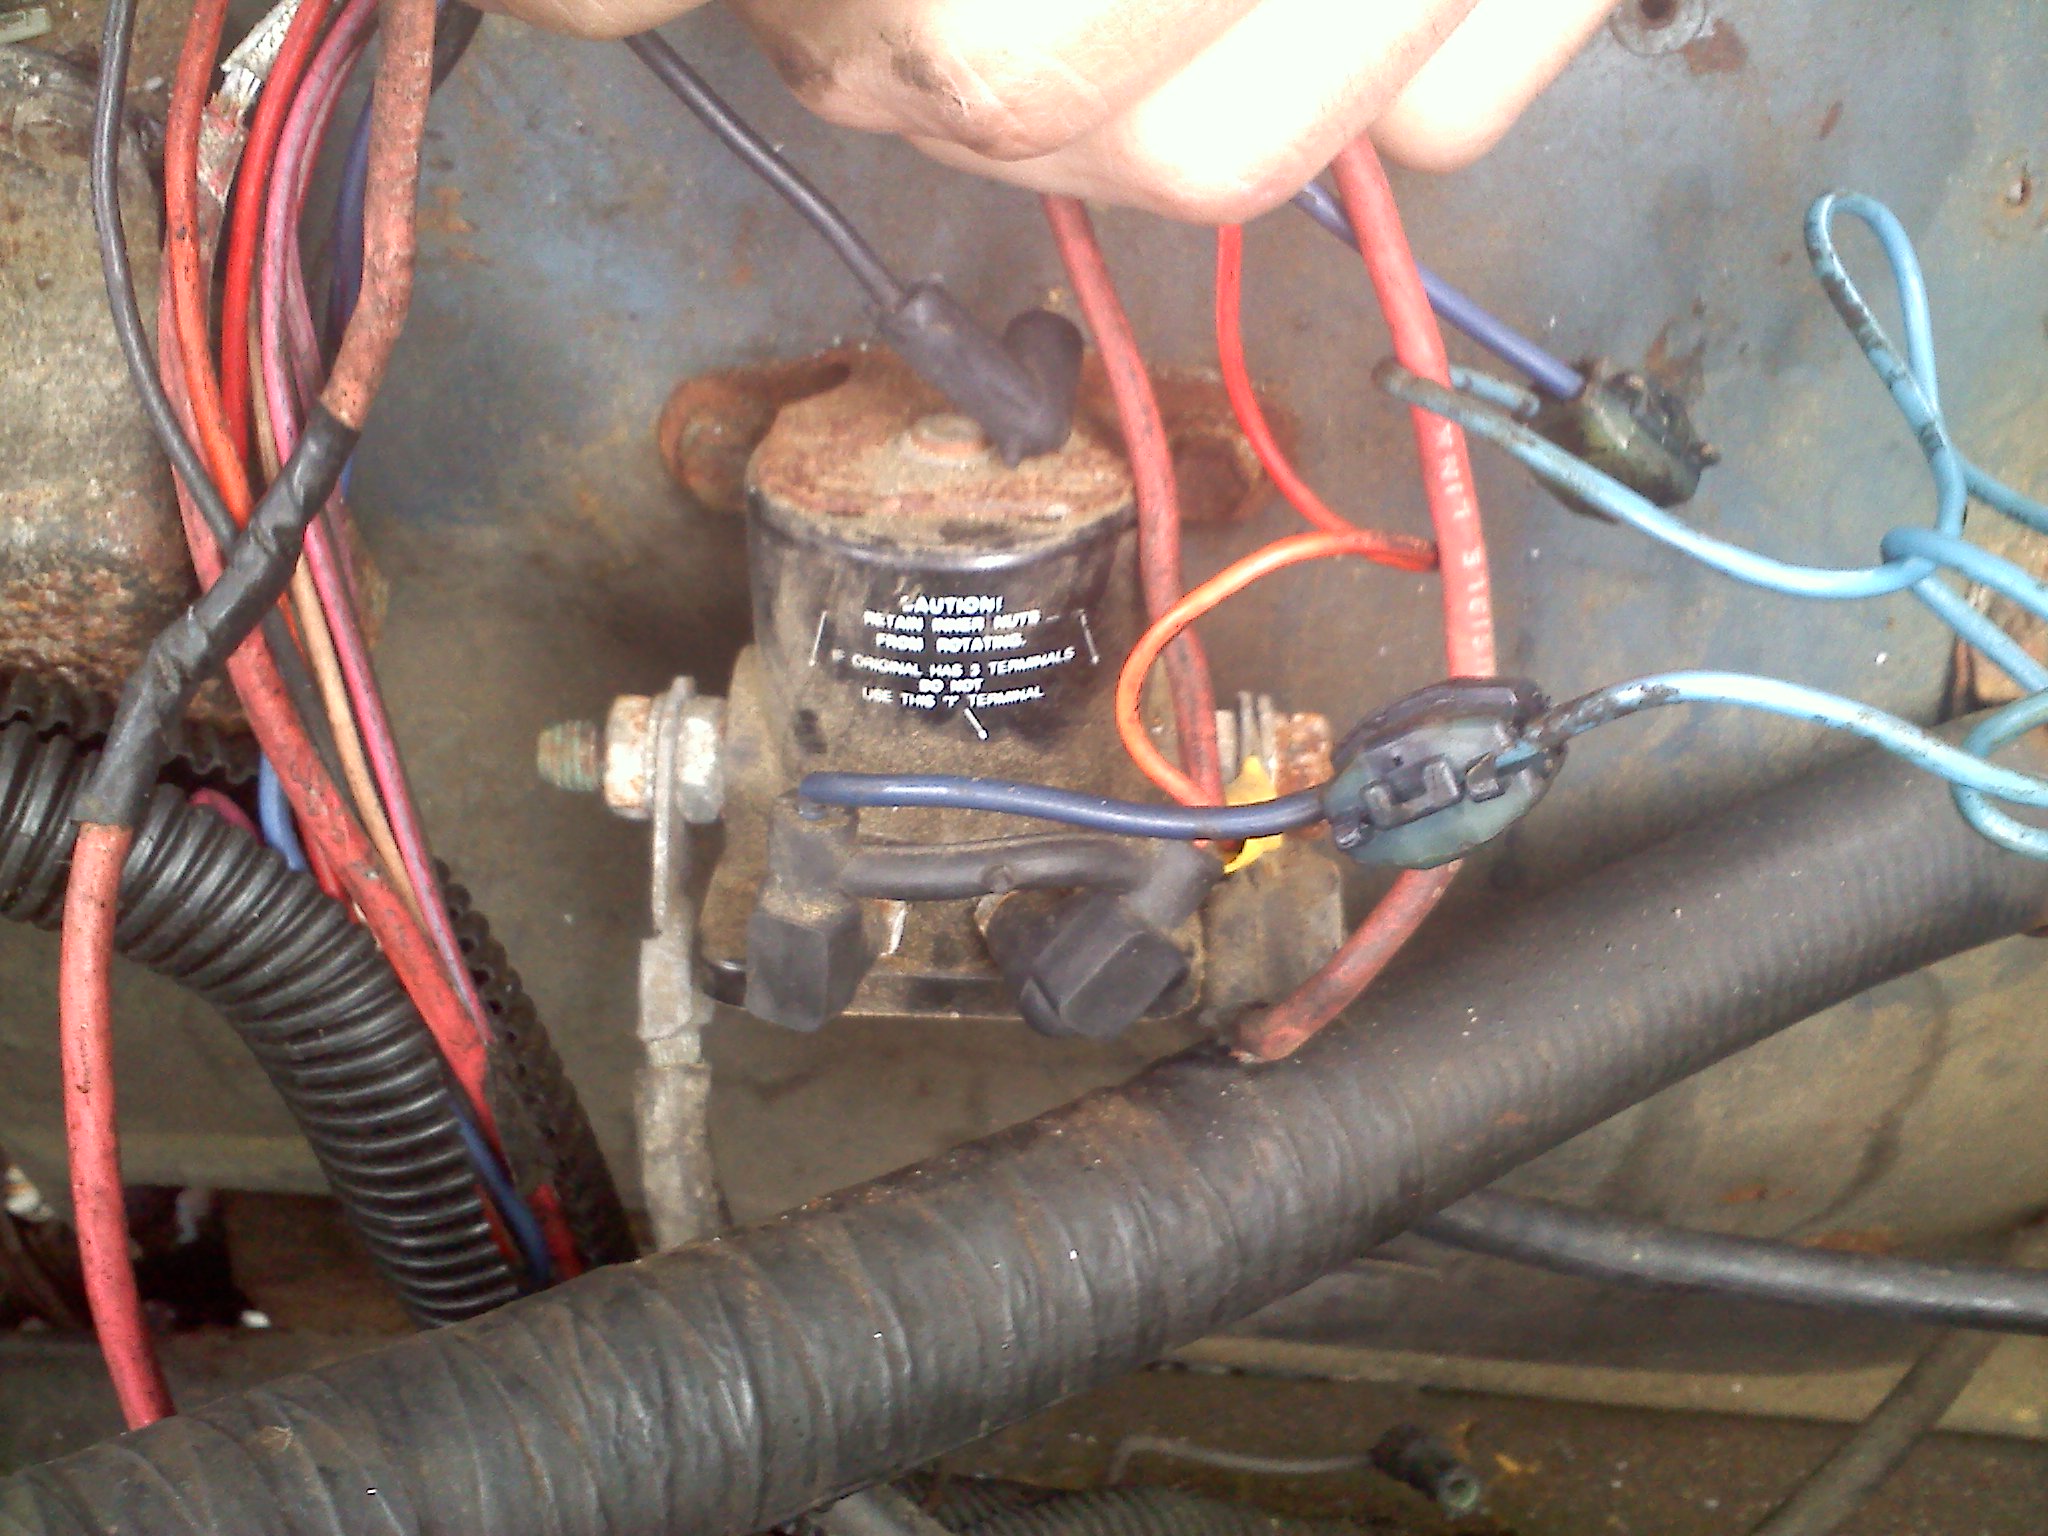
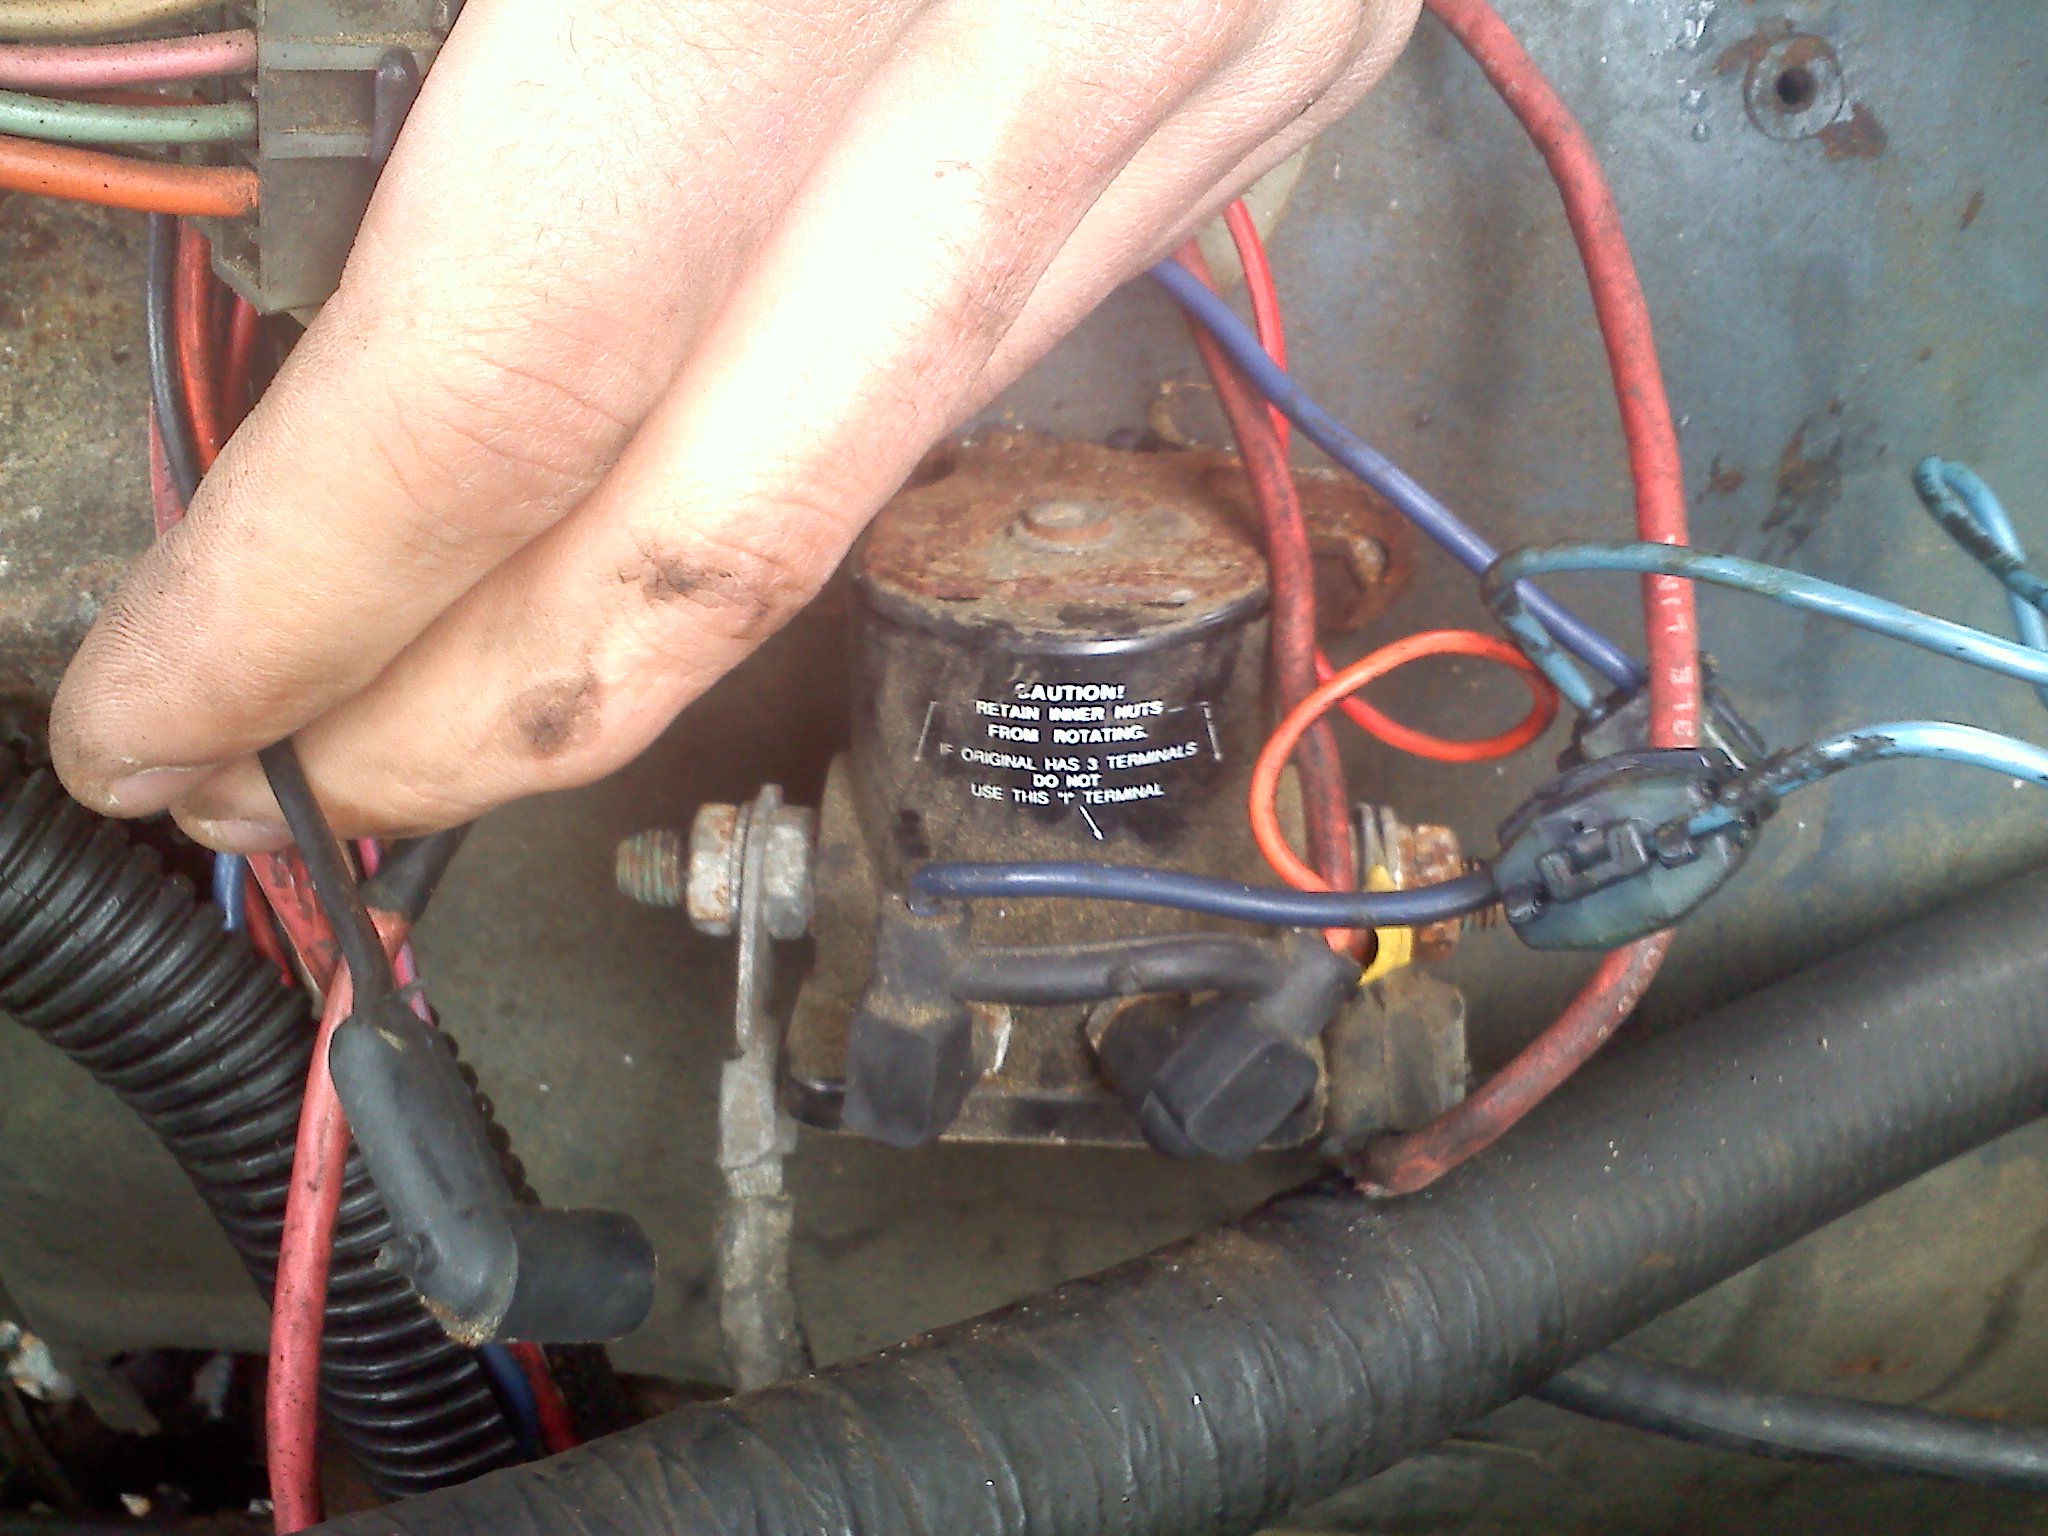
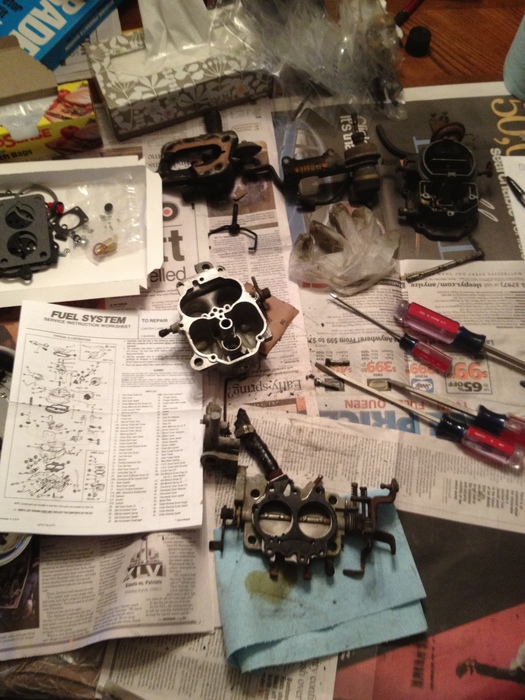
THE '79 CARB I MENTIONED ON DECEMBER 6 WOULD ELIMINATE THE (PROBABLY INOPERABLE STEPPER) COMPUTER CARB YOU MAY HAVE NOW---WITH SO MUCH OF THE STUFF DISABLED

THAT CARB IS MOST LIKELY NOT DOING WHAT IS WAS INTENDED TO DO, AND THE ADDITIONAL STUFF THAT WAS INCORPORATED IN (FROM A '79) USUALLY DON'T MOVE AFTER THIS MANY YEARS. THE '79 IS SO MUCH SIMPLER TO ADJUST/ REBUILD/ AND YOU WON'T HAVE TO REDO THE WHOLE JEEP TO MAKE IT WORK, THE BBD WORKED FINE ON THE JEEP YEARS BEFORE THEY TRIED TO MAKE IT GREENER

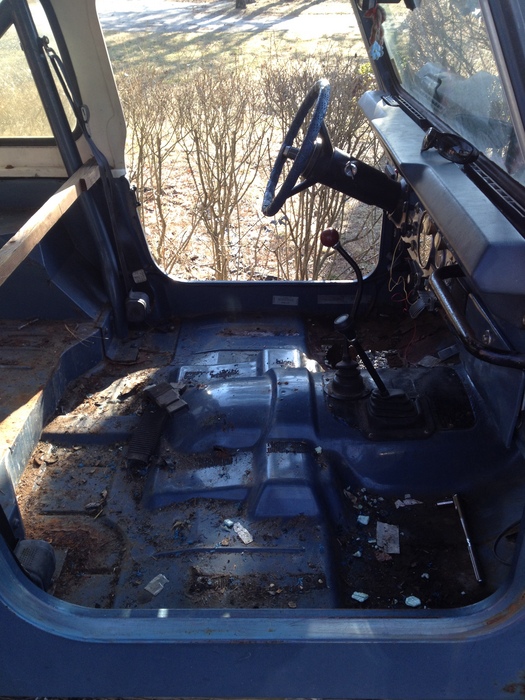
STILL AIN'T GOT THE GAS LINES FIGURED OUT?

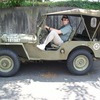
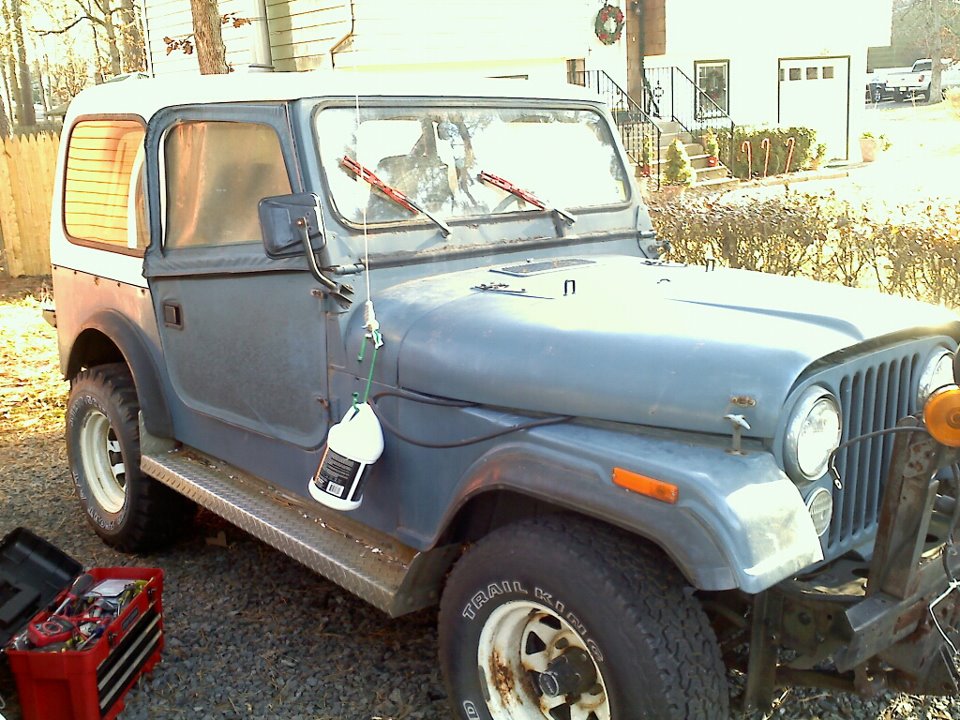
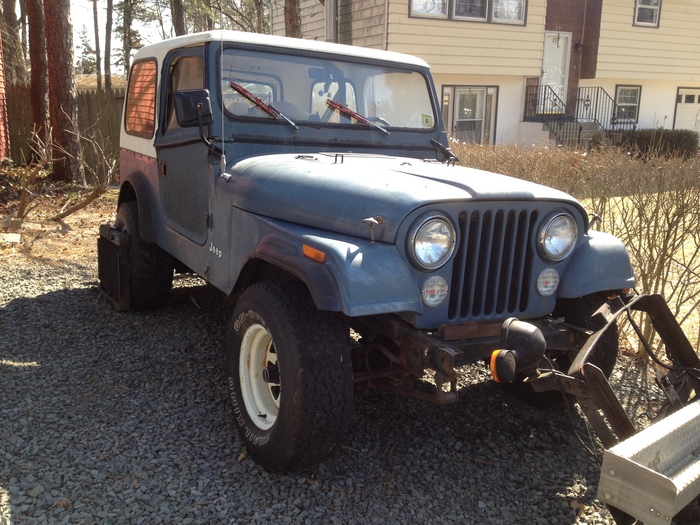
IN YOUR PRESENT CONDITION, I'D SAY YOU MIGHT GET 10 MPG WITH YOUR PASSENGER DOOR TANK!

THE MEDIC
Was this
answer
helpful?
Yes
No
Wednesday, December 28th, 2011 AT 2:23 AM
Tiny
GRIZZLY93
  • MEMBER
  • 68 POSTS
Phew. Long update. Been workin on it as fast as the money comes in. Gas tank is all figured out and installed, all new fuel lines also. Ran nylon fuel lines through the frame, supply and return. Replaced all rubber fuel line between the fuel pump and carb. Added an inline fuel filter between the new fuel line and the pump to catch and junk that might have been in the replacement tank since it was a used one. Thres some gas in it, hooked up the jumper cables and it fired up. The carb was really rough, so I ordered a rebuild kit and went to town with it. The alternator was bad so I replaced that also.

The "rebuilt" carb was placed on there last night, but I didnt mess with it past that. Went to replace the valve cover gasket this morning because it was leaking oil and it turns out the valve cover was actually cracked. Explained all the RTV that the previous owner had put over an area of the valve cover. Have to find another one before I can get it running again.

Last time I had it running(rough) I had to drive it around the block to help motivate me to finish it. Lol. It got all the way around a time or two before I called it quits since its not registered or insured.

The front end wiring is completely chopped to pieces because the P.O. Had rigged it up for a plow and that was his primary use of the jeep, so tracing and replacing to get it straight should be fun.

First pic shows the fuel filter. Also you can see what I meant awhile back by the P.O. Had rigged his own wires to the distributor pickup. They're the grey wires directly above the oil filter. And my homemade green/yellow battery cables.

2nd pic is the fuel lines fished through a crossmember into the frame than ran up to the front of the jeep. And the fresh new alternator.

4th is the complete teardown of the old carb. The thing was reallllly nasty inside.

And the last one is the cracked valve cover.
Was this
answer
helpful?
Yes
No
Thursday, February 9th, 2012 AT 3:43 AM
Tiny
CJ MEDEVAC
  • MECHANIC
  • 11,004 POSTS
KEEP THE UPDATES COMING

I HAVE TALKED TO 3 OTHER JEEP PEOPLE, YOUR "MODULE" IS SOMETHING NONE OF US HAS SEEN BEFORE. BY CHANCE, IS THIS ORIGINALLY A CALIFORNIA JEEP?

WHY SO MUCH HOSE AT THE FUEL PUMP?

JUST SO YOU HAVE SOME GOOD SOURCES FOR PARTS---MAYBE GET YOU AN ALUMINUM VALVE COVER FROM ONE. GIVING YOU SEVERAL LINKS.

KEEP IT UP--STAY MOTIVATED!

THE MEDIC
Was this
answer
helpful?
Yes
No
Thursday, February 9th, 2012 AT 4:10 AM
Tiny
GRIZZLY93
  • MEMBER
  • 68 POSTS
I know somebody who has a IH scout with the same motor that he converted to fuel injection by putting in the intake manifold up from a 4.0 jeep engine. And he also put on a different valve cover so he has his old one for sale for dirt cheap. Any idea if the bolt pattern on the valve cover would be different from a scout to a jeep even though it is the same motor?

No way this is a california jeep. It still has the dealer emblem on it and it was orignally purchased in PA. Im only the 2nd owner.

Ill try to further trace the wires from that module to see where they go to. Maybe that would help identify what it is.
Was this
answer
helpful?
Yes
No
Thursday, February 9th, 2012 AT 4:28 AM
Tiny
GRIZZLY93
  • MEMBER
  • 68 POSTS
Gonna check the one that the guy I know is selling first. If its identical I'll scoop that one up and slap it on there. If not I'll do some late night bidding on eBay. Thanks for the links. Will probably get to work on it this weekend as long as the weather holds out. Will keep you posted! Thanks for the links.

-Jr. Jeeper
Figured the name should fit well
Was this
answer
helpful?
Yes
No
Thursday, February 9th, 2012 AT 5:00 AM
Tiny
GRIZZLY93
  • MEMBER
  • 68 POSTS
Alright medic! Slight update. Got the valve cover and did a little slioght prep work to it. Had to change the studs for the valve cover. Its slightly different but fits and works nonetheless.(With the aid of some RTV) the valve cover kept hitting the upper radiator hose and started tearing through it and it was leaking to avoid it going into the engine I had to do a little workout to run and grab a drain pan and empty my radiator and remove both upper and lower rad. Hoses to get the valve cover to snug in place. Planned on replacing them either way, this just helped me get to that point faster.

After the valve cover was all said and done I was finally able to test the effectiveness of my self taught carb rebuild, which worked magnificently! It high idled normally and kept going when I kicked it down to low idle. Made that $13 rebuild kit worth the time. Now its time to do an entire fluid change. Engine oil/ diff's/ t-case/ tranny/ etc. I discovered something else though. The place where the vent connects to the front diff is actually broken off. Any idea on how easy, or not so easy of a fix that'll be? Havent snapped any pics of that yet but can tomorrow if you need to see it? Let me know so I can ge them for you! Thankyou!
Was this
answer
helpful?
Yes
No
Sunday, February 19th, 2012 AT 4:15 AM
Tiny
CJ MEDEVAC
  • MECHANIC
  • 11,004 POSTS
LOOKING LIKE YOU'RE DOING SOMETHING NOW!

GLAD CARB IS COOPERATING

THE DIFF VENT IS JUST SORTA PRESSED IN, GET YOU A HEAVY, FINE THREADED HEX-HEADED SCREW THAT IS TAPERED (AN AUTOMOTIVE HARDENED TYPE) NOT LIKE A LAG BOLT) SCREW IT IN GOOD AND TIGHT, JUST INTO THE INNER HOLE...NO NEED IN FORCING IT WAY IN. THEN USE A SMALL CROW OR FLAT BAR TO PRY ON THE SCREW HEAD UNTIL YOU REMOVE WHATS LEFT OF THE BROKEN PIECE.

AS FAR AS REPLACEMENT, YOU CAN SURELY ORDER A NEW ONE, OR FIND A THREADED BARBED MALE HOSE ADAPTER THAT MAY BE CLOSE

I HAVE MADE THEM (AND OTHER STUFF) WITH BRASS FITTINGS---MALE PIPE THREADS ON ONE END, BARBED HOSE FITTING ON THE OTHER. I CHUCKED UP THE BARBED END IN MY DRILL--ANCHORED IT IN A VISE, LOCKED THE DRILL "ON". THEN WITH A GRINDER/ DREMEL TOOL, I GROUND THE PIPE THREADS OFF AND SLIGHTLY TAPERED IT, UNTIL IT WAS THE RIGHT SIZE AS THE PART SPUN IN THE DRILL.

JUST TO BE DEAD ON RIGHT, THE LITTLE OUTLET ON THE FUEL FILTER SHOULD BE TURNED STRAIGHT UP, SO IT IS THE HIGHEST POINT (THE ONE FOR THE RETURN)

THIS IS YOUR PCV--PLUG THE LITTLE END WITH THE INSIDE PLUG THAT SHOULD COME WITH IT

http://shop.advanceautoparts.com/webapp/wcs/stores/servlet/product_PCV-Valve-Purolator_5851556-P_5_R%7CGRPFILTAMS_____

AS FAR AS THE GROMMETS--I USUALLY TRY TO USE THE TALLER TIGHT FITTING ONES--SOMETIMES I CAN'T FIND THEM AND "SETTLE" FOR LESS---I'LL SEND YOU SOME PICS OF WHAT I HAVE AND USED IN THE PAST, TILL I GOT THE TALLER ONES.

IMMA PLUMBER, ON THE FRESH AIR END, I'VE USED "PEX" COPPER WATER ELBOWS (3/4") TO MAKE NICE TURNS (THERE'S ONE IN MY PICS)

LET ME KNOW MORE OF YOUR PROGRESS---I STILL HAVE NO IDEA WHAT THAT BOX IS---COULD IT BE AN EARLY VERSION OF THE COMPUTER (LATER UNDER THE PASSENGER DASH?)

THE MEDIC
Was this
answer
helpful?
Yes
No
Sunday, February 19th, 2012 AT 6:00 AM
Tiny
GRIZZLY93
  • MEMBER
  • 68 POSTS
Alright, update time! Been working all day today.

Started off with removing the plow frame on the front, grinded off the small weld line, than smacked it a few times and lifted it off. That thing was heavy. Especially when I threw it down and the bar landed on my foot. Probably about 200 lbs landing on my foot. I turned into a sailor and said some really disturbing things. Haha. But that got done.

Than I had to change the valve cover gasket to fit the valve cover. And there was a slight problem last time I worked with the valve cover. One of the studs had popped out while tightening it, ended up stripping the threads in the head. So I went out and bought a heli-coil and did that while the valve cover was off. Worked like a charm.

Than my parts came for the front turn signals, the entire assembly which I discovered was rotted through the other day. So I swapped them in, and put in the new radiator and hoses. Some fresh coolant, a few pumps of the gas and a turn of the key and it fired right back up again!

Also got started on ripping everything out of the inside, seats and all. Floor is lookin pretty good. The driver side floorpan to replace, and plan on doing herculiner on the entire floor.

BUT, like always, I discovered another problem. There seems to be some kind of wiring issue with the turn signal/running lights. When the headlight switch is pulled out, so that the headlights are on, none of the running lights come on: front or rear. With headlights on, and I switch the turn signal, whichever way its turned the front and rear lights turn on solid. Same for right/left turn signal. BUT when I hit the hazard lights, both front and rear will blink.? I havent got a clue. Medic, I need your expertise on this one! Any ideas on what it could be?
Was this
answer
helpful?
Yes
No
Thursday, February 23rd, 2012 AT 3:10 AM
Tiny
CJ MEDEVAC
  • MECHANIC
  • 11,004 POSTS
GET MY EMAIL?

THE MEDIC
Was this
answer
helpful?
Yes
No
Friday, February 24th, 2012 AT 5:20 AM
Tiny
GRIZZLY93
  • MEMBER
  • 68 POSTS
Yes I did. I ran some tests like you mentioned. I cleaned up the connections on the flasher and now the turn signals work, hazards work, and headlights. I do not have running lights with the headlights on. I figured it was a bad terminal on the headlight switch so
I ordered a new one. Gonna try it out tonight when I get off of work. My list is getting shorter. The 3 primary things left are to fix the floor, fix the brakes, I think they might need new wheel cylinders cuz the back one are leaking, and to be bled. Also I want to do an entire fluid change; diffs, tranny, t-case etc. Already did the engine oil, power steering pump, and radiator. Carb is still working nice as of now. Just want to adjust the idle screws. Seems to idle really high.
Was this
answer
helpful?
Yes
No
Friday, February 24th, 2012 AT 6:30 PM
Tiny
CJ MEDEVAC
  • MECHANIC
  • 11,004 POSTS
USE A TACH DWELL TO ADJUST CARB, BASICALLY PEAK THE RPMS (TO ME, THIS IS EZer TO DO THAN USING A VACUUM GAUGE TO ADJUST THEM. SEE "OCTOBER 25" ON THIS POST

https://www.2carpros.com/questions/1978-jeep-cj7-need-help-getting-started-start-on-troubleshooting

AS FAR AS THE DIFFS, S.UCKING THEM OUT...JUST DON'T GET THE CRAP AND WATER OUT OF THE BOTTOM, I DON'T CARE WHO YOU ARE! THAT'S WHAT NEEDS TO BE GONE....REMOVE THE COVERS AND DRAIN IT COMPLETELY, AS THE AMC JEEP FACTORY SERVICE MANUAL DESCRIBES

ONE OF THEM "INFANT SNOT SUCKER DEALEES" OR A "TURKEY BASTER" WILL EMPTY YOUR MASTER CYLINDER, AND WITH A SHORT PIECE OF FUEL LINE SHOVED ON TO IT, YOU CAN EMPTY POWER STEERING, ETC

REMEMBER EVERYTHING USING 90 WEIGHT (80W-90), DRIVETRAIN, FILL EACH ITEM UNTIL IT RUNS BACK OUT THE HOLE...I USE A PUMP ON A GALLON JUG, WHEN IT STARTS RUNNING OUT, I GIVE IT A FAST 3 EXTRA PUMPS, THEN INSTALL THE FILL PLUG! THE TRANNY IS THE HARDEST ITEM TO FINAGLE THE DARN PLUG BACK INTO!

THIS IS THE PROCEDURE I USE WHEN DOING THE BRAKES...SEE MY ANSWER ON "SEPTEMBER 28" AT THIS POST

https://www.2carpros.com/questions/2002-ford-f-250-changed-master-cylinder-pedal-still-floor

KEEP ME POSTED, LET ME KNOW HOW THE HEADLIGHTS ARE COMING ALONG

THE MEDIC
Was this
answer
helpful?
Yes
No
Saturday, February 25th, 2012 AT 1:57 AM
Tiny
GRIZZLY93
  • MEMBER
  • 68 POSTS
Plan on removing both diff covers and giving them a fresh coat of paint, so they will be drained completely. Already got that pump you showed. Needed one trying to fill my uncles IH t-case when I flushed it for him, so thats already covered.

As far as the headlights go. I got the new headlight switch, and still the same result. Turn signals, hazard lights, and headlights work. BUT no running lights/marker lights when the headlights are on. Must be a break in the wire somewhere, but plan on doing a few tests to be positive on that before I throw any more money at it when it doesnt actually need it. Tuneup parts will be on the list soon. Spark plugs, wires, cap/rotor, etc.

Brake bleeding will be soon also. Need to take a drive back over to the P.O. To see if he has the key to the lock lug nuts. If not, well than it should be interesting cutting them off. Guess new studs will be a necessity.

New floor is in the works, just waiting on the weather to cooperate so I can do a little rust preventative prior to putting in the new "floor"

Hopefully today will be nice enough to do some more work on it, would be nice since its my day off. Will keep you posted!
Was this
answer
helpful?
Yes
No
Sunday, February 26th, 2012 AT 2:41 PM
Tiny
CJ MEDEVAC
  • MECHANIC
  • 11,004 POSTS
I JUST STARTED WORKING PART TIME AT ADVANCE AUTO, LEARNING THE REGISTER PROCEDURES IS KILLING ME! I CAN "CHECK OUT" FINE (BUT SLOW AS CRAP) IT'S CLOCKING IN AND OUT, CHECKING WARRANTY'S, GIVING WARRANTY'S, RETURNS, ADDING IN ANOTHER VEHICLE, OVERRIDES ETC. ETC. AND "COMBINATIONS" OF ALL OF THE ABOVE. THAT'S MAKING ME PULL MY HAIR OUT AND BEGGING FOR HELP!

THE KICKER IS, I'M SHOWN ONCE OR TWICE AT THE SPEED OF LIGHT, THEN LEFT ON MY OWN!

I'M A PLUMBER BY TRADE, WITH MEGA CJ EXPERIENCE, WITH THE 7 I HAVE OWNED AND AIDING OTHER JEEP GUYS (AND OLDER NON-COMPUTERIZED VEHICLES)

I DID FIND OUT TODAY, MY STORE HAS A TOOL, SORTA A "OUTSIDE EZ OUT THINGAMAJIGGER" IT'S DIRECTIONAL AND "BITES" AS IT IS ROTATED CCW. IT'S USED TO REMOVE ANTI-THEFT LUG NUTS. IT SORTA CHEWS 'EM UP, 'CAUSE IT BITES ON THE OUTSIDE OF THE NUT. SEE IF A LOCAL PARTS STORE NEAR YOU HAS ONE. THEN YOU WON'T CHEW UP YOUR STUDS.

IS THE 1979 WIRING DIAGRAM I SENT VIA EMAIL, AIDING WITH THE RUNNING LIGHTS?

KEEP ME POSTED

HAVE FUN!

THE MEDIC
Was this
answer
helpful?
Yes
No
Monday, February 27th, 2012 AT 12:08 AM
Tiny
GRIZZLY93
  • MEMBER
  • 68 POSTS
Awesome. Ill have to try to find it in the local store. Although I am highly upset with advance auto. I had a gift card from there so I hopped online, put all the tuneup parts in the cart, set it for store pickup and than found out they dont accept gift cards online. Bullshit if you ask me. Lol. But its alright, the point is that I got them and put em on, and boy does that jeep fire right up even faster than it had before.

Now the wiring has got me all kinda of confused. I havent done much with the diagram you sent me, ive been following the one in my haynes manual. According to haynes the wiring is different for 80-83 than 79. So to avoid confusion, ive just been following the book. Plus the book is easier to have in front of me when im laying in perhaps the most uncomfortable position trying to get up under the dash. But I gave a second look over the fuse panel because the turn signal wasnt working today. Found the turn signal fuse had blown so I changed it and now its all screwey again. The running lights come on the bright filament in the front when the headlights are turned on. BUT no turn signal in the front when the headlights are on (rear turn signals work). The front turn signals work when the headlights are off but they are on the dimmer filament on the 1157 bulb. Any ideas as to what it could be now? Its slightly different from how it was yesterday.

Covered the fresh cut regions of the floorboard with rustoleum today, and started cutting to shape my new floorboard AKA old detour sign my uncle had. He works for the township so no illegal activites were done in obtaining this piece of aluminum. Haha.

Will hop on the cpu shortly to upload a few more pics of my progress from today. Currently on my "smart phone."

Any chance the next day you work you could pull the part number? Or the name and brand of that tool you were describing? Would be greatly appreciated!
Was this
answer
helpful?
Yes
No
Monday, February 27th, 2012 AT 12:49 AM

Please login or register to post a reply.

Sponsored links