Removal (Sephia)
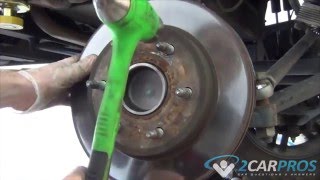
Raise and support vehicle. Remove front wheels. Unstake axle shaft lock nut. Apply brakes and remove axle shaft lock nut. Remove cotter pin and tie rod end nut.
Using appropriate puller, separate tie rod end from steering knuckle. Disconnect stabilizer bar from lower control arm. Disconnect lower control arm ball joint from steering knuckle.
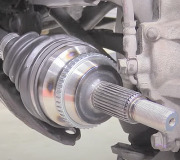
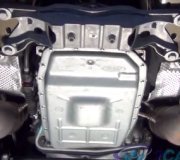
On left axle shaft, carefully insert pry bar between inner joint housing and transaxle, ensuring no damage to boot or oil seal occurs. Using hammer, lightly tap end of pry bar to unseat inner joint housing from transaxle. On right axle shaft, using a brass drift and a hammer, drive axle shaft off of intermediate shaft.
On both axles, remove axle shaft assembly from hub. If axle shaft is frozen to hub, reinstall axle shaft lock nut until flush with end of axle shaft and tap end of axle shaft with brass or plastic hammer.
NOTE:DO NOT disassemble outer CV joint. Replace outer joint housing as an assembly. Service outer boot only after inner CV joint has been removed.
NOTE:Before disassembling left axle shaft assembly, measure and record dynamic damper position from axle shaft end for reassembly reference.
Disassembly (All Models)
Place axle shaft assembly in soft-jaw vise. Keep axle shaft assembly clean during disassembly and reassembly. Remove CV joint boot bands, and slide boot away from CV joint housing. Index mark inner joint housing, tripod assembly or cage assembly and axle shaft for reassembly reference.
Using a screwdriver, remove large circlip ring or stopper ring from inner race groove in inner joint housing (if equipped). See Fig. 2 and Fig. 3. Remove inner joint housing from tripod assembly or cage assembly. Remove snap ring retaining tripod assembly or cage assembly to axle shaft. Using a hammer and brass drift, drive tripod assembly or cage assembly from axle shaft.
Wrap axle shaft end with tape. Remove inner joint housing boot. Index mark and remove dynamic damper (if equipped) as necessary. Remove outer joint housing boot bands and remove boot by sliding it off inner joint housing end. On Sportage, remove dust cover from left axle shaft inner joint housing (if necessary). On all models, clean and inspect all parts. Ensure axle shaft is not bent, twisted or damaged.
Check splines for wear. Inspect tripod bearings, cage assembly (inner ring, cage, and balls) for abnormal wear, excessive looseness, seizure, rust or other damage. Replace as necessary.
SPONSORED LINKS
Thursday, April 15th, 2010 AT 4:07 AM