An engine tune up is necessary at manufacturers recommended intervals to maintain proper engine run-ability. A misfiring engine will cause, low gas mileage, low power output, increased emissions and possible internal engine damage if left untreated. Typically an engine misfire under load, will be a problem with the ignition system, while low engine speed problems will be a vacuum, fuel management or compression issue. When retrieving trouble codes, only consider related codes to a specific misfire problem, like an ignition coil failure code. If a trouble code is present and doesn't pertain to the immediate problem like an EVAP code, ignore it until a later time, when the engine is running properly these codes could cycle out.
Let's Jump In!
There are several combinations of misfire conditions, steady or random, at idle
or under power, which may or may not be detected by the computer and trigger a check
engine or service engine soon light,
read trouble codes to help pinpoint the cylinder(s) in question and follow the
repair guide below.

If no service light is triggered with a steady misfire,
use an infrared thermo
gun to test the exhaust temperature of each cylinder.

SPONSORED LINKS
Start the engine cold, quickly
take a reading
at the front of each cylinder's exhaust port on the manifold while maintaining similar
placement of the beam over each individual port, a misfiring cylinder will be considerably
colder than the remaining cylinders. Example: Three of the exhaust ports test at
190 degrees while one is at 81 degrees, the cylinder at 81 degrees is misfiring.

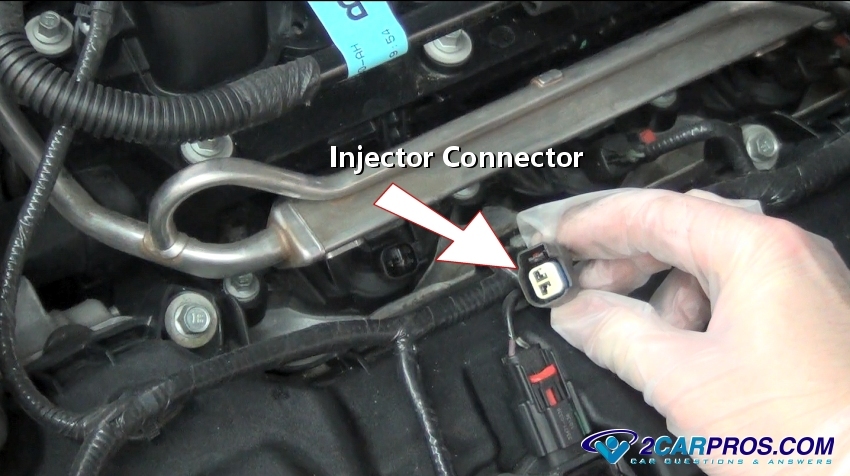
If no results are yet gleaned, start the engine and allow to idle, remove the
fuel injector electrical connector on each cylinder one at a time while observing
the engine performance, if no change is observed at a particular cylinder, the misfiring
cylinder has been located.
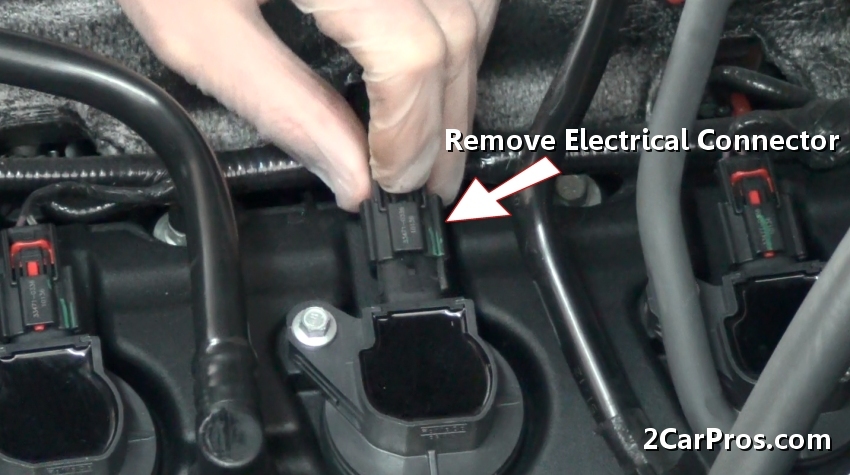
This can also be achieved by removing a coil wire connector (COP systems only
- no plug wire attached ).
Once the misfiring cylinder has been located, remove the
spark plug for inspection, before
removing the spark plugs, mark the plug wires (if equipped) to identify their positions
in the firing order, this will help for proper reassembly.

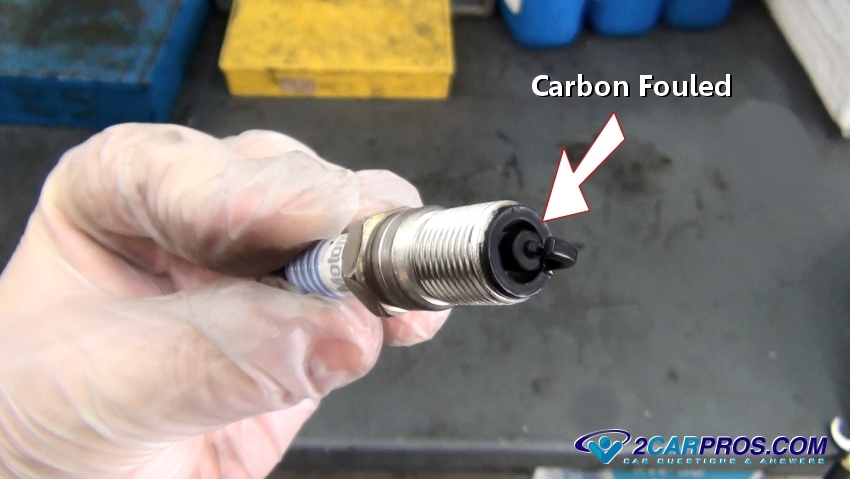
When a cylinder runs rich it will carbon foul the spark plug causing it to short
circuit. Malfunctions for this condition include partially
plugged fuel injector or
catalytic converter,
low compression, failed
fuel pressure regulator
and excessive fuel mixture.
SPONSORED LINKS
A wet spark plug with gas or oil can mean a fuel injector is stuck open,
fuel regulator has failed,
no cylinder compression, broken piston oil control ring, blown head gasket or excessive
leakage from the valve stem seals.

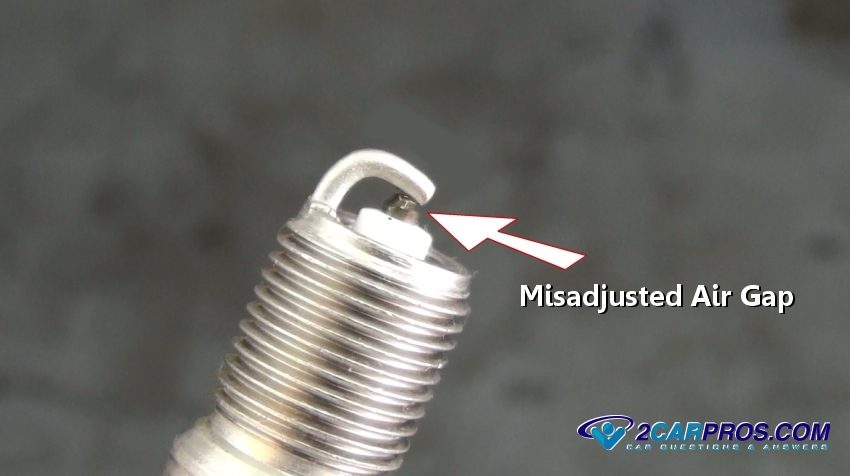
A spark plug must be properly gapped with a specific measurement from the electrode,
a misadjusted air gap can result in a misfire.
Watch the Video!
Please watch this video of the job being done, then continue down the guide to glean additional helpful information.
Using a proper spark plug with a correct air gap will help ensure operation of
the ignition system.

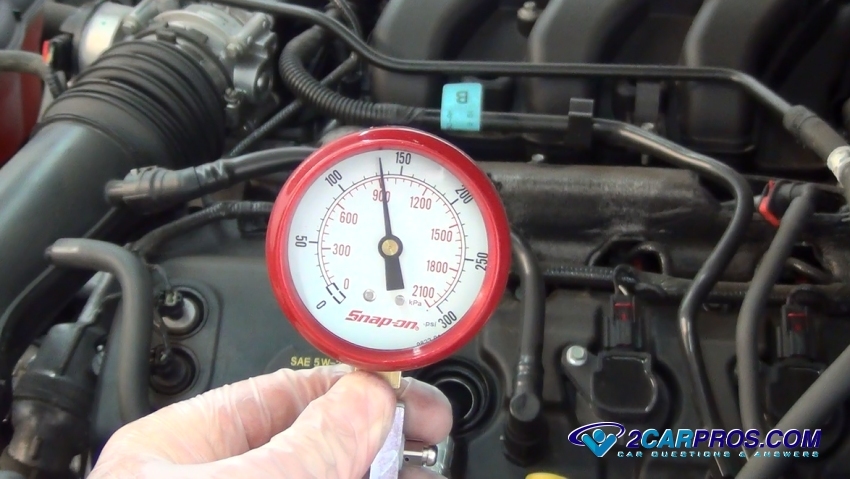
If the spark plug is wet with fuel or carbon fouled upon removal, a compression
check is needed, perform a cylinder
compression test to locate a mechanical failure. If compression is low, it could
mean worn out or broken piston rings, flat camshaft, broken valve spring, burnt
or leaking intake or exhaust valves, dropped valve seat or blown head gasket.
SPONSORED LINKS
If the compression test is okay along with a wet spark plug, the
ignition coil needs to be
tested.

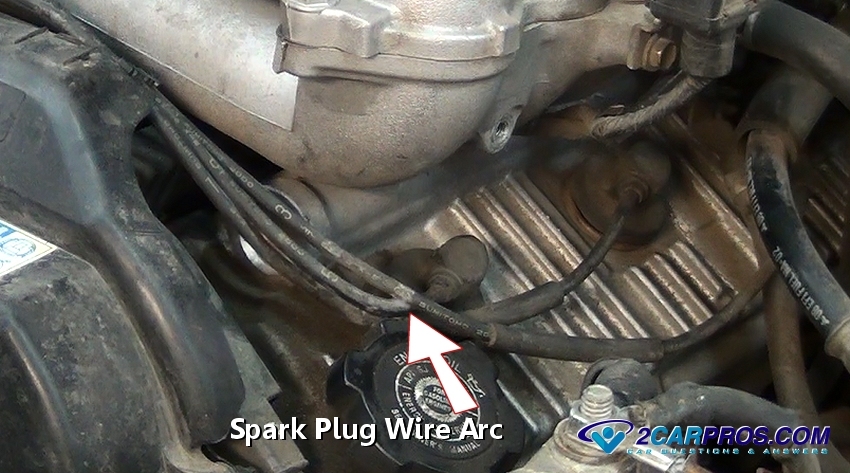
Spark plug wires are designed to transfer an electrical charge from the coil
to the spark plug, when these cables wear, they can short circuit causing a misfire./
A fuel injector regulates the amount of fuel which is consumed by the engine,
if the injector operation has
failed the cylinder will misfire.

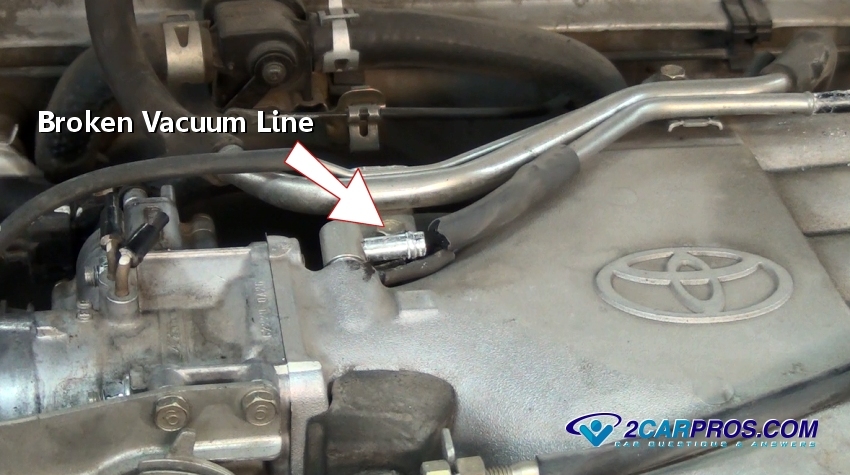
A random misfire is can be associated with broken or dilapidated vacuum hoses
or tubes on and around the engine causing a
vacuum leak, these hoses
are typically connected to the engine intake manifold and supply engine vacuum to
various accessories such as the brake system. If an intake gasket fails or a vacuum
line that is close to an intake port it will cause a steady misfire.
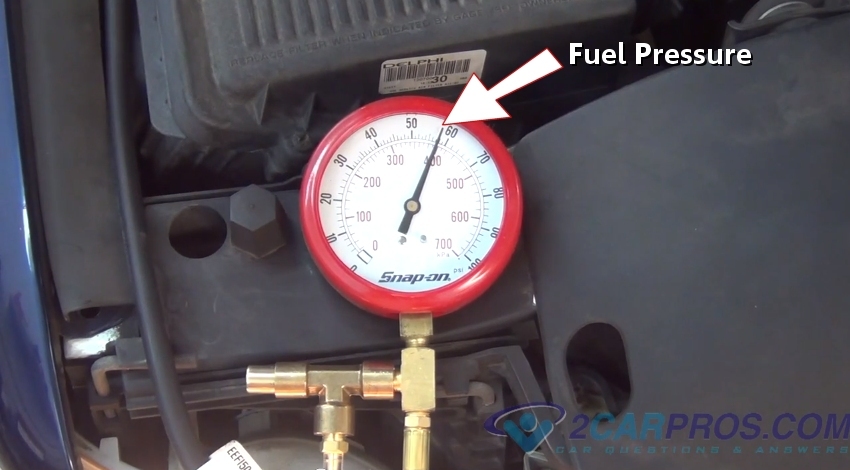
Fuel pressure must maintain a constant pressure, if this flow is impeded by a
clogged fuel filter or
weak fuel pump
the engine can produce a random misfire.
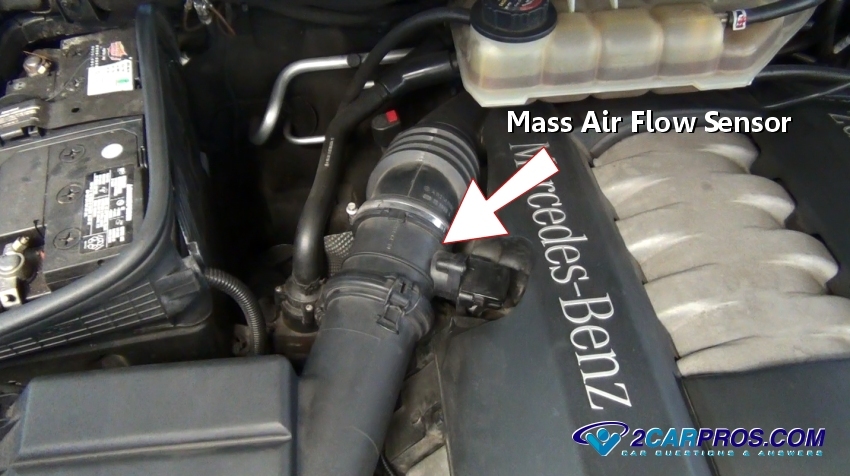
A mass air flow
sensor sends feedback information to the computer, as this sensor wears it can
produce false data causing a misfire.
SPONSORED LINKS
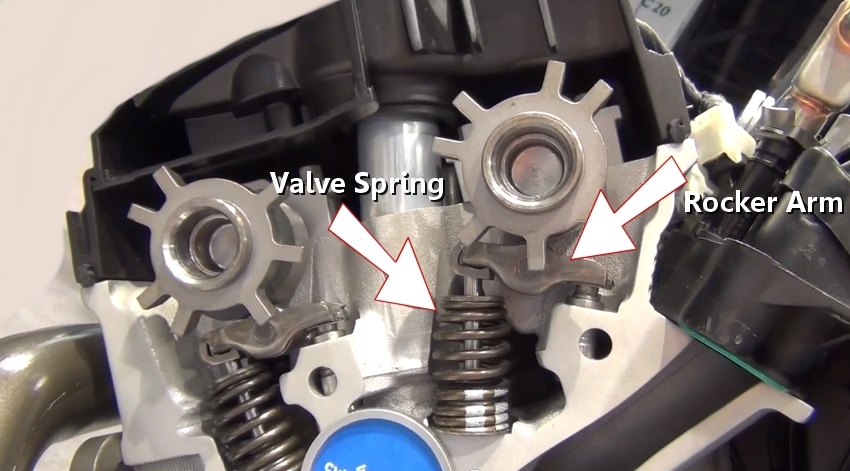
Each intake and exhaust valve utilizes a spring which will return the valve to
its original position (closed). If a valve spring has broken or a cam lobe has worn
down, it will cause the engine to misfire and run rough due to the loss of compression.
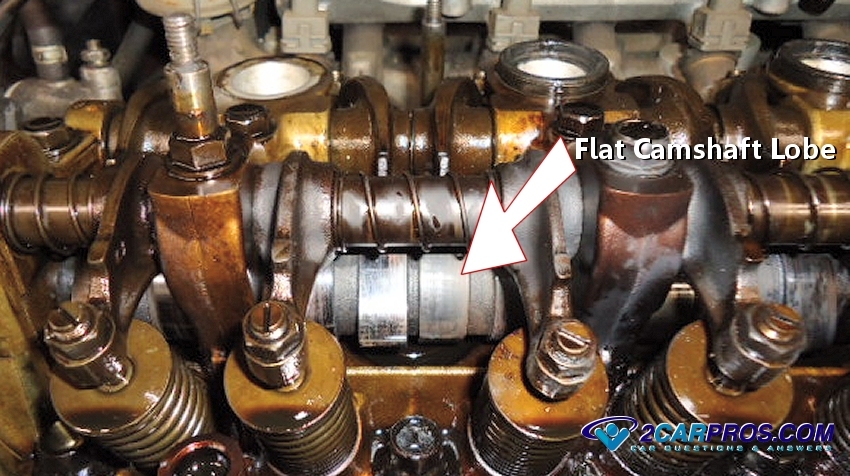
These conditions don't always show up in a
compression test, because
a compression test is performed at engine cranking speed. If a camshaft lobe is
halfway worn down, it will show up only when the engine is running and under load.
In some conditions a broken valve spring can effect different aspects of engine
performance for example: If just a small part of a coil breaks off, the spring can
still close the valve but only at low RPM's, causing a high RPM misfire. If the
spring breaks somewhere in the middle it will affect both idle and power conditions.
To test for this condition, remove ignition coil connector or ignition system or
fuel pump fuse to disable the engine from starting. Remove valve cover(s) to gain
access to visually inspect the valve train. Inspect the condition of the valve springs,
use a flashlight and small mirror to aid in the inspection. Have a helper crank
the engine over while observing rocker arms and cam lobes, confirming full movement,
if one or more lobes are traveling less than the others the camshaft has a flattened
lobe and replacement is required.
A head gasket is used to seal the cylinder head to the engine block. The cylinder head is fastened to the engine block using head bolts that are tightened to a specific torque. When a head gasket wears (blows) it can allow coolant or exhaust gasses to enter the combustion chamber causing a cylinder misfire.
Questions?
Our certified technicians are ready to answer misfire questions for free. We hope you saved money and learned from this guide. We are creating a full set of car repair guides. Please subscribe to our 2CarPros YouTube channel and check back often for new videos which are uploaded regularly.
Article published 2022-03-10
SPONSORED LINKS